Sony A33 Operation
The Sony A33 relies on a large, color LCD screen and electronic viewfinder for all user interaction, with its compact size not leaving room for the small LCD info displays that are common on many full-sized SLRs. Both the LCD display and electronic viewfinder provide the same user interface experience, which is clear and highly visible, making it very easy to switch back and forth between display types. The drawback is that since one or other display type is always active when the camera is in use, this must contribute to reduced battery life. One feature we do like very much is the infrared proximity sensor that switches off the LCD screen when you hold the Sony A33's electronic viewfinder up to your eye.
Menus can be navigated either by using the four way arrow pad, or by turning the control dial. The button in the center of the four-way arrow pad makes selections, although with little room on the camera body, there are no markings on the arrow pad and central button to indicate these functions. The control dial is also used to adjust shutter speed and aperture in Manual or Priority exposure modes. Since there's only one control dial and two variables to adjust when in Manual mode, the Exposure Compensation button is held in to switch between the two variables. In other record modes where Exposure Compensation is available, the same button allows adjustment of the compensation amount, and an autoexposure lock (AEL) button fixes the curent exposure level while held down, allowing a metering reading to be taken, and then the subject reframed as desired. The left and right arrow buttons respectively access the drive mode and white balance dialogs, while the up arrow changes the display type, and the down arrow calls up the ISO sensitivity dialog. A dedicated Movie button is used to start and stop video recording, separate from the still image Shutter button. A Depth of Field Preview button adjacent to the lens mount will stop the lens down to the selected aperture while held in, allowing depth of field to be confirmed visually.
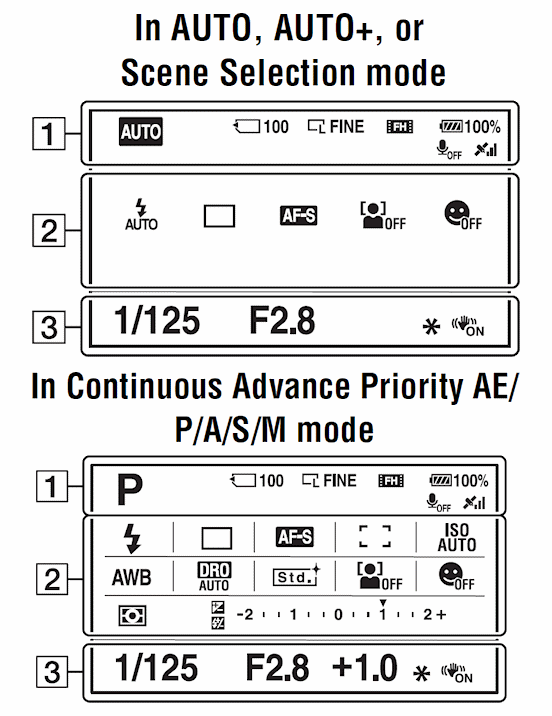
Record Mode Displays
Full-time Live View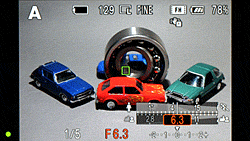 The information display in record mode includes
the shutter speed and aperture settings, exposure compensation level, exposure mode, flash mode, ISO sensitivity setting, metering mode, AF mode, number of available images, resolution for still images and movies, compression for still images and movies, aspect ratio, image stabilizer mode, drive mode, white balance,
creative style mode, Face detection / smile shutter modes, DRO / HDR modes, focus confirmation, battery status, etc. As you change exposure settings, the display changes to reflect what the captured image will look like, also known as "exposure simulation." A graphic display mode allows you to see both shutter speed and aperture represented on gauges showing their current position relative to the available range for each exposure variable. You can also enable a
live histogram. Through the Setup menu, you can enable a rule-of-thirds grid display. See the illustration below (courtesy of Sony America) for information callouts in record mode.
The information display in record mode includes
the shutter speed and aperture settings, exposure compensation level, exposure mode, flash mode, ISO sensitivity setting, metering mode, AF mode, number of available images, resolution for still images and movies, compression for still images and movies, aspect ratio, image stabilizer mode, drive mode, white balance,
creative style mode, Face detection / smile shutter modes, DRO / HDR modes, focus confirmation, battery status, etc. As you change exposure settings, the display changes to reflect what the captured image will look like, also known as "exposure simulation." A graphic display mode allows you to see both shutter speed and aperture represented on gauges showing their current position relative to the available range for each exposure variable. You can also enable a
live histogram. Through the Setup menu, you can enable a rule-of-thirds grid display. See the illustration below (courtesy of Sony America) for information callouts in record mode.
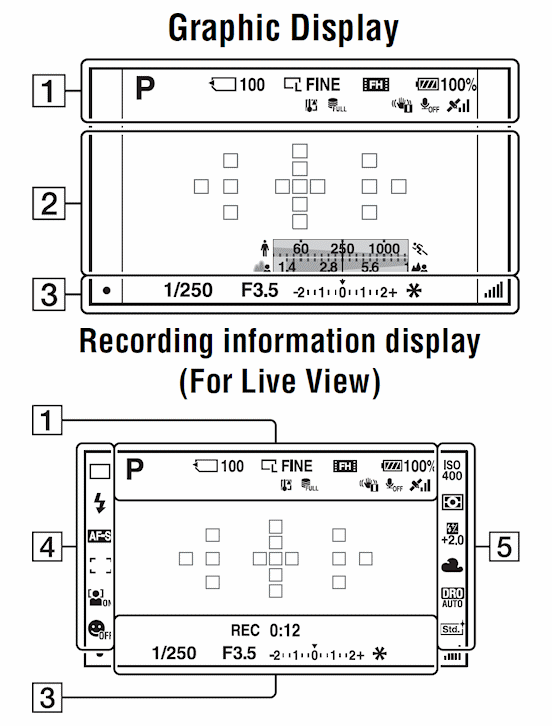
| Sony A33 Record Mode Displays | |||
Section 1
|
|||
 |
Exposure mode
|
 |
Image quality of still images |
|
|
Memory card
|
 |
Image size of movies |
Remaining number of recordable images |
Remaining battery |
||
 |
Image size of still images / Aspect ratio of still images / Image size of panoramic images |
Overheating warning |
|
Database file full / database file error |
Camera shake warning |
||
No audio recording of movies |
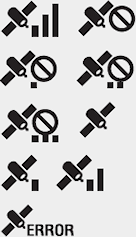 |
GPS triangulating status |
|
Section 2
|
|||
Spot metering area |
AF area |
||
Shutter speed indicator |
Aperture indicator |
||
Section 3
|
|||
Recording time of the movie |
EV scale |
||
Focus |
AE lock |
||
Shutter speed |
SteadyShot scale |
||
Aperture |
|||
|
Section 4
|
|||
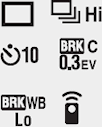 |
Drive mode |
|
AF area |
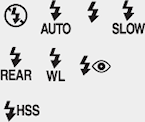 |
Flash mode / red-eye reduction |
Face detection |
|
 |
Focus mode |
 |
Smile shutter |
Smile detection sensitivity indicator |
|||
Section 5 |
|||
ISO sensitivity |
|
Metering |
|
Flash compensation |
 |
White balance (auto, preset, custom, color temperature, color filter) |
|
 |
D-Range optimizer / auto HDR |
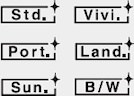 |
Creative style |
| Sony A33 Record Mode Displays | |||
Section 1
|
|||
 |
Exposure mode
|
|
Image size of movies |
|
|
Memory card
|
Remaining battery |
|
Remaining number of recordable images |
No audio recording of movies |
||
 |
Image size of still images / Aspect ratio of still images |
|
GPS triangulating status |
|
Image quality of still images |
||
Section 2
|
|||
|
Flash mode / red-eye reduction |
Face detection |
|
|
Drive mode |
|
Smile shutter |
|
Focus mode |
|
AF area |
ISO sensitivity |
|
White balance (auto, preset, custom, color temperature, color filter) |
|
|
D-Range optimizer / auto HDR |
|
Creative style |
|
Metering mode |
|
Exposure compensation / Metered Manual |
Flash compensation |
|
EV scale |
|
Section 3
|
|||
Shutter speed |
Aperture |
||
Exposure |
AE lock |
||
SteadyShot |
|||
Playback Mode Displays
Information Screens In Playback mode, the default image display shows the most recently captured image or movie. Pressing the Up arrow (Disp) button cycles through the main display (with no information), a simplified display with basic information overlay, and a detailed thumbnail display with RGBY histogram, shooting info and blinking highlight/shadow display (overexposed areas are shown in black, underexposed in white). The most recent display type will be stored and shown the next time by default. Pressing the Right or Left arrow displays the next or previous image (if currently viewing a still image) or movie (if currently viewing a movie). Curiously, there's no direct way to switch between viewing movies and still images. Instead, you must either go to the Index view (described below), then select the Movie or Still Image tabs at the left of the screen, or enter the Playback menu, then select the relevant type in the Still / Movie Select option.
Index View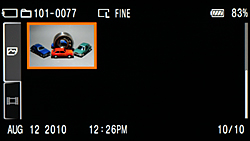 Pressing the Exposure Compensation (Zoom Out) button switches to an Index view of either still images or movies -- but not both at the same time. You can view either six or twelve thumbnails on screen at once in Index view, but changing the number of thumbnails involves eight button presses to get to the Playback menu, and change the Image Index option. The Left, Right, Up, and Down arrow buttons move between the image thumbnails, and rolling the Control dial has the same effect. The soft key at the center of the four-way controller selects an image or movie for viewing. The Delete key deletes an image or movie. Two tabs at screen left are used to change between viewing still images, or viewing movies, since the A33 can't display both types at the same time.
Magnified View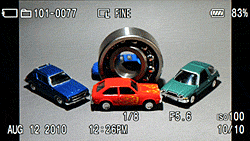 Pressing the AEL (Magnify) button while viewing a single still image in Playback mode switches to the magnified view. Unless viewing a panoramic image, once in this view, you can press the Magnify and Zoom Out buttons to zoom in or out as much as 11.8x,
while pressing the arrow buttons pans around the image. The Playback button exits magnified view, and the Delete button deletes the magnified image (after a confirmation screen), then returns you to full image view. For panoramic images, the first press of the AF (OK) button scales the panorama to fit the screen on its shorter side, then pans the length of the panorama automatically once, before returning you to full image view. Pressing the OK button while the panorama is panning will pause the display, at which point you can enter magnified view by pressing the Magnify button. This then allows you to pan and zoom exactly as you would with any other still image.
Pressing the AEL (Magnify) button while viewing a single still image in Playback mode switches to the magnified view. Unless viewing a panoramic image, once in this view, you can press the Magnify and Zoom Out buttons to zoom in or out as much as 11.8x,
while pressing the arrow buttons pans around the image. The Playback button exits magnified view, and the Delete button deletes the magnified image (after a confirmation screen), then returns you to full image view. For panoramic images, the first press of the AF (OK) button scales the panorama to fit the screen on its shorter side, then pans the length of the panorama automatically once, before returning you to full image view. Pressing the OK button while the panorama is panning will pause the display, at which point you can enter magnified view by pressing the Magnify button. This then allows you to pan and zoom exactly as you would with any other still image.
Movie Playback
Pressing the OK button while viewing a single movie in Playback mode launches movie playback. A second press will pause movie playback, and a third press will resume it. While the movie is playing, rotating the Control dial will cue forwards or backwards through the movie. Pressing the Down arrow button while paused brings up a volume adjustment control, allowing the volume to be adjusted within a seven step range, or the video muted altogether, by either turning the Control wheel or using the vertical arrow buttons. The Delete button deletes the magnified video (after a confirmation screen).
 Fujifilm GFX 50S Review
 Fujifilm X-T3 Review
 Olympus E-M5 III Review

Follow Imaging Resource