CORRECT COLOR IN ONE CLICK
iCorrect 4.0 -- The Leatherman of
Color Correction
Editor
The Imaging Resource Digital Photography Newsletter
In 1968, Tim Leatherman persuaded his wife they could drive through Europe in a $300 Fiat. Sparks flew. From the Fiat. Tim, being something of an engineer, wondered why he couldn't have a pocketknife that included an engine hoist or at least a pair of pliers.
A few years later, he had invented the Leatherman (http://www.leatherman.com), nicknamed the Personal Survival Tool, which has evolved into a dozen variations to handle life-threatening situations other than driving a Fiat through Europe with your spouse.
Unfortunately, no Leatherman handles color correction. And it is one of life's little Unassailable Facts that while it's darned hard to fix color, even a child can tell when it's off. Color is the Fiat of digital photography.
In our May 18, 2001 issue -- gee, two years ago -- we reviewed iCorrect (http://imaging-resource.com/SOFT/ICOR/ICOR.HTM), a little $139 Photoshop plug-in that simplified the life-threatening task of color correction. Two years is an epoch in software time. And iCorrect has evolved as dramatically as Leatherman since then.
But what excited us two years ago is still very much the pocketknife/pliers of the product. Like a pocket knife, it does the automatic stuff (brightness/contrast/saturation) well. But like a pair of pliers, it actually asks you to tell it what in the image is skin, sky, foliage. Once you tell it what the color is supposed to be, it knows how to fix it.
Today iCorrect (http://www.imaging-resource.com/cgi-bin/nl/pl.cgi?ico) is a family of products that includes two standalone Windows applications and two cross-platform Photoshop plug-ins. We routinely recommend it to readers who ask for a replacement for PhotoGenetics or who need a tool to fix all their images. It's a product we've come to rely on over the years (to correct the white balance in our trade show images, for example), produced by a company that knows what it's doing so you don't have to.
MEET THE COMPANY
Promising to "make the color right," Pictographics (http://www.picto.com) has focused on refining CandelaColor, its color technology software for digital imaging. CandelaColor is a set of code libraries -- "sophisticated and highly complex mathematical color science algorithms," according to the company -- to correct color throughout the digital imaging process.
iCorrect is "a simple and easy to use form" of those algorithms. Just open an image in iCorrect and it's color corrected.
If that automatic correction needs a tweak -- say, to correct off-the-chart skin tones -- iCorrect makes it as simple as a click to refine the correction.
THE SKIN TONE TEST
In fact, one of the toughest color correction jobs is correcting skin color. iCorrect has always handled this with remarkable grace, unfazed by race if sometimes momentarily stunned by cosmetics (but aren't we all).
It's able to correct the skin tone of several models of various races in the same image because it has defined the color parameters of skin itself. This "memory color" as Pictographics calls it, describes the range of hues and saturation in realistic skin color.
And it's as simple as clicking on an arm or a forehead to apply. Click on any skin, tell iCorrect it's skin (not foliage or sky) and you've made one of the most difficult color corrections there is.
FOUR ICORRECTS
There are four iCorrect incarnations: iCorrect Entree, iCorrect, iCorrect Professional and iCorrect EditLab. Each adds something to the mix.
All four offer the following basic features:
- Automatically set the black and white point;
- Automatically adjust brightness and contrast; and
- Automatically remove any color cast from 24-bit images.
Entree (http://www.picto.com/iCorrectEntree), like iCorrect, displays the original image and the corrected image side by side. Underneath are checkboxes to disable auto black/white point and controls to adjust brightness and contrast.
 |
| iCorrect, The Application |
iCorrect (http://www.picto.com/icorrect) trumps Entree with added features (also included in Pro and EditLab):
- Automatically corrects common reference or memory colors like neutrals, sky blue, foliage green and skin tones; and
- Handles both 24-bit and 48-bit images.
Of course, none of this "works" if you don't calibrate your monitor. Pictographics doesn't leave you high and dry on that count. In the Setup menu, you'll find a Monitor Adjust option that tells you exactly what to do in two easy steps to calibrate your monitor.
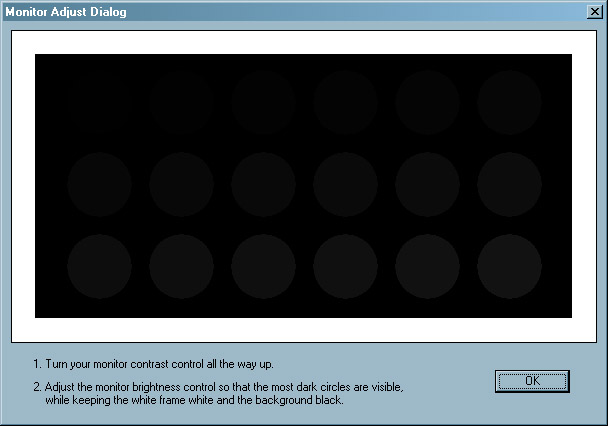 |
| Calibrating Your Monitor |
In addition to a handy Help pane below the main window, iCorrect also offers a Guide that you can view on-screen or print out for reference. You really won't need it, though.
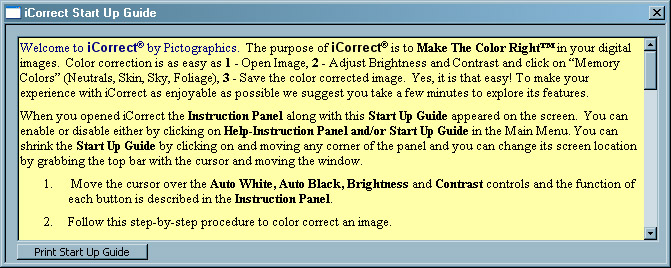 |
| Printable Guide |
These two applications are designed to help anyone correct unpleasant color even if they're confused by technical terms like brightness, contrast, saturation and hue. Both do it for you very well, although iCorrect is more useful than Entree with difficult images.
If your digicam shoots everything a little too red or a little too blue, Entree is all you need to fix it. Of course, you don't get the benefits of applying your own intelligence to color correction (where you tell the program what it's looking at) unless you start with the $39.95 iCorrect.
Either is a tremendous bargain when you consider they both provide the same smart correction engine in CandelaColor. But Dave's made them even a bit more compelling with a special Deal for our readers.
Pictographics has written a tutorial (http://www.picto.com/PhotoKiosk) on using iCorrect in Windows XP as an in-home photo kiosk "to view organize, color correct, print and send digital photos." While it's a novel approach, it doesn't offer essentials like local color correction for red-eye removal or retouching and cropping tools.
ICORRECT PLUG-IN
If you're using an image editor that taps into the power of Photoshop-compatible plug-ins, however, you'll want one of the two cross-platform versions of iCorrect.
The $79.95 iCorrect Pro (http://www.picto.com/iCorrectProfessional/default.htm) is the latest incarnation of the original plug-in we reviewed two years ago. It displays the image in one panel with checkboxes for:
- Auto black and white points;
- Less and More buttons for both brightness and contrast;
- A pulldown menu to select the memory color;
- A preferences button (where you can define up to 10 of your own memory colors and adjust the strength of the auto black and white points); and
- A Save ColorCircuit button (to record the correction in a file that can be used with the free ColorCircuitQ to batch process corrections to a number of files).
While it corrects color, ColorCircuitQ can do a lot more, applying unsharp masking, removing noise, resampling and renaming files. Unfortunately, there isn't an OS X version (although it does run reliably in Classic mode). A PDF User Guide documents the application.
EDITLAB PLUG-IN
What more could you possibly need?
Well, how about that engine hoist? That's pretty much what EditLab delivers with its ability to write and edit ICC profiles. You can save any correction as a ColorCircuit to massage the data in unprofiled image files -- or you can save it as an ICC profile to attach to any image.
You can use EditLab (http://www.picto.com/editlab) in four ways:
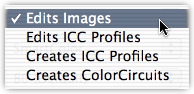 |
| Four Ways |
- You can apply the color edit to the image itself;
- You can apply the correction to an existing ICC input profile, effectively editing that profile;
- You can save it as an ICC input profile, assigning it to other images;
- You can save it as a ColorCircuit file, to batch apply the correction to other images.
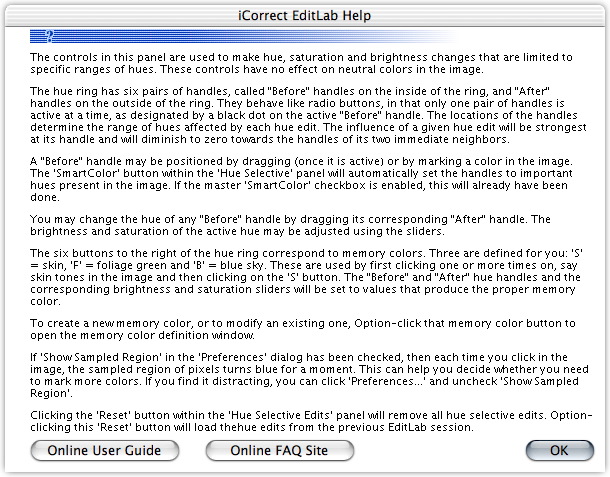 |
| An EditLab Help Screen |
iCorrect EditLab runs on Mac OS 8.6/9.2/10.1/10.2 with a Power PC processor and 128-MB RAM. On Windows 98/ME/2000/XP it requires a Pentium-class processor with 128-MB RAM.
It has been tested with Adobe's Photoshop 5.0/6.0/7.0, Photoshop LE, PhotoDeluxe and Photoshop Elements 1.0/2.0 on both platforms.
The installation includes an HTML guide. You do have to drag the plug-in to the Plug-Ins directory of your image editor, however.
At $99.95, EditLab adds the following features to iCorrect:
- Saturation control;
- Hue selective color editing;
- Zooming and scrolling;
- Workflow optimization (actionable corrections with or without custom correction);
- Linear mode for 16-bit images with a gamma of 1.0; and
- Create and edit ICC input profiles.
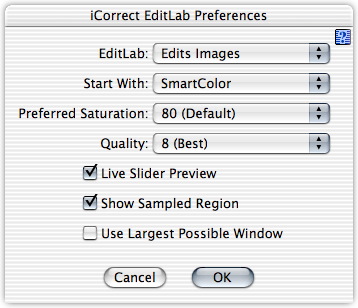 |
| Preferences |
EditLab's capabilities are neatly organized in four tabbed panels: Color Balance, Black/White Point, Brightness/Contrast/Saturation and Hue Selective Edit. They are stacked, in fact, in the order they should be applied to the image to minimize the time it takes to correct an image.
If you've checked SmartColor in the Preferences dialog window, iCorrect will already have made the correction for each tab. You can click the SmartColor button in any tab to repeat the analysis and correction (helpful when you use the Reset button to undo your changes).
In the Color Balance window, a step wedge indicates the color cast iCorrect corrected. You can manually indicate a neutral by clicking at a neutral shadow, midtone and highlight, too. Alternately, you can work with sliders (Cyan to Red, Magenta to Green, Yellow to Blue) to set the color balance.
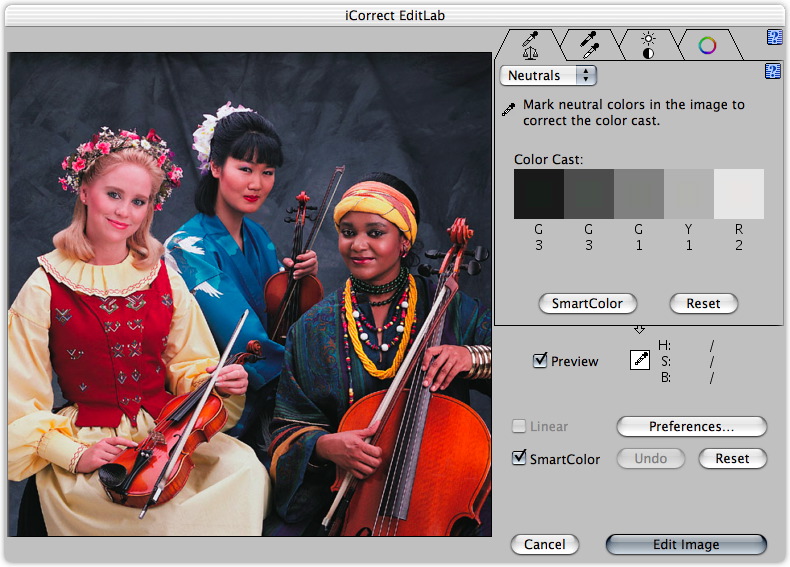 |
| The Color Balance Panel |
Black/White Point displays a histogram with a black and a white point you can slide. You can also click on a dark pixel to set the black point and a light pixel to set the white point.
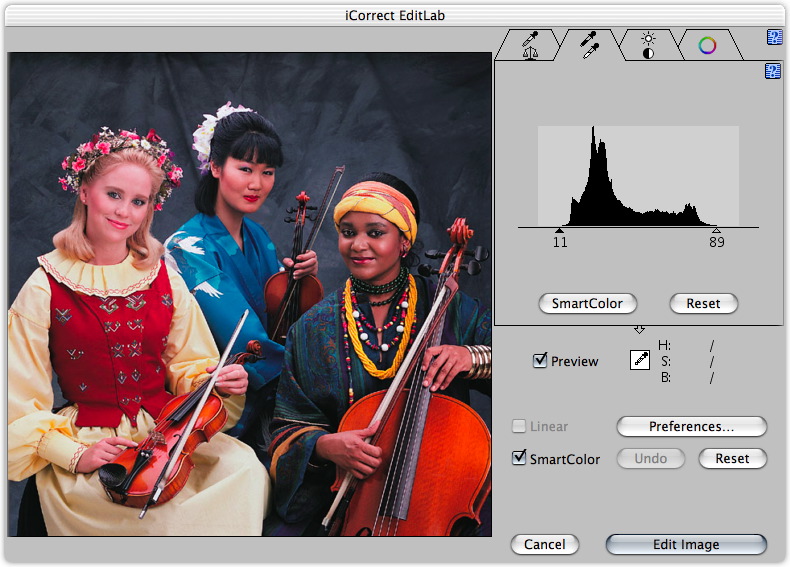 |
| The Black/White Point Panel |
Brightness/Contrast/Saturation uses sliders to make adjustments. A Brightness and Contrast curve can also be displayed. Saturation can be tailored to your taste in the Preferences.
 |
| The Brightness/Contrast/Saturation Panel |
Finally, Hue Selective Edit displays a hue ring with Before handles on the inside and After handles on the outside. SmartColor sets the handles at the image's major hues. You activate any one pair at a time by clicking on it, then slide the After handle along the ring to change the hue.
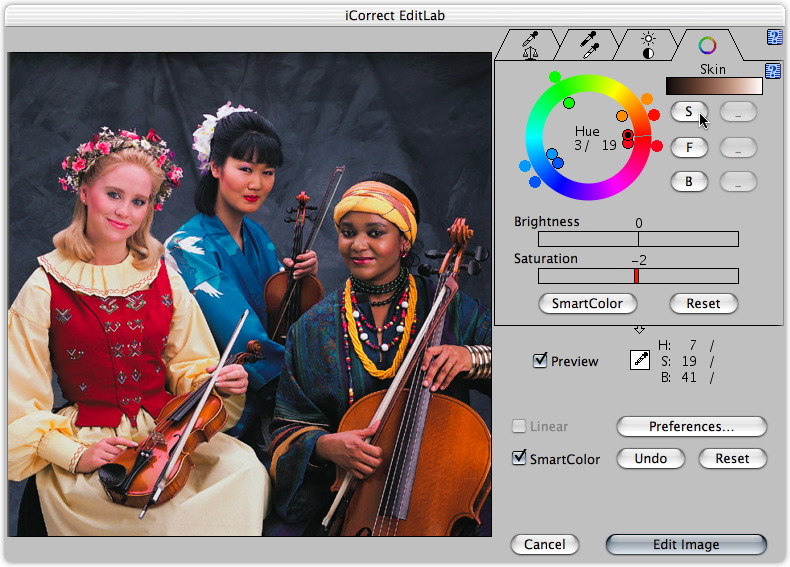 |
| The Hue Selective Edit Panel |
This is also where you can identify skin, foliage and sky hues by clicking them in the image and then clicking on the corresponding memory color button. The same trick is used to make a custom memory color, except you control click one of the three blank memory color buttons to define it.
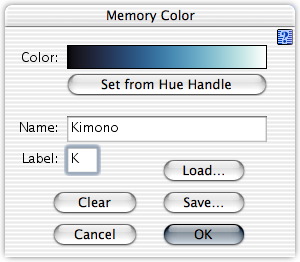 |
| A Custom Memory Color We just control-clicked a free button. |
In practice, we rarely have to tour the tabs to correct color. The first, automatic correction, is usually dead on. When it's not, we usually get there by using a memory color.
The adjustment we play with most is saturation. Which is an easy correction to make.
RECOMMENDATIONS
Here's where we're supposed to delineate the trade off between simplicity and power. You know, if you need pocketknife simple, you get a toothpick. And if you want the power of pliers, you need a tool belt. Nothing in between.
Pictographics doesn't do that to you. Every one of these products is easy to use and built on the same digital color correction technology. You just buy the one with the set of tools you'll actually use.
Our biggest complaint two years ago was price. Not that Pictographics listened to us, but even the high-end EditLab is less than the original iCorrect. And you can sample this power for no more than $20 -- even less with our Deal.
There is one image you won't want to color correct, though. Shoot a color target with your digicam and hang onto it for a few weeks. We're about to wrap up our review of Pictographics' inCamera. inCamera takes that shot, analyzes it and creates a digital camera color profile. It can also build and edit display profiles for your monitor. Combined with iCorrect (and with the bundle discounted for subscribers), it can probably even fix Fiats.