This page has been formatted to facilitate printout of the review.
Use your browser's "Back" button to return to the previous page, or the links at the top and bottom of this page to navigate to related information. If you have difficulty fitting the text on this page onto your printer output, simply resize your browser window to a narrower width and print again.
Back
to Full PhotoPrinter 2000 Pro Review
Up to Imaging Resource Accessories Page
 |
ArcSoft PhotoPrinter 2000 Pro Software Review: Ultimate Printing Options Reviewer: Stephanie Boozer (Review Posted: September 11, 2000) |
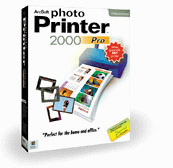
Like PhotoPrinter 2000, this Pro version offers great versatility for minor digital image manipulation and a ton of layout options for printing. The main difference between the PhotoPrinter 2000 and the Pro version is the ability to layout multiple images on a page (the other version only allows one image to be printed multiple times on a page) and the addition of a text feature. Don't let the "Pro" appendage fool you, this program retains all the ease and simplicity of ArcSoft's other digital imaging software products and is fun to use.
System Requirements
Windows:
Like the rest of ArcSoft's digital imaging software, PhotoPrinter 2000 Pro takes only a couple minutes to install. Clicking the Setup icon will open the Windows Installation Wizard. A minimal software package contains the software CD and a tiny manual neatly stashed away in the jewel case.
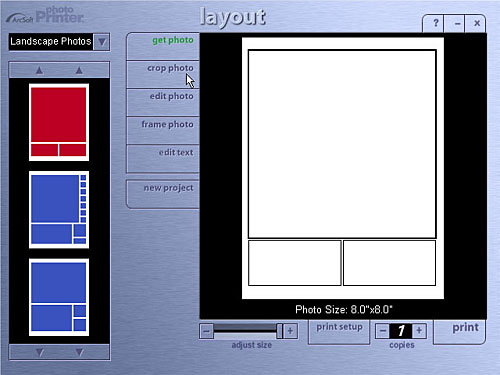
We found the user interface extremely navigable, with no complicated screens. Launching the application pulls up the main Layout Screen, which features a page preview window and several option buttons. On the left side of the screen is the layout section, which allows you to select a layout template from a menu of options. Directly to the right are various function buttons and at the bottom of the screen are the printer controls and setup options. The three top right buttons are present on every screen and offer shortcuts to pull up the Help menu as well as minimize the screen or exit the program.
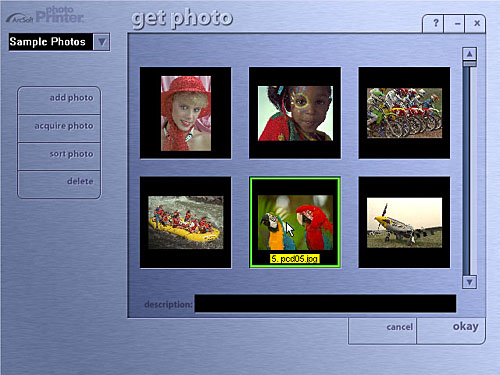
Selecting the Get Photo button on the main screen (which flashes until you click on it) takes you to the Get Photo Screen where you can select the image you want to print. The software CD comes with a small sample image album, but you can also pull up an album of your own or acquire images from any TWAIN device such as a digital camera or scanner. The Add Photo button lets you add an image to an existing album, or you can delete an image with the Delete button. Additionally, the Sort Photo button lets you sort images in an album by file name, size, type, etc. When you've selected the image you'd like to print, click the Okay button at the lower right corner. This returns you to the main screen. Cancel does the same, but with a blank image preview area.
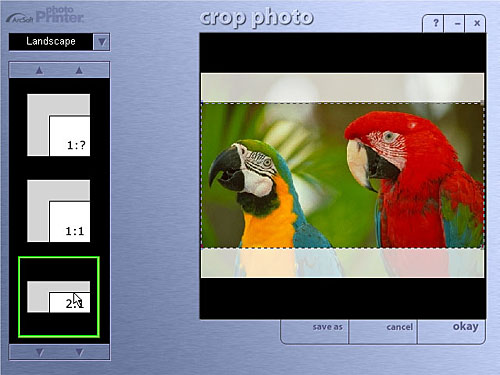
Once you've selected your image, you can crop it by hitting the Crop Photo button which takes you to the Crop Photo Screen. A selection of aspect ratios is available on the left hand side allowing you to freehand crop the image by moving the dotted lines. Clicking the arrow next to the top left text box lets you switch between Landscape and Portrait cropping options. After cropping, it's a good idea to click the Save As button at the bottom right side of the screen and save the image under a different name from the original. Selecting Okay takes you back to the main Layout Screen.
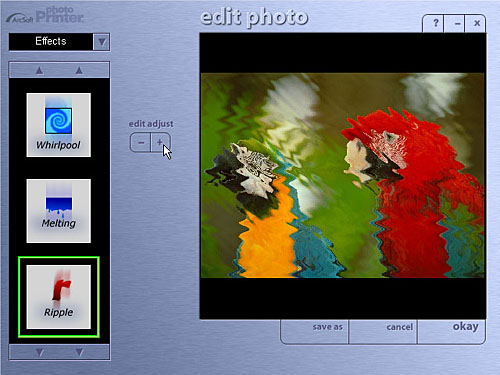
Like PhotoPrinter 2000, the Pro version provides a bevy of image effects and enhancements to choose from. From the main screen, clicking the Edit Photo button takes you to the Edit Photo Screen. Here, you can select from either the Effects or Enhancements menus, selectable by clicking the arrows beside the text box. Under the Effects menu, you have several creative options which allow you to manipulate the image into an oil painting or a sketch, apply ripples or fisheye effects and many others. Under Enhancements, you can adjust image values like brightness, hue, saturation, etc. To make adjustments, just highlight the effect or enhancement and click the plus or minus button to increase or decrease the amount of the manipulation. As with PhotoPrinter 2000, you can only make one adjustment at a time on this screen. To perform multiple functions, you'd have to make the initial adjustment, save the image and select Okay, then come back to select another one. This is only a minor criticism, but can be time consuming if you want to make several adjustments.
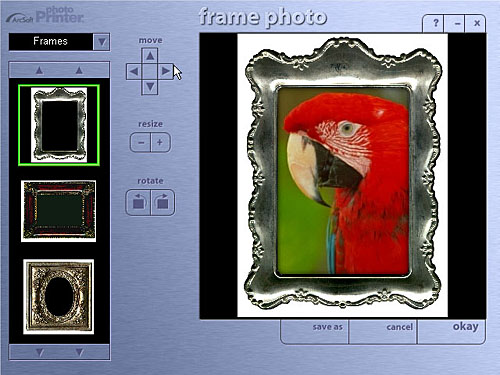
From the main Layout Screen, clicking the Frame Photo button takes you to the Frame Photo Screen, where you can choose from a varied selection of frames, borders, edges, shapes and calendars. Clicking the arrow next to the upper left text box changes categories (Edges, Borders, Frames, etc.) and the up and down arrows move through the selections. Once you've selected a frame or border, you can move the image around inside the frame, enlarge it or rotate it to accommodate the frame better via the arrow buttons on the left of the preview window. Here, as in the other screens, you have the option to Save As, Cancel or click Okay.
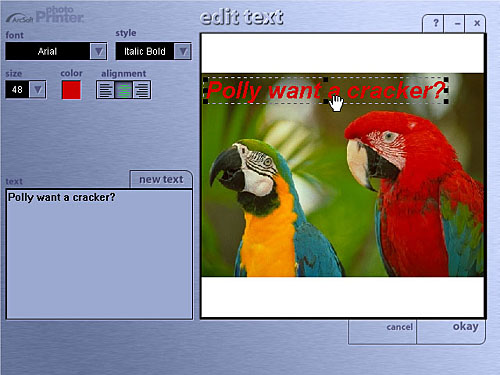
PhotoPrinter 2000 Pro also gives you the option of adding text to an image, through the Edit Text button on the main Layout Screen. Under Edit Text, you can select the font, size, style, color and alignment of the text. You can also position the text anywhere on the image with the mouse. This is a handy feature that gives you even greater creativity.
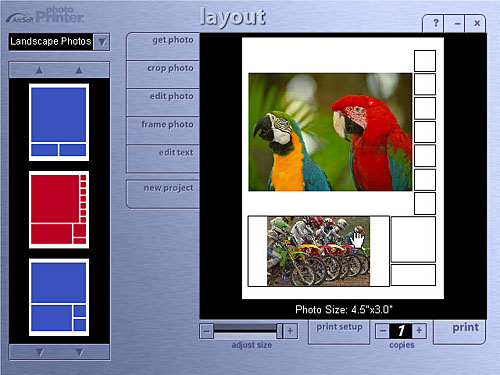
The Template Menu on the left side of the main screen lets you set up how many photos are printed on a page as well as select the appropriate layout. Clicking on the arrows next to the left text box lets you choose between portrait and landscape layout templates. Additionally, the text box beneath the image preview area reports the size of the main image, which is adjustable by moving the scroll bar. To print different images on the same page, all you have to do is select the box on the layout template where you'd like to place another image and double click it or click the Get Photo button. This opens up the Get Photo Screen, where you can open a new image. The rest of the option buttons work the same way, as they apply to whatever image box is selected in the layout. The New Project button at the bottom of the list clears the image preview area and pulls up a blank page (effectively like selecting the delete key). Be sure you want to do this as you can't get the previous layout back.
The print functions at the bottom of the Layout Screen are pretty self-explanatory. The Print Setup button pulls up a setup window for selecting the printer, paper size, orientation, etc. The Copies plus and minus buttons increase or decrease the number of copies to be printed. And finally, the Print button sends it all to the printer.
Overall, we really liked the straightforward operation of this program. Like its sister, the PhotoPrinter 2000, the Pro version is extremely versatile and user-friendly, providing a nice blend of photo manipulation tools and printing options. At only $29.99 from ArcSoft, PhotoPrinter 2000 Pro is definitely an affordable solution to most consumers' printing needs. Purchasing the software provides a free membership to the PhotoIsland.com website with an extra 10 MB of image storage space (PhotoIsland.com allows members to share images online with family and friends, create a guestbook and provides access to special offers and free software downloads). This is a great product with loads of features and capabilities!
Reader Comments!
See
what other Imaging Resource readers have to say about ArcSoft's PhotoPrinter
2000 Pro, or add comments of your own. (Have you purchased
the DigiSnap yourself? Come back here and share your experience with the rest
of the community!) Questions or feedback on this review? E-mail us at [email protected].
For More Info:
Visit ArcSoft's
Product information page.
This document copyright (c) 2000, The Imaging Resource,
all rights reserved. Visitors to this site may download this document
for local, private, noncommercial use. Individuals who have themselves
downloaded this page may print a copy on their personal printers for convenience
of reading and reference. Other than this explicit usage, it may not be
published, reproduced, or distributed in print or electronic and/or digital
media without the express written consent of The
Imaging Resource.