Use your browser's "Back" button to return to the previous page, or the links at the top and bottom of this page to navigate to related information. If you have difficulty fitting the text on this page onto your printer output, simply resize your browser window to a narrower width and print again.
Back
to Full PhotoStudio 2000 Review
Up to Imaging Resource Accessories Page
 |
ArcSoft PhotoStudio 2000 Software Review: An Inexpensive Alternative to PhotoShop Reviewer: Stephanie Boozer (Review Posted: July 17, 2000) |
With the growing trend of digital cameras comes the growing need for consumer-friendly image editing software. After snapping an image, consumers now want to color correct or digitally enhance it before emailing it to friends or posting it on a website. Yes, the world is going digital and tecno-savvy consumers are keeping up with the times. Among the vast sea of image editing software products out on the market is ArcSoft's PhotoStudio 2000, an extremely user friendly program that makes it quick and simple to organize and digitally enhance images. From a variety of filters and special effects to a bevy of online tools, PhotoStudio 2000 has everything you need to get the most out of your photos quickly and efficiently.
System Requirements
Like the software, the packaging is simplicity in itself. Inside the box we found a software CD and a relatively thin manual that includes a tutorial section (which we doubt you'll even need). Likewise, installing PhotoStudio 2000 is quick and uncomplicated. Just pop in the CD and double click the setup file or let the Windows Wizard take over while you sit back and relax for a few minutes. Once installed, all you have to do is launch PhotoStudio and get to work. We found the main screen of the program easy to navigate and very user-friendly with menu bars, palettes and a work area in the center.
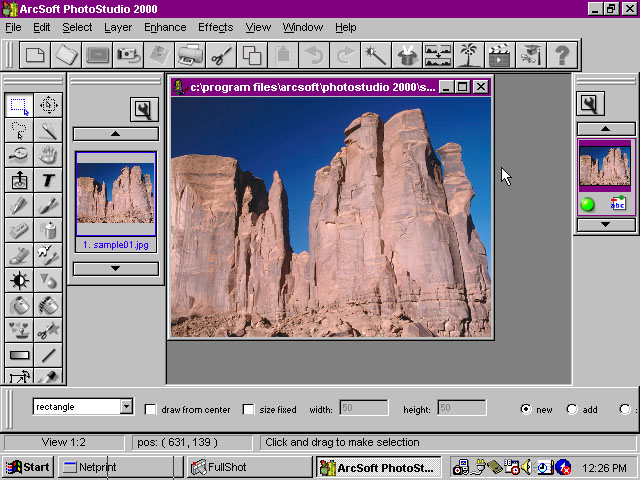
The tool bars around the sides and bottom of the screen are referred
to as palettes. What's great about these palettes is that you can grab one with
the mouse and drag it out to the center of the work space, where it turns into
a small window which can be placed anywhere. The luxury of this is that you
have a completely customizable work space set up for the way you work best.
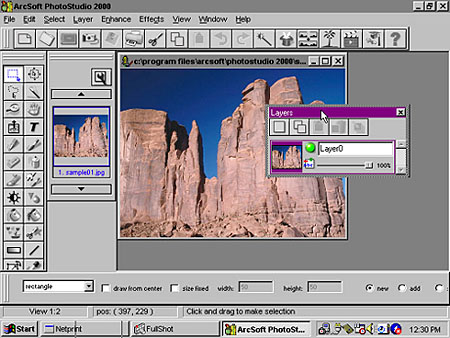
The top row of buttons across the image work area are shortcuts to the most commonly used menu items like Save, Print, Copy, etc. The Album Palette lies on the left side of the work area and displays images in the currently selected album. (Albums are simply collections of images that you set up. A sample one is included with the software). On the right side of the work area is the Layers Palette, which displays thumbnails of each image layer when you're working with multi-layered images (more on layers later). Also on the right side is the Tools Palette, which gives you access to different drawing, painting and editing tools. Finally, along the bottom of the work area is the Options Palette, which displays the available options for the tool selected. For example, if the text tool is highlighted, the Options Palette displays the available fonts, sizes, etc. As we mentioned, these palettes can be quickly moved around the desktop and set up for how you work best.
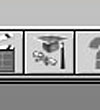 Navigating through
the program is relatively simple, but if you need assistance, ArcSoft has included
a snappy little helper dubbed the Studio Assistant. Clicking on the Studio Assistant
button pulls up a small help menu featuring the most commonly asked questions.
There's also a Help Menu button, just beside the Studio Assistant, for those
times when you need more information. If that's not enough, just click on the
PhotoIsland.com (the palm tree) button. Buying the software gives you a free
membership where you can create photo albums online and get all the help you
need with PhotoStudio. Like many Windows applications, simply positioning the
mouse over buttons displays a tool tip window with a description of its function.
When you're ready to open an image, you can use the File menu to locate a specific
image or browse through an album. The Album Manager feature lets you organize
images into albums with specific names such as "Family Vacation" or
"Julie's Wedding." Setting up an album is very simple, just click
Open Album from the File menu. A window pops up with a pull down menu of available
album titles. Scroll down to New Album and click. You've just created a new
album. PhotoStudio comes with a sample album of images to play around with while
learning the software. If you want to work on an image in an album, just scroll
to the desired image in the album palette and double click it to open it in
the work area. You can also take images straight from your digital camera or
scanner (any TWAIN device) and pull them directly into PhotoStudio through the
Acquire option on the File menu. There's also a Slide Show option which displays
album images in a slide show format for easy review of all images.
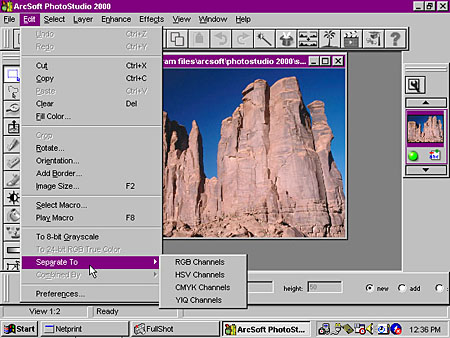
In addition to the normal cut and paste functions, the Edit menu lets you alter the image's rotation and orientation, add a border and change the image size. You can also select or play a macro object and separate the image into RGB, HSV, CMYK and YIQ channels. We're not going to get too technical here, but in addition to separating into channels, you can change the channel preferences. For instance, selecting Preferences from the Edit menu allows you to alter the RGB levels and change the background transparency (leave white or add a checker board for measuring placement) of an image.
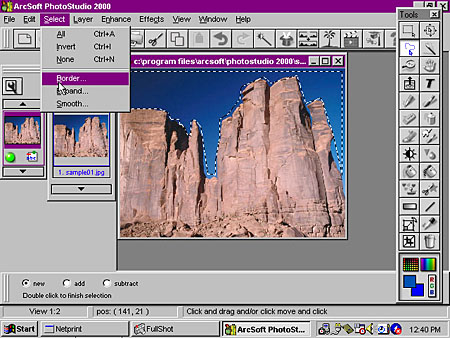
The Select menu is pretty straightforward, giving you some quick shortcuts to selecting certain parts of the image (all, invert, none, etc.).
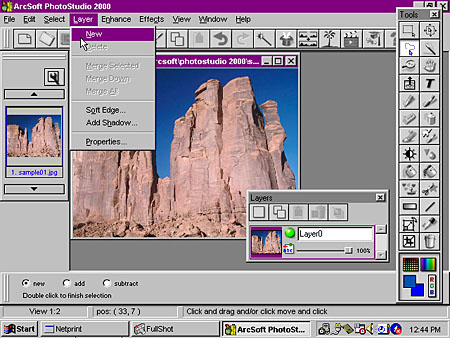
If you're working with a multi-layered image (such as one with text in one layer and the background image in another), the Layer menu allows you to add or delete layers or change their properties. For example, if you want to add text to an image, it's simplest to create a new layer just for the text. That way, you can move it around easily or delete it if you change your mind without messing up the entire image. Layers can be turned on and off from view on the Layer Palette, by clicking the green dot. However, if you want to delete a layer, you must do it through the Layer menu (we tried hitting the Delete key while the layer was selected in the palette, but nothing happened). When you drag the Layers Palette out from its original position, you get a few more options - like the ability to determine the percentage of the layer's visibility (this is fun for making images appear transparent). Layers are also beneficial when you want to apply a special effect to the image without effecting the text or other layers. If you're new to the idea of working with layers, the manual gives a nice overview.
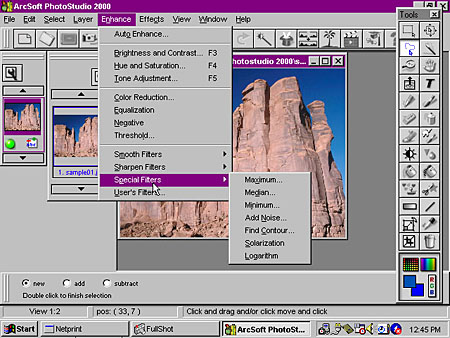
Under the Enhance Menu, you have a lot of options to choose from for manipulating the image, such as altering the brightness and contrast, adjusting the hue and saturation or turning the image into a negative value. There's also a variety of filters that allow you to apply a blurring effect or sharpen lines. Special filters under this section include the ability to add noise or solarize the image, among others. The time saving Auto Enhance feature adjusts the image sharpness, brightness, tone, contrast and color with one fell swoop. Once complete, Auto Enhance lets you adjust the intensity of the correction through a sliding scale.
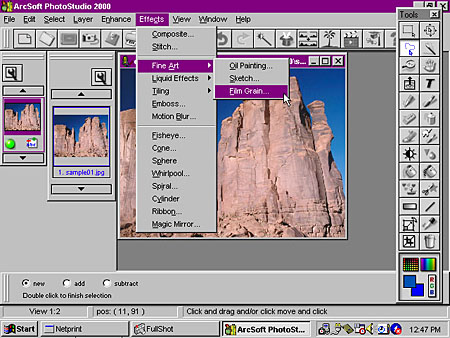
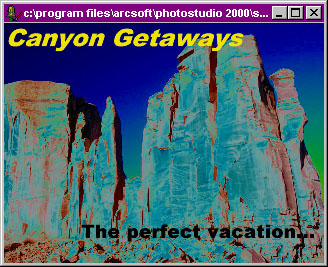
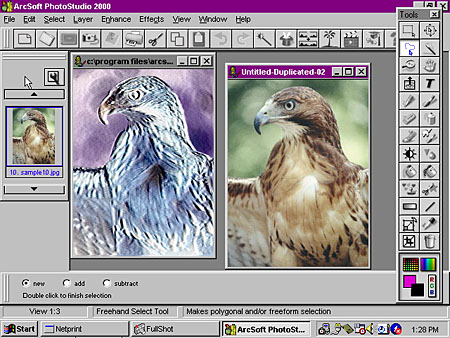
The Effects Menu is where the fun starts. With artistic effects like Emboss, Motion Blur, Fisheye, Ribbon and others, you can set your creative spirit free. The Fine Art option lets you apply Oil Painting, Sketch or Film Grain effects while the Liquid Effects lets you give the image a Ripple or a Melting look. Some other useful options are the Stitch and Composite features, which allow you to "stitch" together a series of images into a panorama or blend two images together. You have absolute creative control over the intensity of both. The sky's literally the limit with this menu as you can apply as many or as little effects as you like. Don't worry about messing up, a multilevel Undo feature gives you the freedom to correct any mistakes or just change your mind.

More effects and corrective tools, such as Red-Eye Removal, Magic Wand selector tool (which helps select large, odd-shaped areas), Stamps, Shapes and various transform and color tools, are available through the Tools Palette. You also have the ability to draw freehand, fill large areas with the paint bucket and clone objects. A really excellent feature about this software is that if you need to perform the same corrections to several photos, you can program the macro tool and do them all with one click. Just choose Select Macro from the Edit Menu and follow the prompts. This is a real time-saver that we greatly appreciate.
Overall, we found PhotoStudio 2000 to be an excellent upgrade
to earlier versions of this software. Image correction and effects can be performed
quickly and without hassle, meaning that users new to digital editing shouldn't
have too much trouble getting started. Earlier versions of PhotoStudio were
somewhat limited in everything from the workspace to the correction options.
ArcSoft seems to have listened to earlier complaints and completely redesigned
the program. The customizable workspace is a definite plus, as is the macro
feature which allows for quick, simple batch processing of multiple images.
The connection to PhotoIsland.com opens up even more possibilities, as it allows
you to e-mail photos straight from the application, share photos by posting
them on the website, download free software and many other bonuses. Plus, the
purchase of PhotoStudio gives a bonus of twice the amount of free image archival
space on the PhotoIsland.com website.
The software package retails for $39.99 from ArcSoft, which can be purchased from their website directly. For the amount of creativity gathered browsing the site and the PhotoIsland.com bonuses you receive, we believe this is an excellent value. PhotoStudio 2000 is a wonderful program for the digital imaging novice as well as for the experienced consumer, as it puts a world of control at your fingertips without any complications.
Reader Comments!
See
what other Imaging Resource readers have to say about ArcSoft's PhotoStudio
2000, or add comments of your own. (Have you purchased the
DigiSnap yourself? Come back here and share your experience with the rest
of the community!) Questions or feedback on this review? E-mail us at [email protected].
For More Info:
Visit ArcSoft's
PhotoStudio 2000 information page.
This document copyright (c) 2000, The Imaging Resource,
all rights reserved. Visitors to this site may download this document
for local, private, noncommercial use. Individuals who have themselves
downloaded this page may print a copy on their personal printers for convenience
of reading and reference. Other than this explicit usage, it may not be published,
reproduced, or distributed in print or electronic and/or digital media without
the express written consent of The
Imaging Resource.