The Blarney Stone of Calibration
Datacolor Spyder3 -- Charming Color Into Compliance
 By MIKE PASINI
Editor
The Imaging Resource Digital Photography Newsletter
Review Date: April 2008
The beer around here recently turned green, as it does every year in the middle of March for some inexplicable reason. The thirsty encourage it by wearing a bit of green themselves. At the bunker, we decided to take this seriously by painting the whole place green.
Going green may be one of the newer virtues, but we predict it will never catch on where your monitor is concerned. Monitors cry out for a certain kind of balance that's frankly admirable. It makes your photographs look real, too.
The well-balanced monitor does not come out of a box. It takes some adjustment to get it right. Some people flatter themselves that they can do this by eye. And then never do. Others have been reading us for years and believe what we tell them: you need a little gadget to get this reliably right enough to do as frequently as it needs doing. A monitor calibrator.
Years ago we thought we'd seen enough of these gadgets. We'd calibrated our monitors and planned to live happily ever after, recalibrating every month or so with the same gadget.
Then things got interesting.
Pantone, famous in commercial printing circles for getting color right, came out with a little stick of a colorimeter called the huey that not only calibrated your monitor but stuck around to monitor the ambient light, adjusting monitor brightness as the room light changed.
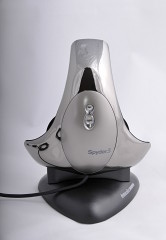
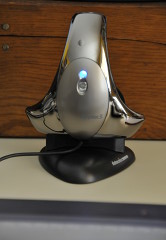
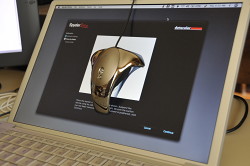
Spyder3. Sitting in its cradle.
Our review of the hueyPRO (http://www.imaging-resource.com/ACCS/HUEY/HUEY.HTM) noted the dissatisfaction our Atlanta lab guys had with its predecessor. But we found no such issues with the hueyPRO and continue to use one on our second computer here.
But in that review, we confessed we were long-time devotees of Datacolor's Spyder. Our main keyboard with two monitors has always relied on a Spyder for calibration. But those Spyders didn't monitor ambient light and they took longer than the hueyPRO to calibrate.
Enter the Spyder3.
Smaller than the Spyder2 (with a much more flexible USB cord, incidentally), it seems to have learned a few tricks from the huey. Like the huey, it comes with a stand (something the Spyder2 didn't have) and it can monitor ambient light (as did the Spyder2). It's also a good deal faster than the Spyder2, requiring 5 instead of 7 minutes for your first calibration and just 2.5 minutes to recalibrate. The Spyder2 recalibrated as slowly as it calibrated. It only knew one way.
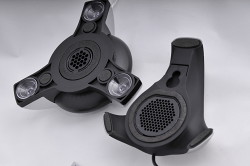
Sensor Size. Spyder2 (left) has a significantly smaller sensor than the Spyder3.
It's also got the largest screen sample area (or aperture), which increases light sensitivity about 400 percent, according to Datacolor. Couple that with a seven detector color engine (which nobody else has except the Spyder2) and the Spyder3 can see things other colorimeters can't.
Like its predecessor, it can calibrate multiple monitors but the software has grown up. It's a lot easier to do the trickier things than it ever has been. And there are a few new tricks, too, like recording your monitor's white luminance history.
We never complained about our older Spyders but we never reviewed them either. Each one had some issue that seemed to require duct tape to resolve. But not the Spyder3. Datacolor seems to have gotten it right this time.
MORE THAN ONE SPYDER3 | Back to Contents
Datacolor use the Spyder3 name in a number of packages. The two colorimeter packages -- the $169 Spyder3Pro and the $279 Spyder3Elite -- use the same hardware with different software. A third package -- the $499 Spyder3Print -- is a spectrocolorimeter with software to calibrate your printer.
This review discusses the Spyder3Elite. It adds the following software features to the Spyder3Pro:
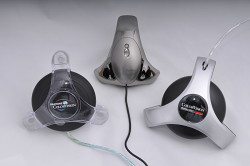
Spyders. The original Spyder (left), the Spyder2 (right) and the smaller Spyder3 (center).
- Unlimited gamma choices, user defined
- Custom targets (NTSC, PAL/SECAM, Cineon, L-Star)
- Expert console
- Custom B/W luminance control
- Display History Utility
- Studio Match function
- Front projector calibration
- Gamma curve editing
- L-Star workflow option
- Custom curves
- PreciseLight Functions
- Hi-Bit profiling option
The system requirements are rather modest, supporting Mac OS X 10.3 and higher or Windows 2000/XP/Vista via USB. Your color monitor's resolution should be 1024x768 or higher with a 16-bit video card (but you have a 24-bit card, no doubt). You need 100-MB of disk space and 128-MB of RAM.
The Spyder3 sports a new built-in ambient light sensor. Its seven filter/detector technology is 29 percent more accurate than the Spyder2 and suitable for profiling wide gamut, LED backlight and AdobeRGB displays. Initial calibration takes five minutes and the new ReCAL option only 2.5 minutes. The Spdyer3 can be mounted via its removable suction cup, with a counterweight or a tripod mount (for projection systems). The USB cable is integrated into the device which includes a cradle and a two year hardware warranty.
Both monitor calibration software (with an extensive Expert mode) and a utility to monitor ambient light are included with the Spyder3, which sports a new LED status indicator now. The LED remains illuminated when your system goes to sleep. A Quick Start Guide and screen cleaning packets are also included.
INSTALLATION | Back to Contents
Installation is pretty straightforward. You 1) install the software, 2) plug in the Spyder3 and 3) launch the software. The Quick Start Guide steps you through that, adding that after calibration, you can 4) have the Spyder3 monitor your profiles and ambient light.
But there are a couple of other things you might do before that. The first is to clean your monitor. Datacolor provides a two-step Klear Screen wet and dry screen cleaner to do that. The other thing is to let your monitor warm up. CRTs take about 30 minutes to stabilize while LCDs are ready in just a few minutes (but it doesn't hurt to wait half an hour). Make sure no direct light is falling on your monitor.
Monitoring Ambient Light. Very high ambient light being monitored by the Spyder3. Note the blue LED, which remains lit when you put your system to sleep.
You should also decide whether you want to use the suction cup or the weight to hold the Spyder3 to the surface of your screen. You can use either method on either a CRT or an LCD. We were able to angle our screens so gravity did as well as the suction cup. We don't like sticking anything to our screen.
Finally, make sure you've disabled any screen saver. You don't want the calibration process interrupted by your screen saver just as the last measurements are being made.
During the software installation, Datacolor installs Spyder Utility as a Startup Item on your system. Spyder Utility makes sure your display profiles and their matching calibration data are loaded at startup for each calibrated display. It also checks that they are still in use (including the more stringent Spyder Certification standards, if applicable) during your session. And it optionally monitors ambient light levels, too, warning you if the light levels are too low and reporting generally what they are in its pulldown/popup menu. Spyder Utility's main job is to adjust monitor brightness to compensate for ambient light to the extent that's feasible.
Another part of the installation worth noting is the extensive HTML Help system. You can access it directly from within Spyder3Elite, the calibration program.
The age of your monitor is not an insignificant factor, to put it gently. Monitors in use for over five years may profit much from calibration, but that doesn't mean they're capable of correctly displaying the full gamut of colors that a new monitor would. The Spyder's job is to measure what your monitor is doing and profile it so the specified color is displayed but if your monitor can no longer display that color (say the green gun is shot), no profile is going to make it display it.
CERTIFICATION | Back to Contents
Spyder Certification is an option you can enable during the calibration process that will let Spyder Utility check a number of conditions to confirm your monitor is within the parameters defined for certification or report which parameters are out of spec.
The parameters checked include:
- The profile assigned to the display by the operating system is a Datacolor Spyder3-created profile
- That profile was created with Spyder Certification set to 'on'
- The LookUp Table (LUT) currently loaded in the video card is the LUT from that profile
- Ambient light conditions are the same as when the display was calibrated
- The display has been recalibrated within the time limit specified in the Spyder Utility's preferences
- The display has been run through full calibration within the time limit specified in the Spyder Utility's preferences
- The computer has been turned on for at least the time specified in the Spyder Utility's preferences
CALIBRATION & PROFILING | Back to Contents
Once you've installed the Spyder software and connected the Spyder itself to your USB port (a hub is fine), you're ready to calibrate and profile. There's no need to disable any currently active profile.
Calibration, as the Help file explains, keeps your monitor in a consistent state so that it displays colors in the same way, day after day, month after month.
As noted in Imaging Resource's Spyder2 review, that involves determining:
- What colors are the red, blue, and green channels of the display?
- How does the light output of channel vary as the pixel value is changed from 0-255?
- What color are the pure grey values (equal RGB numbers, for instance 200/200/200 should be a light-medium grey, with no color tint to it.
Once the software knows how the display is behaving, it can correct it by loading correction curves into the video card (or sometimes the monitor itself), to produce a smooth tone curve and neutral greys. This step also adjusts the monitor to the gamma setting and color temperature that you want. (The sRGB standard uses gamma 2.2 and a white point of 6500K.)
With the display producing smooth tones and neutral greys, the software can create a color profile describing the display's color characteristics. Programs like Adobe Photoshop can use display profiles to compensate for the known quirks of a display device, and insure accurate color rendering.
It isn't hard to make the physical connection between the Spyder and your monitor. But what often isn't appreciated -- with any hardware calibration device -- is the consequences of the choices you make in the software itself. These can, frankly, invalidate the process.
That's why having a user-friendly calibration program is essential. A lot is made of the hardware but how you use the software can make or break the profile.
So what did we think about the software? Much improved. We didn't run into embarrassing questions, really. And when we were torn between options, we found the software was all too happy to chime in with an expert opinion, sort of like a tax advisor.
Let's step through the calibration process to show you exactly what we mean.
The Calibration process involves three steps: selecting Calibration Settings, Measuring the Display and Creating the Profile.
To set Calibration Settings:
- When you launch the Spyder3Elite application, it presents a screen asking for the display you wish to calibrate. A popup menu allows you to select between displays. Whichever display you select, the window moves to that display.
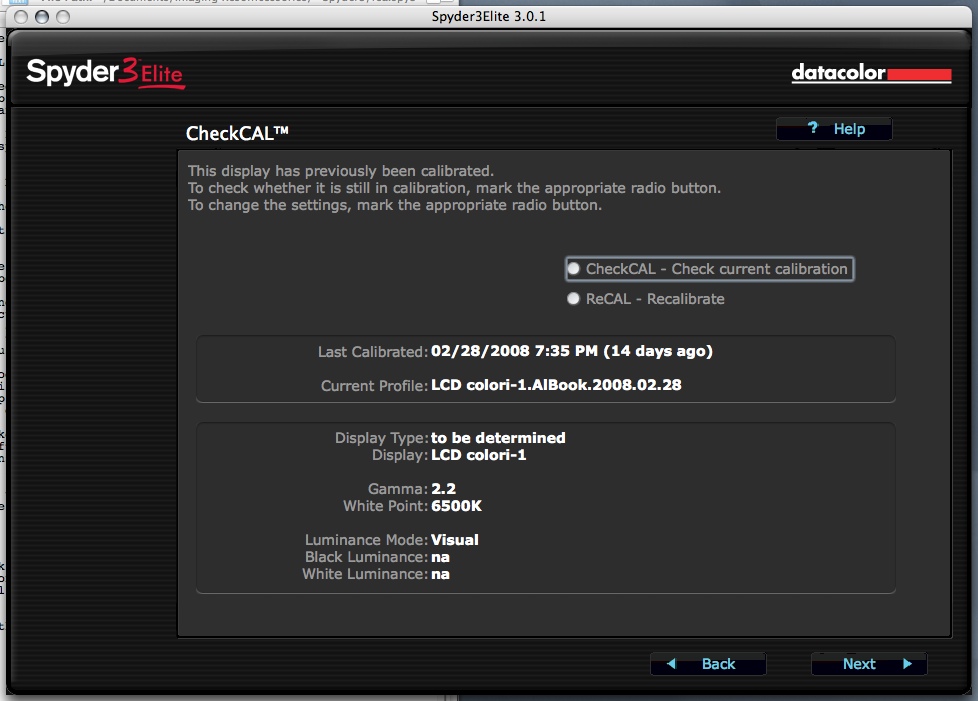
- If the display hasn't been previously calibrated by the application, it presents the New Display screen to ask you to identify the type of display (CRT or LCD) and what controls are available on it (Brightness, Contrast, etc.). If the display has been previously calibrated using the application, the program suggests (by drawing a box around the radio button option) that you either check the current calibration (whose settings are displayed) or recalibrate. Recalibration is much faster than the initial calibration, skipping the RGB gradient readings.
- You are then asked to select the target values for the display. A few suggestions are made and the Help button is always there for more information. We selected a Gamma of 2.2 and a White Point of 6500K.
- You can then select whether or not to enable Spyder Certification. If you do enable it, the software will monitor the display and alert you if it falls out of certification.
- Next you can enable Gray Balanced Calibration, which Datacolor recommends for all displays unless you want to expedite your CRT calibration, where it isn't much of an advantage.
- You can then enable Ambient Light Compensation, analyzing the room light condition as part of the calibration target. Five light levels are detected: Very low, moderately low, medium, high, very high. Datacolor recommends using LCDs at medium and darker and CRTs at moderately low and darker. In changing conditions, you can set this off.
- Confirm the current settings.
CALIBRATION: SETUP
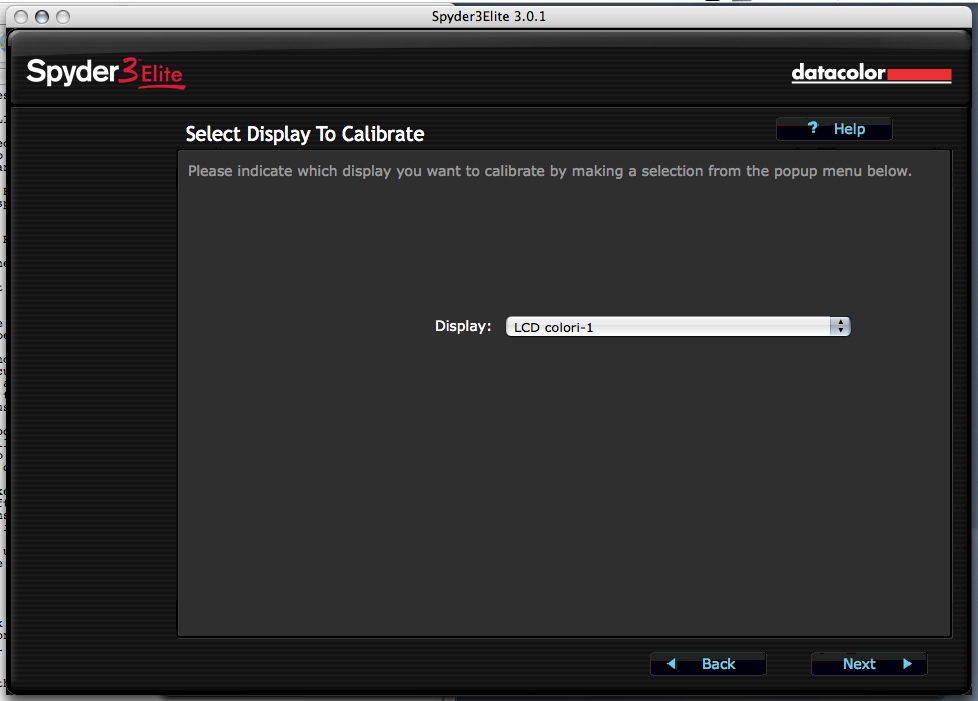
Selecting the Display
Settings
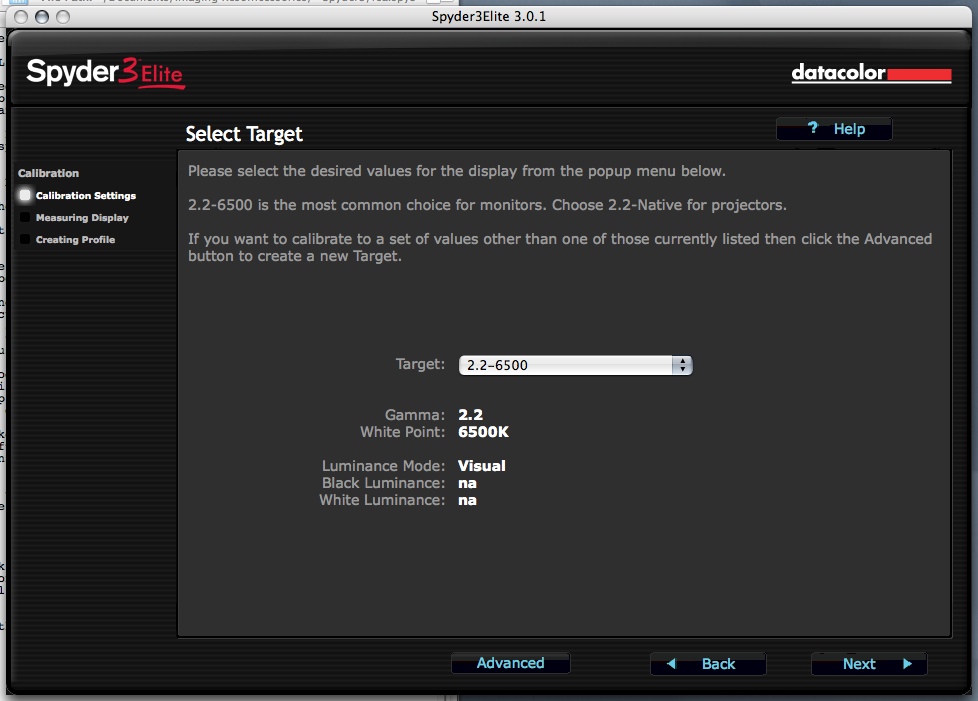
Selecting the Target
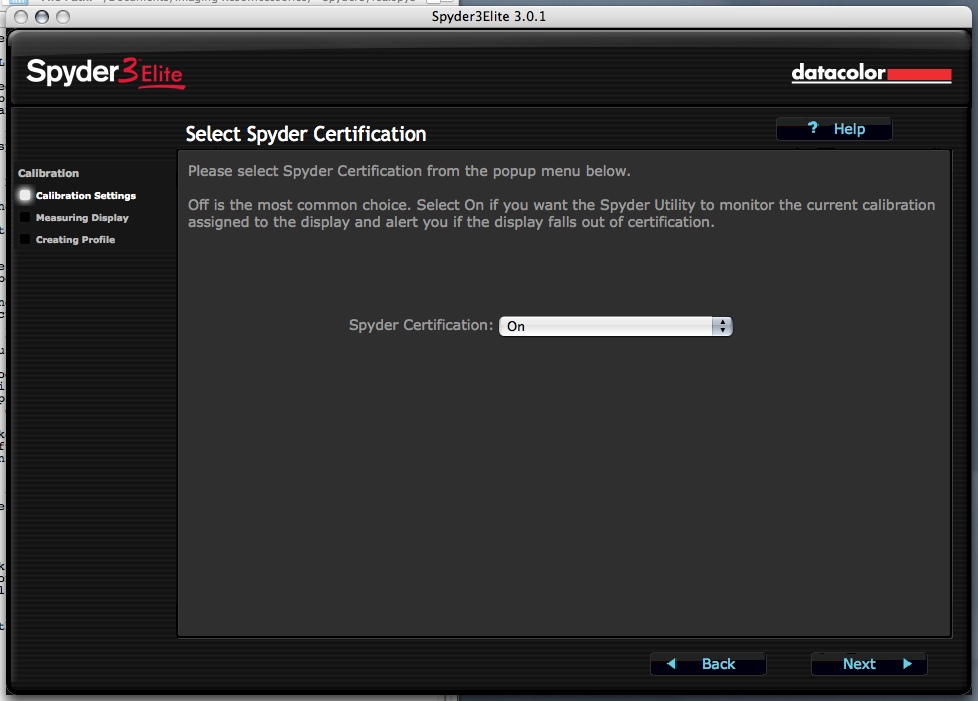
Certification Screen
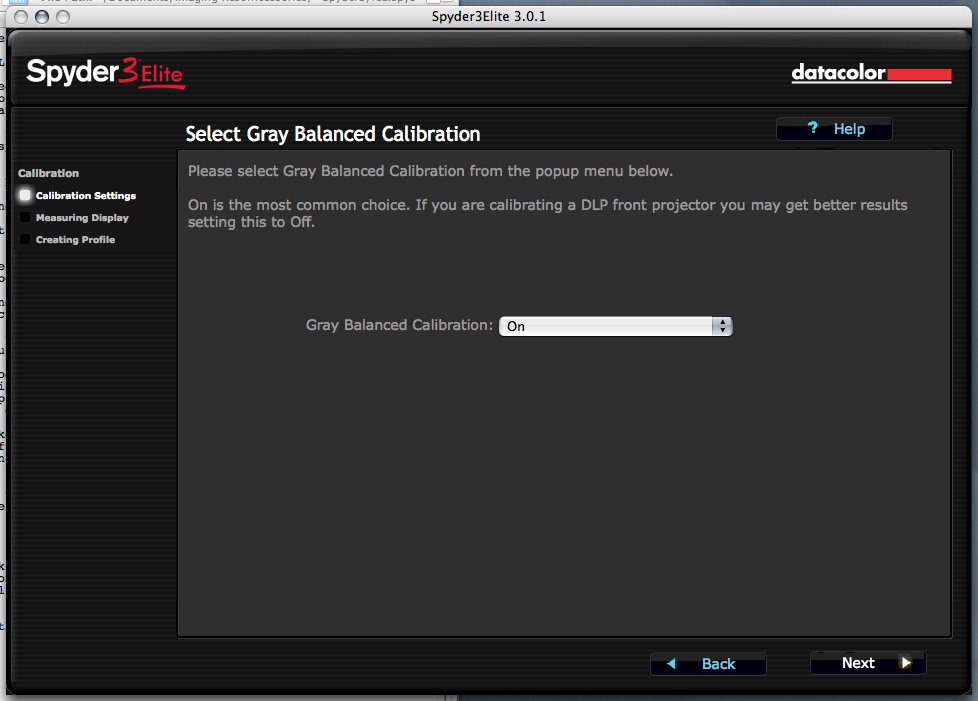
Gray Balance
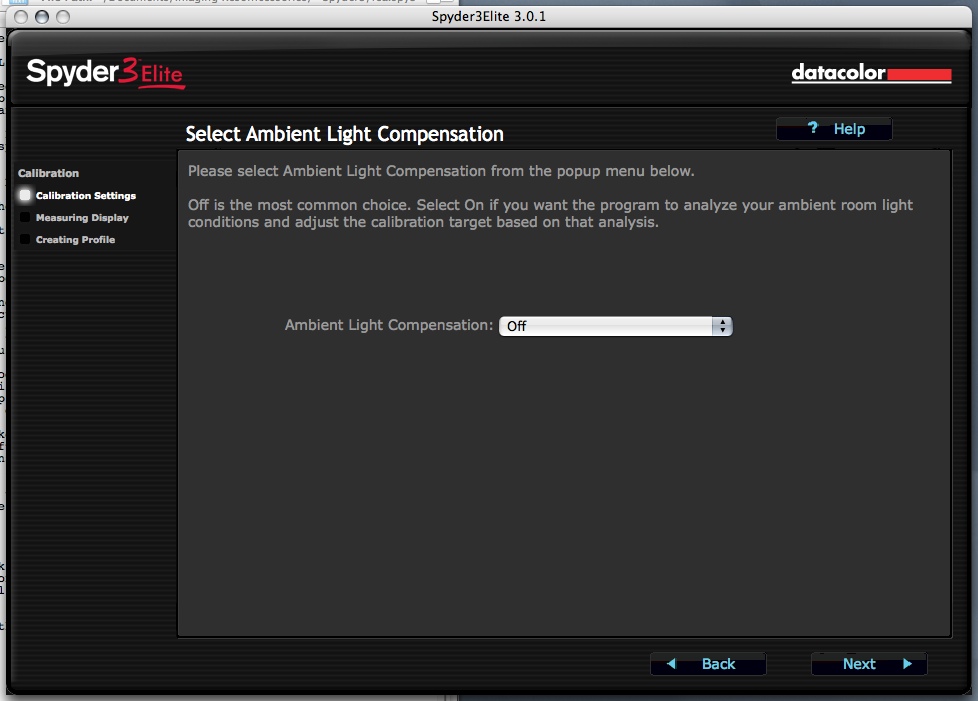
Ambient Light Compensation

Settings Summary
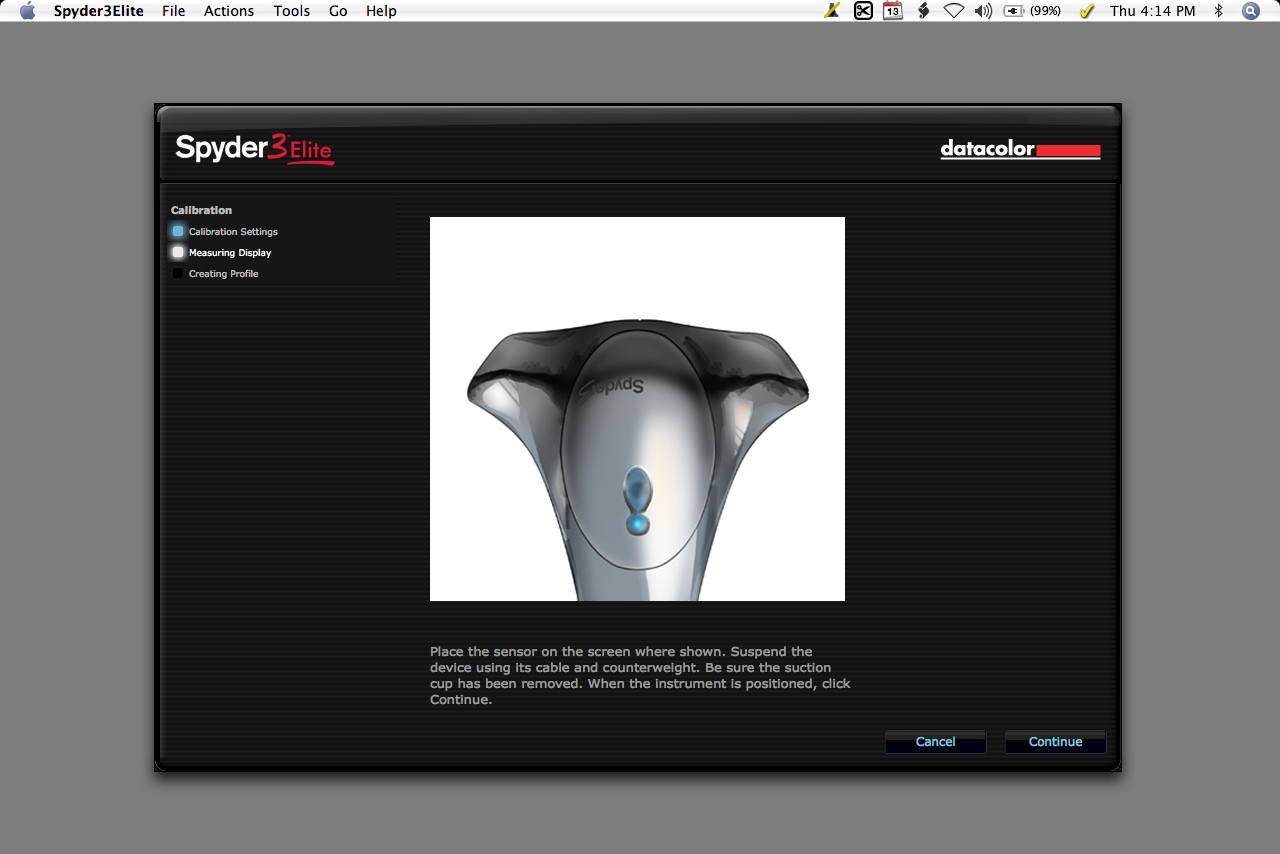
Spyder Target
Then you're ready to Measure the Display.
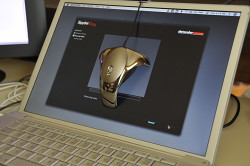
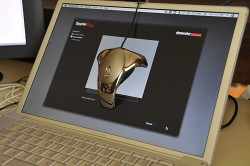
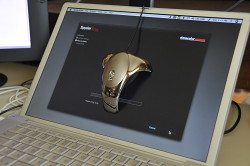
- An image of the Spyder3 is shown on the screen to guide placement of the real thing. Click the Continue button to begin measuring.
- The screen will display a sequence of colors under the Spyder3 colorimeter, starting with Red, then Green and then Blue before going through neutral colors. Various shades of RGB are displayed for the initial calibration but recalibration just displays the solid colors.
CALIBRATION: MEASURING THE DISPLAY
White
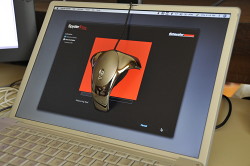
Red
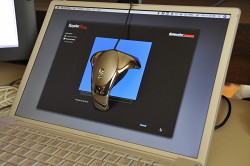
Blue
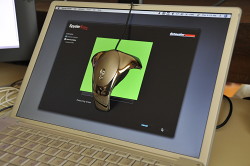
Green

Light Gray
Medium Gray
Dark Gray
Black
All that's left is to Create the Profile.
- When the process is complete, you specify the profile name. We always like to add the date to the suggested name. Datacolor takes care of the rest.
SPYDERPROOF | Back to Contents
After your profile has been created, the application displays the SpyderProof screen allowing you to compare your calibrated monitor to its uncalibrated state. Our screen shots can't show the dramatic difference between the Before and After states, unfortunately.
A series of 16 images, four in black and white, are displayed. The Switch button lets you quickly compare the two states.
A final screen reminds you not to change the controls and to recalibrate on a regular basis.
CALIBRATION: FINAL STEPS
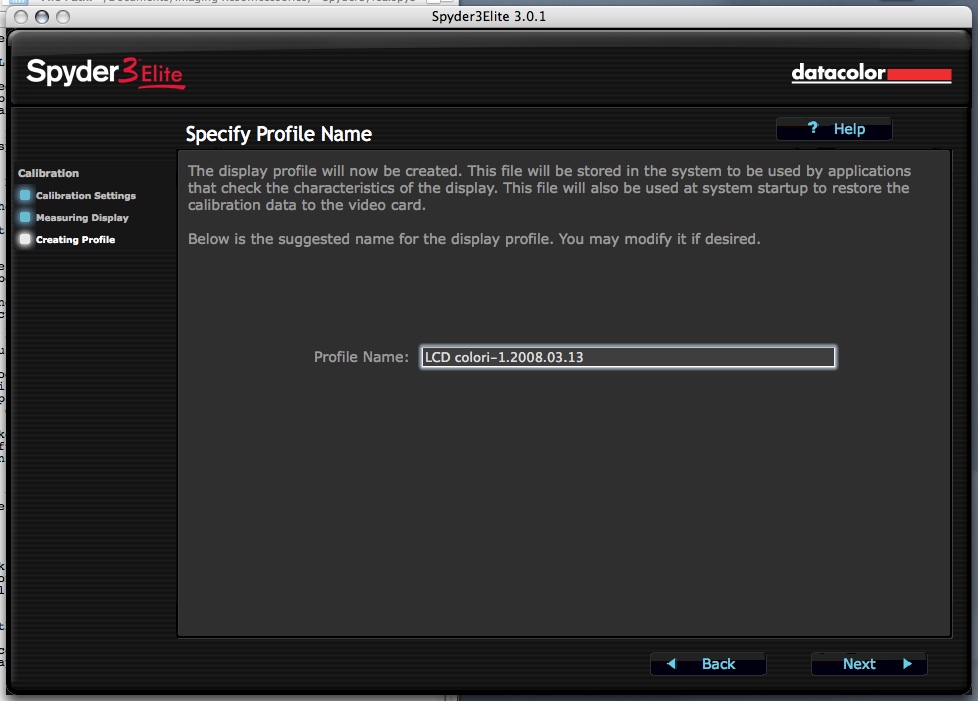
Naming the Profile
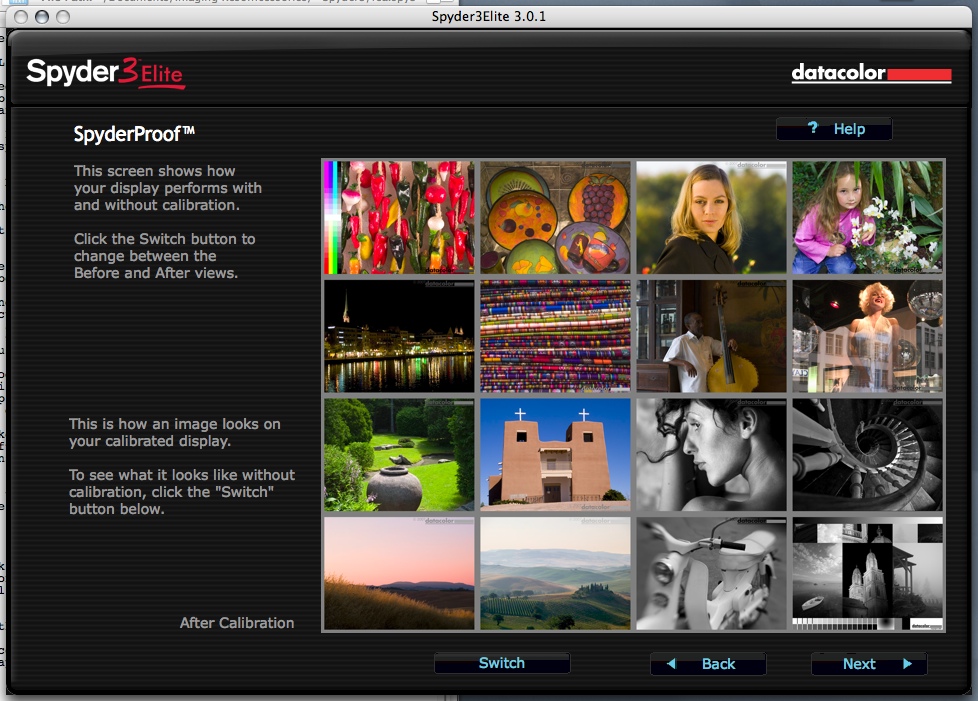
Spyder Proof (calibrated)

Spyder Proof (uncalibrated)
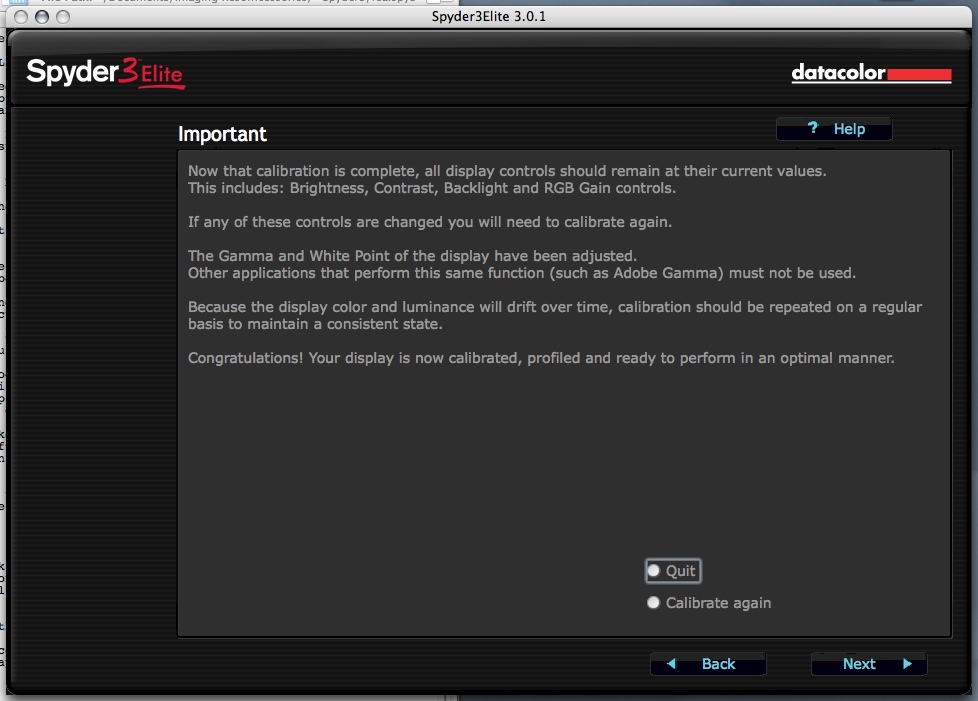
Reminder
Expert Screen (optional)
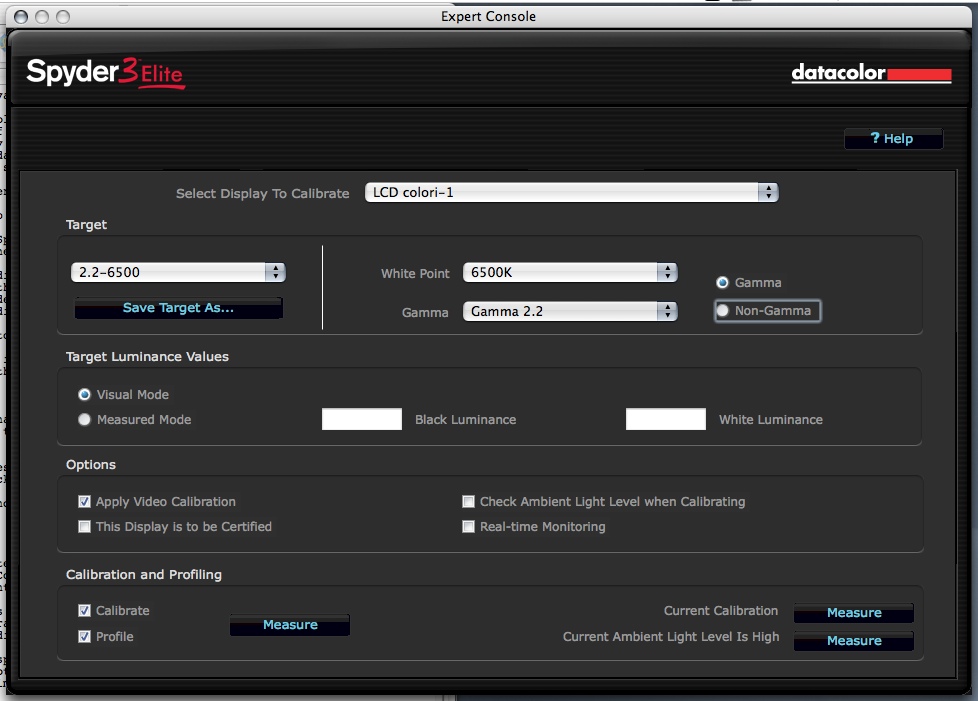
EXPERT CONSOLE | Back to Contents
While the step-by-step guided process gets the job done quickly, Datacolor also provides an Expert Console that puts almost all of the targeting, calibration and profiling elements on one screen.
Datacolor recommends running the program automatically before using the Expert Console so the program knows the characteristics of the displays and to determine multiple display targets automatically.
Settings include Display to Calibrate, Target (gamma and white point), Target Luminance Values, Options (Apply Video Calibration, Certification, Ambient Light Check, Real Time Monitoring), Calibration and Profiling.
STUDIO MATCH | Back to Contents
The Studio Match function works in two ways: matching multiple displays connected to one computer or displays connected to multiple computers.
Unlike Macs, Windows computers may need a separate video card for each display of a multiple monitor setup. If your card can't store a unique calibration for each display connected to it, you'll need to have a separate card for each display.
Datacolor also warns that a perfect match (particularly between a CRT and LCD monitor) isn't the game. Studio Match will match the displays "as closely as possible."
After selecting the displays to match, you confirm the match settings of Gamma and White Point before measuring luminance and measuring the displays. The final step is to create the profiles.
AMBIENT LIGHT | Back to Contents
Being able to measure ambient light is an interesting feature. There are two schools of thought about compensating for ambient light. The first is that if you have to compensate for ambient light, you're in trouble. The second is, well, get real.
A shop that does color correction for prepress, for example, has long known it should be working in windowless rooms painted a middle gray with very dim ambient lighting. That ambient lighting won't change from hour to hour, no matter what the weather is. Monitoring ambient light might be useful in this situation only to point out, as the Spyder3 will, that the ambient light isn't the same as when the monitor was calibrated. Which could happen when the janitorial staff turns on the overhead fluorescent lights.
A home office, however, will find it hard to avoid a window or to employ a room darkening shade if the room is shared with guests or other family members. Here, adjusting the ambient light makes a difference. You aren't getting the best view of your image because the room is too bright to begin with, but you'll find the image isn't unreadable when you return in the evening to work on it.
In between these situations, there's quite a few of us. We may have space that is only used for image editing but more likely it's office space that could use a little illumination once in a while, too.
GUIDANCE VS. HELP | Back to Contents
Monitor calibration, with all its jargon, can be intimidating. And providing a Help screen that defines the jargon into merely technical terms really doesn't help. I've often been further confused by some of the monitor calibration help I've gotten. And nothing turns you off faster than being confused.
Fortunately, Datacolor has put together an excellent Guidance system. It's all HTML, so it comes up in your browser when you click on the Help button on any screen. And there's a handy index to let you explore the subject at your leisure.
What makes it a Guidance system instead of merely a Help system? Well, each topic is handled in several levels. There's the short answer that leads the discussion, an explanation of the "purpose of this step" and the long answer that explains the topic in detail. Finally, there's a link to the Datacolor Web site for more information.
Selecting target values for gamma and white point, for example, have always been confusing. Where do these values come from? What do they mean? More importantly, what does it matter which values I choose?
The quick answer tells you to set gamma to 2.2 and white balance to 6500 degrees Kelvin. Well, it's actually even quicker than that, pointing to the 2.2-6500 option. It also suggests 2.2-Native for projectors, though.
Then it explains why you do this. "This screen allows you to choose the values that you will use to calibrate your display. The desired values are specified by selecting a Target from the popup menu. A Target is a convenient way to collect all of the desired values together in a single setting with a meaningful name."
Next it explains that white point is the color of white on your display and gamma is the tone response. It also explains that black luminance is how black your display's blacks are and white luminance who bright the whites are. And it explains the Certification check box.
After a little more on targets in general, it offers this advice: "The easiest way to create a Target is to proceed completely through a calibration process, setting all of the Target values and then after Calibration is complete, choose Save Target As from the File menu to create a Target that records all of the values used for that Calibration. That Target will then be available in the Target: popup to use for future calibrations or other monitors."
Advice like that is not just help. It's guidance.
The $279 Spyder3Elite and the $169 Spyder3Pro can be had for at a discount that also helps support Imaging Resource at the following links:
| Pro: | Con: |
|---|---|
|
|
I've always trusted a Spyder to calibrate my main monitors. And at first I was resistant to employing yet another Spyder. Things were fine, why screw them up? But the Spyder3 is a significant improvement over its predecessors.
There are the technical improvements like its increased light sensitivity, not to mention the unique seven detector color engine it shares only with the Spyder2. But the improvements I most appreciate are the user ones like the more flexible USB cord, the smaller colorimeter (which is easier to place on an LCD) and the faster and more efficient software.
That last is the most important because it means there's really no reason to put off recalibration. It only takes two and a half minutes. I almost look forward to it these days.
Update: See our Datacolor Spyder5 review for the latest version, and order the Spyder5 colorimeter from one of Imaging Resource's trusted affiliates: