THREE TIMES FASTER
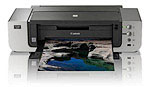
Canon Pro9000 Mark II
Refines a Classic
By MIKE PASINI
Editor
The Imaging Resource Digital Photography Newsletter
Review Date: June 2009
Canon introduced two Mark II printers in March. The $850 Pro9500 Mark II uses 10 pigment inks and the $500 Pro9000 Mark II uses eight dye inks. Both make 13x19-inch prints.
When we reviewed the original Pro9000 we applauded its "vibrant color, fast printing and versatile media handling that challenges not just the i9900 but pigment-based 13x19 printers."
And now it's three times faster, printing a bordered 13x19 color image in 1:23, according to Canon. Canon's FINE print head technology and large 6,144-nozzle print head using ink droplets of two-picoliters are harnessed to an enhanced double encoder system for media control to make quality prints at that level of performance.
We'll look at the specs before discussing what a big printer can do for you. And then do it!

Speed Demon. The big print head is the secret to the Pro9000 Mark II's speed.
Highlights of the Pro9000 Mark II's features include:
• High Resolution Printing. Canon Full-photolithography Inkjet Nozzle Engineering technology with two picoliter ink droplets achieve 4800x2400 dpi printing.
• Faster Printing. The Pro9000 Mark II prints approximately three times faster than its predecessor. It prints a 13x19 image in the same time as the original Pro9000 prints an 11x14.
• Individual Ink Cartridge System. The eight-color dye-based ChromaLife100 ink system uses individual cartridges for each color. Using Canon paper and ChromaLife100 inks results in prints with 100-year fade resistance when stored in an archival photo album.
• Two-Way Paper Feeding. Up to 150 sheets can be loaded in the rear tray. A front tray accommodates single sheets of fine art papers too thick for the rear tray.
• USB 2.0 Hi-Speed. As fast as USB 2.0 gets. Cable not included.
• Rollers. The back of the hefty unit has rollers so you can lift the front and roll the printer away from the wall for front feeding.
• Canon Generation Green Technology. Generation Green is Canon's environmental initiative which includes printing multiple images on one sheet; individual ink tanks to reduce waste; Energy Star compliance that's 25 percent more efficient than "conventional models;" RoHS compliance restricting the use of hazardous materials in electronic products (no cadmium, mercury, lead, hexavalent chromium, polybrominated biphenyls or polybrominated diphenyl ethers; hardware recycling program; and a refurbishing program for recovery and salvage of Canon products.
Less persuasive perhaps are these features:
• Ambient Light Correction. Available under Windows Vista only, color output can be adjusted for viewing under a variety of lighting conditions.
• Auto Photo Fix. Images are optimized as portrait, scenery, night scenery, snapshot with scenery or snapshot with night scenery. Canon claims backlit, underexposed faces are automatically brightened and color casts removed.
• PictBridge. A front-accessible PictBridge port lets you print directly from your camera. Cable not included.
These latter features seem particularly misplaced in a high-end printer. Ambient Light Correction is only available under one supported operating system but also shouldn't interest anyone intent on selling their prints (where the lighting, after all, should be secondary to the image). Auto Photo Fix is something the average user of a $500 printer can not only live without but should certainly mistrust. And PictBridge printing may be convenient but it, too, is not the sort of unoptimized printing we expect users to do on this kind of printer.
The effect of these last features is almost to give the impression this is a low-end unit designed for people who have no idea what they're doing. Nothing could be further from the truth.
The more you know about printing, the more you're going to like the Canon Pro9000 Mark II.
SPECIFICATIONS | Back to Contents
Following are the Pro9000 Mark II's specifications:
Printer Type: Inkjet Photo Printer Features: Auto Photo Fix, Borderless Printing, Document Printing, Grayscale Photo Printing, Photo Printing, 2-Way Paper Feeding, eight Individual Ink Tanks, Advanced Pattern Print, Ambient Light Correction (Windows Vista only), Auto Sheet Feeder, Index Print, PictBridge and Fine Art Paper Support Print Speed : 8x10 borderless color photo in about 47 seconds, 11x14 color photo on 13x19 paper in about 1 min. 23 seconds Number of Nozzles: 6,144 Print Resolution: Color and Black up to 4800x2400 dpi OS Compatibility: Windows Vista/XP/2000 and Mac OS X v10.3.9 to v10.5.x Standard Interface: USB 2.0 Hi-Speed and PictBridge (cable not included) Paper Sizes: 4x6", 5x7", 8x10", Letter, Legal, 11x17", 13x19" Output Tray Capacity: Auto Sheet Feeding Rear Tray holds 150 sheets; Front Tray holds a single sheet up to 1.2mm thick Noise Level: Approx. 42.5 dB(A) in the best quality mode Power Consumption: 16W (1.2W standby) Warranty: Toll-free technical phone support plus one-year limited warranty with InstantExchange Program Software Included: Setup Software & User's Guide CD-ROM, PIXMA Pro9000 Mark II Printer Driver, Adobe Photoshop Elements 6, Easy-PhotoPrint EX, Easy-PhotoPrint Pro, Solution MenuThe Pro9000 Mark II ships with:
- The PIXMA Pro9000 Mark II inkjet printer
- Eight inks: CLI-8BK Black, CLI-8C Cyan, CLI-8M Magenta, CLI-8Y Yellow, CLI-8PC Photo Cyan, CLI-8PM Photo Magenta, CLI-8R Red and CLI-8G Green
- Separate print head
- Power cord (no brick required)
- Documentation and warranty card
INSTALLATION | Back to Contents
Our Installation Gallery and our Software Setup Gallery show you how to unbox the printer, set it up and install the software. You can use the View menu to see the images as a slide show or walk through them in gallery mode.
We were surprised, on opening the box, not to find an installation poster. But Canon has provided an installation booklet instead. That has the advantage of focusing your attention on fewer steps at a time.

The Box. No poster this time.
You might be tempted to skip the book and just rip off the packing materials and the orange tape, install the print head and pop in the cartridges, but there were points along the way where the booklet came in handy.
The printer manages to align the print head by printing two sheets of letter-size paper. You don't have to evaluate anything because the printer checks each line as it is printed, rolling the paper back into the printer just a bit.
Software installation was a breeze. Just pop in the CD and select the Easy Install option. We did manage to screw it up, though. We accidentally skipped the alignment segment entirely because we automatically clicked the lower right button (which is usually OK but in this case was Next). Easy to remedy, as our gallery shows.
HARDWARE TOUR | Back to Contents
While larger than the i9900, the Pro9000 Mark II appears to be exactly the same size as its 30 lb. predecessor. The front tray is now opaque black plastic but its the same three-panel design. The rear feed support is still smoky plastic in two sections but there's a dust cover over the paper feed slot now.
The Power cable (without a brick) connects to the rear left corner of the printer while the USB cable connects to the rear right corner. Wheels at each rear corner make it easy to reposition the printer.

Back Corner. No FireWire but USB 2.0 Hi-Speed. Note the roller, making it easy to reposition the printer, say, out from the wall when you want to use the art paper feed.
The front panel has just the Power button, Paper Eject button, Front Feed button and PictBridge port on the control panel on the printer's right side. There's no fancy touch screen or menu system on the Pro9000 Mark II. It's designed to do one thing well.
All of which should sound a lot like the original Pro9000. It would be hard to tell the Mark II apart from its predecessor, frankly.

Control Panel. Indentical to the Pro9000.
While the Pro9000s are larger than the i9900 that preceded them, they don't really demand much more space. They all fit across the end of a table very nicely until you open them up to print, when they ask a bit more space on either side.
The i9900 had a FireWire port that we miss on the Pro9000s, which connect only through their USB 2.0 Hi-Speed connection (or the PictBridge port in the front).
For this review we limited our experience of Canon's software utilities to just the maintenance utility (which shows ink levels) and the driver (tapping into the ICC profiles Canon provides).
Canon provides a number of printer profiles designed to optimize printing with the Pro9000 Mark II's ink set on different Canon papers. Canon's top end Photo Paper Pro, for example, is also known as PR-101. When printing on this sheet, you'd select the PR1 profile and turn off any color handling in the printer driver's Color Options panel, setting Color Correction to None. Profiles for Matte and Photo Paper Plus Glossy are also available. Multiple versions are also installed (PR1, PR2, PR3, for example) indicating the quality setting (with one the highest). And since the Pro9000 Mark II can print on a variety of media, profiles are included for Museum Etching, Photo Rag, Premium Matte and semi-gloss.
We printed 13x19 images from DNG Raw files processed with Nik Software's Sharpener Pro in Adobe Photoshop CS3. And we tried a few of our favorite digicam JPEG images as well.

Cartridges. Newly installed and all lit up.
CONSUMABLES | Back to Contents
The ChromaLife100 eight-color dye-based ink system in the Pro9000 Mark II features Photo Cyan, Photo Magenta, Green and Red inks in addition to the standard Black, Cyan, Magenta, Yellow. Each cartridge is $14.99 with an eight-color set bundled for $104.99 ($119.92 otherwise). A four-pack of just Black, Cyan, Yellow and Magenta is available for $52.99.
Usage depends on your images, of course, but don't be alarmed to find yourself replacing the Green and Red cartridges less frequently than the others. And expect the Photo Cyan and Photo Magenta to run out more frequently, as well.
We were a bit surprised by how long the Canon cartridges lasted. Our screen shot of the ink supply status shows how things stood after printing eleven 13x19s, one of them predominately magenta. And in the shot, you can see that just Photo Magenta shows any use.

Ink Levels? Very little ink used after eleven big prints.
We were so surprised, in fact, that we took the cartridges out to confirm their ink levels. And indeed they were still nearly full, except for Photo Magenta.
That's pretty impressive, considering we were printing on some pretty porous sheets (like Museum Etching). It's even more impressive when you compare that performance to HP's $300 13x19 printer, the B8550. After just one 13x19 and a few 8x10s, we'd exhausted those cartridges.
Canon supplied us with the $49.99 DAP-101 Digital Art Paper Variety Pack of 13x19 paper. That includes five sheets each of textured Museum Etching, Hahnlemuhle Photo Rag (100 percent acid-free cotton rag), smooth Premium Matte and velvet-textured Photo Paper Plus Semi-gloss. Printing on thicker art papers is one of the joys of using a big printer and Canon supplies a variety of art papers to try.
Packs of 20 sheets of these 13x19 papers are available for Museum Etching at $99.99, Hahnlemuhle Photo Rag at $69.99, smooth Premium Matte at $54.99 and velvet-textured Photo Paper Plus Semi-gloss at $42.99.
And, of course, the full range of Canon papers at small sizes is also available.
BIG PRINTING | Back to Contents
But wait, let's think about this. Just how much empty wall space do you have in your place?
It's not a big deal to print a bunch of 4x6 prints and stick them in a drawer. Or make an 8x10 to put in a stand-up frame on the shelf or an end table. But if the word gets out that you're making 13x19 prints, you may find yourself uninvited to certain social gatherings. There's only so many of these you can display or give away.

Big Prints. We've covered a work table with 13x19 prints from the Pro9000 Mark II.
Over the years, we have printed dozens of these on a variety of Canon, Epson and HP 13x19 printers. But there's only two of them on display here. One framed and hanging on a wall, the other framed and standing in an easel. We flip through the stack of the rest of them once in a while for inspiration.
Mainly what we do is frame them and give them away.
That can be embarrassing, though. We found ourselves admiring one in the living room of a friend we hadn't seen in a while, wondering why it looked familiar. Did we know the artist? Why was that image so familiar? Uh, yes.
There are in fact, quite a few more of our 13x19s in circulation than we realize. When you print 13x19s, you aren't printing photos, you're making something else.
The thought occurs to us if there shouldn't be just one 13x19 printer in every family. Like there used to be one wagon or one television.
Or one artist.
Because when you get into big printing, your images are either going to scream at you or sing to you. If you know what you're doing behind the lens and at the keyboard, they're going to sing.
And you'll want to put them on that stage dressed in more than photo glossy. Suddenly your work can be printed on fine art paper. Fine art paper can be stock as heavy as a board, stock made of cotton rag, stock with texture, stock that's a warm creamy color instead of that bleached blue photo glossy look.
You may accidentally find just the right combination of image and paper support. Which is when you'll realize there are no 13x19 frames around.
Our Aug. 31, 2007 newsletter article "Framing a 13x19 Print" (and the Letters column in the next two issues) is full of advice, but the gist is to buy 18x24 inch frames and mats and have the mats cut with an opening of 12.75 x 18.75 inches for a 2-5/8 inch border all around.
So the truth is, big printing is a different kind of printing. One gorgeous print at a time, the paper carefully considered with a framing system you can live with.
FINE ART MEDIA | Back to Contents
So what exactly is fine art paper?
Standard photo papers are medium to light-weight sheets with a glossy or matte surface ranging in size from 4x6 to 13x19. They use either an archival swellable surface that encapsulates the inks or a more transient porous surface which sucks them in (and is often advertised as "instant dry").
Fine arts papers, in contrast, are medium-weight to heavy-weight with a variety of surfaces ranging from canvas to watercolor textures with semi-gloss and smooth surfaces as well, usually in only large sizes. A printing surface is sized on what are often 100 percent rag sheets to receive the ink. They offer a different look for you images, mimicking everything from black and white printing to canvas.
But because they are thicker than standard paper, not all printers can accommodate them. The Pro9000 Mark II can handle paper weights from 17 to 53 lb. in the rear tray and paper thicknesses from 4 to 47 mil in the front tray. Be sure to select the corresponding Media Type (Board Paper for very thick non-Canon sheets).
The bright, glossy surface of a standard photo paper reflects the most light and therefore delivers the widest density range. Fine arts papers sacrifice that range for special effects that may make more of an impression for some images.
Many companies other than the printer manufacturer offer fine arts papers (with their essential printing profiles), among them Legion Paper (http://www.legionpaper.com) and Premier Imaging Products (http://www.premierimagingproducts.com).
Canon offers four 13x19 fine arts papers:
- Museum Etching (FA-ME1) is a 93 lb. sheet 22.4 mils thick with a rough surface.
- Photo Rag (FA-PR1) is a 50 lb. sheet 12.2 mils thick with a textured surface.
- Premium Matte (FA-PM1) is a 56 lb. sheet 11.6 mils thick with a fairly smooth surface.
- Photo Paper Plus (SG-201) is a 69 lb. sheet 10.2 mils thick with a satin, semi-gloss surface.
Basis Weight (or Substance) is the weight in pounds of a ream of the paper (500 sheets) in a standard size. When a paper is described as 25 lb., it means a ream weighs 25 pounds. Simple as that.
Paper Handling is more important than generally appreciated. You should always let a new package of paper acclimate to your environment. Printers need a warm room to function properly and your paper should sit in that warm room with your printer for about two days before you try using it. General recommendations are 60-75 degrees F and 40 to 60 percent humidity (if you're comfortable, the paper's comfortable).
When it is time to use it, note any special handling suggestions from the manufacturer. Some heavily textured papers must be brushed free of paper lint before they go through your printer. Any sheets you stack should be fanned to separate them and get some air between them, avoiding doubles and making feeding more reliable.
Try not to touch the printing surface. Swellable sheets will swell on contact with the moisture of your fingertips and porous sheets will actually draw that moisture in.
Store unused sheets flat in the resealed package they came in.
Finally, let your prints sit a day before final evaluation. Some problems are immediately apparent. But more subtle ones only emerge after the surface of the sheet has stabilized.
To avoid fading, mount your prints behind but not in contact with glass. Longest permanence is achieved in dark storage -- but where's the fun in that. Do display your images where direct sunlight will not hit them, though.
Even though we'd done it with the Pro9000, we drew a blank trying to figure out how to front load the fine art media Canon supplied, which is too thick to bend through the rear feed. The installation manual doesn't even show how to set the printer up for front feeding and the PDF manual doesn't even describe the process (except to say follow the on-screen instructions). Two bads, Canon.

Uh, What? Not a very helpful message.
Fortunately, we found an illustrated guide to the convoluted process on the Canon site (http://www.usa.canon.com/consumer/controller?act=ModelInfoAct&fcategoryid=182&modelid=18122#SupportDetailAct). It's in the Support section's FAQ page under "How do I load the paper?"
Halfway down that page, look for "Loading Paper in the Front Tray." Or just follow out simplified explanation below.
The trick to setting up the printer for front feeding is to open the front tray just a bit from its closed position and lifting it up. Then set the tray in the higher notch and open it flat. The Front Feed button will light up (that's the small bottom one) when you've done it right. Unlike the rear-feed open position, the tray really should be flat, not inclined upward.
The next step is to press the button on the back corner of the printer that Canon calls the Front Feed Support button. That drops the back end of the printer down to support the paper before it's printed. If you're printing 13x19 sheets, you'll also want to press the right corner of the Front Feed Support door to extend the V-shaped Support arms.
With the two beds open flat, you can then press the Front Feed button. The printer configures itself internally before flashing the bar-shaped Power lamp next to the top Power button for about 30 seconds. Wait until the flashing stops before loading paper.
When the Power lamp is on solid and the Front Feed button flashing quickly, you can insert a sheet of paper on the front tray, sliding it through the printer onto the back end. There is a small white arrow and limit line on the front tray that indicates how far into the printer to push the paper. Make sure the paper is also up against the small side guide by that alignment mark.
After you've aligned the sheet, press the Front Feed button to actually load the paper. The Front Feed button will flash slowly as the paper is positioned for printing.
When you install the software for the printer, several fine art paper profiles are also installed. Be sure to select them in both your application's printer dialog box and the print dialog box. Your application may display the full title while the print dialog box just reference the paper type.
That tells the printer how to lay down the ink. You won't get good results if your printer driver tries to print on Photo Rag as if it were Glossy photo paper.
But before you ever click the Print button, there's some work to do. We won't go into the process of optimizing your images. There's not much special about that process for printing 13x19s except to note your sharpening may be a bit different because you're not going to be rubbing your nose into the print like you would a 4x6.
One other thing worth noting is that you can send a 16-bit channel image to the Pro9000 Mark II for printing. The main advantage of this would be to maintain your tone and color options if you don't like what you see in the print. Typically, you would reduce 16-bit channels to 8-bit before printing.
That does send a lot more data to the printer, which takes longer, but the printing didn't seem to take much longer. The only way we could slow the printer down was by printing monochrome. Our magenta flowers or a black and white image did print somewhat slower than full color, although the black and white (using the Grayscale option rather than full color) printed much faster than on the original Pro9000.
Important Print Settings

Application Print Dialog. The key settings (as seen in Photoshop CS3) are on the right in the Color Management panel. Note Color Handling is done in the application not the printer and the Printer Profile is set to the right printer/paper ICC profile.

Printer Driver. When you get to the printer driver itself, make sure you've got the Media Type set to the paper you're using and the Print Quality set to High.

Printer Driver. Also make sure you have no Color Correction set in your Color Options. You don't want the printer adjusting color after the ICC profile has done it.
While you can print glossy and semi-glossy sheets with a full bleed at 13x19, the art papers require a border. Canon provides a paper size with a border for its art papers, which you should be sure to select when using Printer Setup to set the printer and sheet size.
Once you're ready to print, you should do your output sharpening. We use Nik Sharpener Pro, which lets us specify the kind of printer (inkjet), the paper (fine art) and the resolution (4800x2400). Our images don't require any local (or creative, as Nik puts it) sharpening but if you're doing portraits, it's a nice feature.
At the print dialog box, make sure you indicate that the application has control of color, not the printer. Then select the correct ICC printer profile from the popup list. Look for the Pro9000 Mark II and the paper (SG1 for semi-gloss in our screen shot) both.
After dismissing the print dialog box, check the printer driver dialog boxes for quality and color options.
Quality should show the correct paper in the media type field and you might want to confirm the print quality setting as well (which tends to be Standard more often than High).
Color options should be set so the Color Correction field is None. You want the color to be controlled by the application, not the printer.
Using those settings, we printed a variety of images from close-ups to landscapes in natural and artificial light. While JPEG images printed very well (you can't tell them from the prints that started life as a Raw image), we had a lot more fun manipulating the Raw images. Nothing we did to them was beyond the printer.
We especially liked printing on the non-glossy, matte papers. They were ideal for the baby pictures we printed, giving the image a softness a glossy sheet would not have been able to deliver. We wanted to reach out and touch those baby prints. Likewise the close-up prints of flowers. We really thought we could smell them, the illusion was so compelling.
And the crispness of our landscapes just astonished us. Trees lining a sidewalk showed every leaf, every blade of grass. Nik had a lot to do with that. Raw images are notably softer than their JPEG equivalents, which can be confusing to novices used to images sharpened by the camera. But that's part of the fun of working with Raw files.
The Pro9000 Mark II's resolution is so fine that even under a loupe we couldn't detect a dot pattern on any of the papers we used.
The Canon Pro9000 Mark II is a faster Pro9000. Its dyes deliver a brilliant range of color that, under proper storage, will outlive you (which is all that counts). And yet the printer is capable of subtle variations in tone and color that, printed on a variety of fine art media, simply astonished us.
While you can certainly print smaller size images on the Pro9000 Mark II, the real thrill is dawdling over an image to print at 13x19. The printer's grainless resolution, quickness and fidelity (using the ICC profiles provided with the paper) make printing as rewarding an experience as pressing the Shutter button. That makes the Canon Pro9000 Mark II our favorite printer.