WHO NEEDS A COMPUTER?
HiTi 630PS -- Drugstore Prints at Home
Editor
The Imaging Resource Digital Photography Newsletter
Review Date: February 2003
The trouble with getting into digital photography has always been getting prints. No more dropping the old roll of film off at the drugstore and picking up your prints later. Instead, you're stuck with all these files.
|
C O N T E N T S |
Even worse, if you (or a loved one) is allergic to computers, you can't play digital. No sense buying one of those adorable digicams, you'll never see a single picture.
Well, not quite. Hold the phone. Hang on a minute. These fellows at Hi-Touch Technology have invented a home drugstore printer that does not need a computer. With the HiTi 630PS and a digicam, you can take digital pictures and get 4x6 digital prints without using a computer. And those prints are real, continuous tone prints, just like you get at the drugstore. No charge for development and free film, too.
Even more impressive, this $250 printer does it for just 40 cents a print, too. Which can excite even people with computers. Because that, folks, is a price breakthrough. The next closest competitor is $100 more.
WHO ARE THESE GUYS? | Back to Contents
Hi-Touch Imaging Technologies (http://www.hitouchimaging.com) was established in Feb. 2001 in Taiwan. With 350 employees, their focus is in hardware ASIC design, moving mechanisms, firmware/driver/application development and color science. Every one of those talents is evident in the 630PS.
THE 630 LINE | Back to Contents
Hi-Touch actually makes two 630 printers, the PL and PS models (as well as heavy-duty printers for professional photo labs). The PL lacks the PS's cabled controller and media slots, requiring a computer.
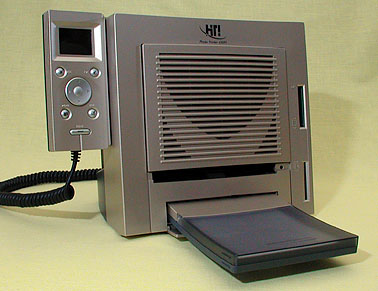 |
| The HiTi 630PS |
But the PS model's independence from a computer intrigued us, so we asked to review it.
FEATURES | Back to Contents
Available from camera dealers, the 630PS consists of a small footprint, upright printer with two media slots and a detachable but cabled controller with a color LCD. Cut sheet paper, perforated to 4x6 size, is fed into the straight-through paper path from a small cassette. A power cable and USB cable round out the package.
The controller's job is to tell the processor built into the printer what you want to do. It lets you print an index print of everything on your card (in several formats), ID photos, stickers and every image on the card unattended. And it even provides access to some minor image editing capabilities.
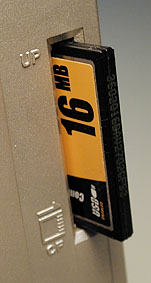 |
| CompactFlash Slot |
The two media slots accommodate CompactFlash and SmartMedia cards. Adapters for Memory Stick and SD cards are available (http://www.hitouchimaging.com/accesories.asp?lkid=330) for $34.99 each. Hi-Touch told us that future models will support five formats (MS/SD/MMC/CF/SM).
The printer is Digital Print Order Format compatible, so if you tag images for printing in your DPOF-capable camera, the 630PS will know what to do with them.
Printed documentation is a little sparse but we found the PDF included on the CD to be everything we needed and the Web site (http://www.hi-ti.com/english) very helpful as well.
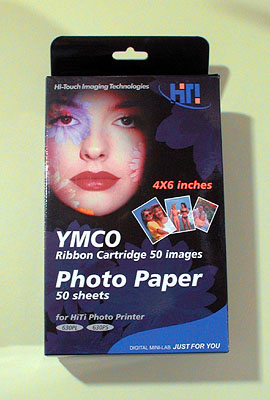
The sample print kit that ships with the printer includes eight sheets of photo paper, one sheet of 4x4 sticker paper, one sheet of 4/2/4 sticker paper and one ribbon cartridge good for 10 prints.
THE DYE SUB DIFFERENCE | Back to Contents
Prints from the 630PS are continuous tone, not screened, using dye diffusion thermal transfer (photo dye sub) at 300x300 dpi. These aren't your inkjet's dpi, though, because the density of each dot is variable (somewhat like your monitor's pixels). These are dot-free prints (http://www.hitouchimaging.com/tech.asp). Hi-Touch said the prints compare to inkjets at 4800 dpi.
 |
| A Paper Kit |
Dye sub printing uses a heating element to heat dye impregnated in a ribbon to over 350 degrees, at which point it turns into a gas and migrates into the surface of the specially coated photo paper. Temperature controls how much dye transfers at any point on the paper.
In addition to yellow, cyan and magenta dyes, the ribbon contains a clear coating. Hi-Touch's Magic Coating Technology protects the dyes from UV light and waterproofs them, sealing the dyes into the paper.
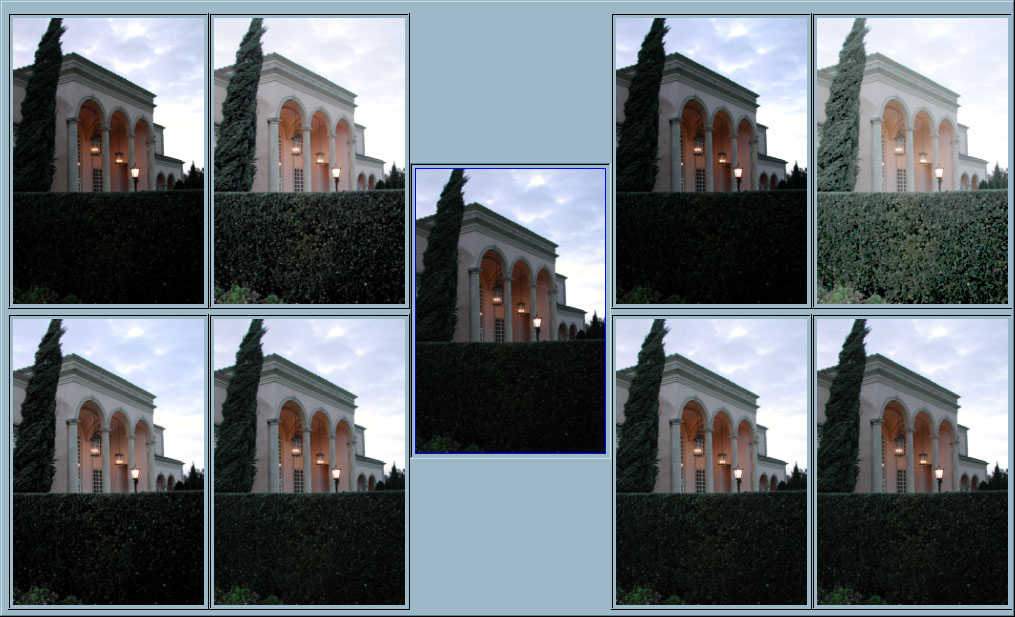
Our 3.32-megapixel images took about two and half minutes to turn into 4x6 prints, ready to be handled. Bend and tear the print along the two perforated short edges and you have borderless prints. You can trim about four at a time.
The paper is sold in kits that include 50 sheets of 4x6 paper and a new ribbon for $19.95. There are a number of kits available either directly from the company or through your camera dealer. Kits include dye-cut sticker paper for all the various sizes supported by the print driver as well as combinations of them.
With no messy inks, dye sub printing is very clean. Once in a while, you'll
want to clean paper dust off the feed transport rollers inside the printer,
but that's it. A $9.99 cleaning
kit is available to do that. Otherwise, this is as clean and simple -- and
beautiful -- as photo printing gets.
HARDWARE DESIGN | Back to Contents
We found the "space age" design of the 630PS to be attractive as well as functional. Its air-conditioner grill may even be a calming influence.
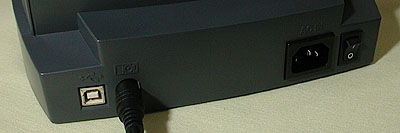 |
| The Base USB port (white), controller, power cable, power switch |
The power cord is simply that. No power brick is required. And the USB port is nearby, so all cables are hidden in the back. A power switch is also located at the rear of the base.
The controller slips into a small holder on the side, which is also nicely designed. We found the buttons a little stiff, but at this price, we aren't complaining. A coiled cord lets you handle the controller conveniently.
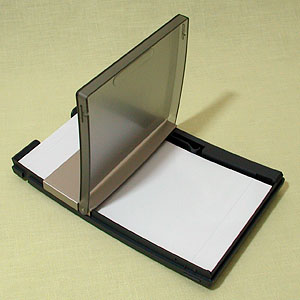 |
| The Cassette Holds about 25 sheets |
We really liked the cassette. Our old workhorse dye sub requires us to handle each sheet of paper. Unless you're in a dust-free environment, that can be a problem. Not to mention the difficulty of aligning the paper to the feed slot without touching the sensitive surface. Not a problem with the 630PS. In fact, the 25-sheet cassette meant we could let it run unattended. Finished prints stacked up neatly on top of the cassette.
 |
| The Ribbon Cassette It just pops in behind the grill |
Because the cassette is curved, we had a little trouble seating it in the printer. But we managed to figure it out.
A small LED on the front indicates the power status. It also serves to monitor the progress of any firmware updates. In the course of our two-month testing, we downloaded one firmware update (a beta, at that), updating the printer without incident.
One of the more aggravating aspects of our old dye sub is how hard it is to insert a ribbon. We were delighted with the 630PS's cartridge system, which simply slips into the generous bay that's exposed when you press a button on the top of the printer. It was, in a word, a snap. Very nice.
TWO MODES | Back to Contents
The printer not only operates in two modes, but it's smart enough to figure out which one is appropriate.
If you don't attach a USB cable to the USB port, it knows it's in standalone mode. The LCD on the controller displays a color menu of icons.
Even with a USB cable attached, if your computer is off, the printer realizes you want to run it from the controller in standalone mode.
But if the printer senses a computer at the other end of the USB cable, it will display "PC Mode" on its LCD and behave like any other USB printer.
CALIBRATION | Back to Contents
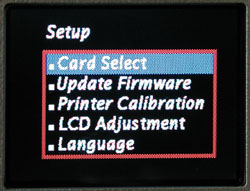 |
| The Setup Menu |
The Setup menu on the controller does provide a limited calibration routine, mainly to align the paper to the print head. There is a set of images to pick the optimal skin tone, but we really couldn't tell one from the other. They all looked good.
Some images tended to print with contrast and a little dark, but that merely reflects the reduced density range of going to print on any medium. The color itself was accurate. In general we were delighted with unedited images printed straight from the card. We hadn't expected that.
And for the odd print that could use some help, the simple built-in image editing (see the Enhance command below) is often enough to save the day.
The Setup option also lets you switch between CompactFlash and SmartMedia readers if you load both bays with cards. It also has a Firmware Update option, LCD Adjustment (for brightness, contrast and hue), Language and an About screen that reports the controller version and firmware version.
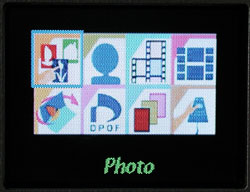
WHAT THE CONTROLLER DOES | Back to Contents
The six-button controller with a 1.6-inch color LCD provides a computer-free interface to the printer's functions.
The Main Page displays a set of eight icons. On the top row are Photo, ID Photo, Index and Sticker. Along the bottom are Quick Photo, DPOF, Print All and Setup.
 |
 |
|
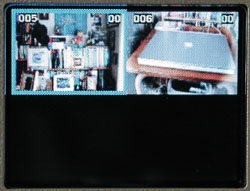
| The Main Menu |
Two Thumbnails |
You navigate to your choice with the four-arrowed toggle button and press the OK button to select it.
Select Photo to scroll through the thumbnails of the JPEG images on your storage card one at a time. When you see one you want to print, press OK. Use the Up or Down arrow key to set the number of copies to print and press OK again. Continue through the card. When you've finished, press Print to batch print the set.
While previewing your images, you can press the Edit button. Functions available include Move, Rotate (not really necessary), Resize and Copies.
You can also Enhance the image, changing its Brightness, Contrast, Color R/G (hue shift from red to green) and Color B/Y (blue/yellow hue shift).
ID Photo is a pair of special ID photo formats that use matching die-cut photo paper. You can print 12 one-inch ID photos or 9 two-inch ID photos on a 4x6 sheet.
An Index print can be formatted into 6x5, 8x7 or 5x4 columns/rows, providing a handy contact sheet of your card contents.
There are also two Sticker formats, 4x4 and 4/2/4.
Quick Photo simplifies printing a single image. Just select the photo and press OK to send it to the printer.
Press Print after selecting DPOF to confirm and print the DPOF order.
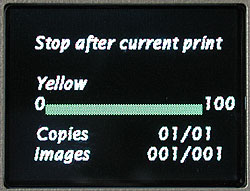 |
| Printing Yellow |
Similarly, press Print after selecting Print All to confirm and start printing.
PUTTING IT TO WORK | Back to Contents
So just how would you use the 630PS without a computer?
Start by turning on the printer, inserting your storage card (with an adapter if necessary) and printing an index of the card contents. If you like what you see, Print All. Otherwise use the Photo command to select what you want.
With a DPOF-capable digicam, you can select which images to print in the camera and just use the printer's DPOF option after you've inserted your storage card.
The only catch to this convenience is that there's no equivalent of those drugstore negatives for reprints. Once you erase your images from the card, you've only got the prints.
Keeping with the no-computer theme, one solution might be one of those digital photo wallets that can copy your card contents. With gigabytes of storage, they're something of an iPod for your photo collection.
Low-cost storage cards are in the works, too. The idea is to mimic film by providing an inexpensive but write-once medium.
And if you really miss the drugstore, you can still pop in to use their photo kiosk to copy your card contents to CD.
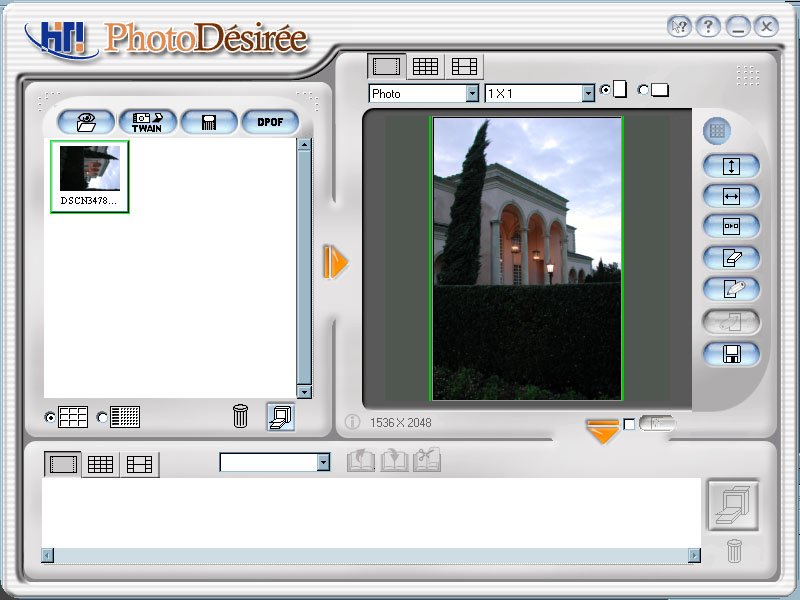
OK, HOW ABOUT THE COMPUTER? | Back to Contents
Yes, you can plug this pup into your USB port and print directly from your image editing software. As long as it's running under Windows. A Mac driver is not yet available.
 |
 |
|
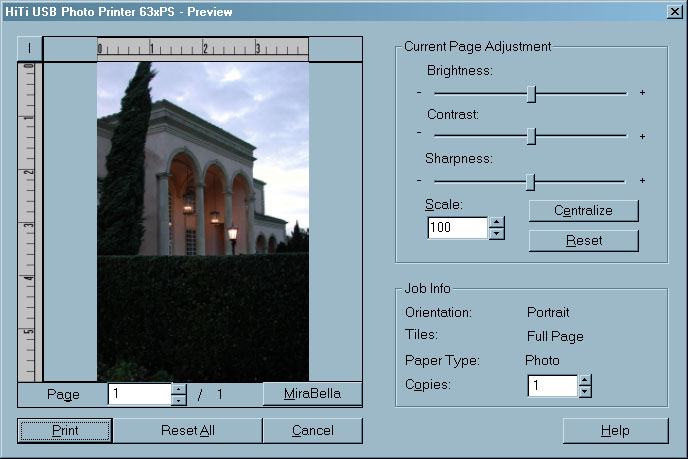
| Printing From Photoshop Elements |
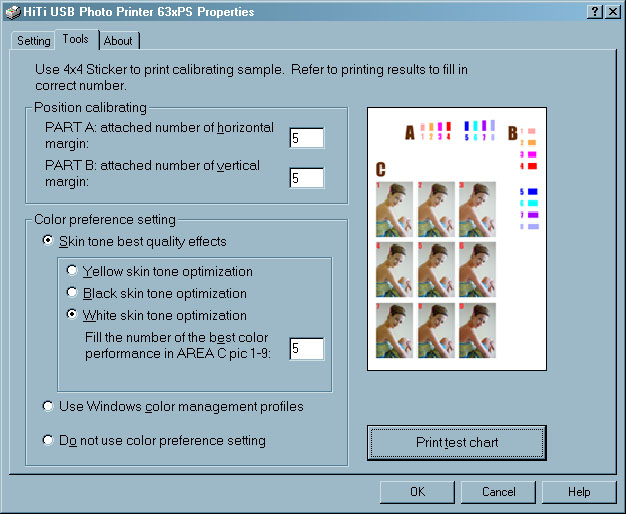
Calibrate From the Driver |
We printed from Photoshop Elements, Photoshop Album, Picasa, EasyShare and directly from Windows XP. From the driver, you can set portrait/landscape orientation and crop/expand the image to fit the printer's 4x6 format.
 |
| Mirabella Accessed from the Print command |
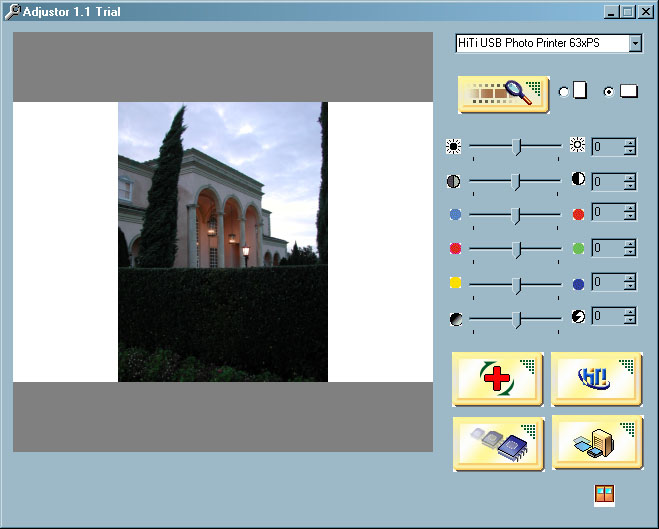
Included with the driver is Mirabella for making last minute tonal shifts directly from the print dialog box and Desiree, an image editor. There's also a separate program available on the Web site called Adjustor to adjust printing parameters and save the modifications as a driver default. You can modify color, brightness, contrast and sharpness either by moving a control bar or inputting a number.
 |
 |
|
| Desiree |
Adjuster |
SOME SURPRISES | Back to Contents
We had some old images from the days when a 640x480 image was high resolution. So we copied a few to a card and let the printer do what it would with them.
Surprisingly, they were enlarged without artifacts. The final prints were indistinguishable from higher resolution images.
That bodes very well indeed for lower-resolution cameras.
As we write this, a Macintosh driver for the printer is still a dream. The company plans to outsource the project, we were told, but hadn't yet found a Mac programmer.
For standalone operation, the size of your image matters, too. JPEG file size must be smaller than 3M, expanding to no more than 6,229,312 pixels and can not exceed 2,950 pixels on either side. The beta firmware we tested, however, supported JPEGs up to 8-MB, expanding to 7.5-megapixels with a maximum long dimension of 3,574 pixels.
CONCLUSION | Back to Contents
Personally, we could sit in front of our monitor for days playing around with a single image, printing it several hundred times to capture just the right effect, like a sort of Giacometti of photo imaging, constantly revising the image as the subject itself varies.
But with the 630PS around, we found ourselves coming home with some pictures in our camera, copying them to a laptop (just to be safe) and dropping the card into the 630PS for instant prints. We passed the 4x6 prints around to anyone who would take them and got them shuffled into random order just like real drugstore prints. It was just too easy not to bang out a batch of 4x6 prints.
This is, simply, the best solution we've found for computerless digital photography that gives you everything you could get from your drugstore.