UNDER $150
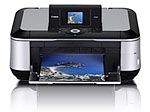
Canon MP620 --
WiFi All-in-One Printer
By MIKE PASINI
Editor
The Imaging Resource Digital Photography Newsletter
Review Date: December 2008
The printer game has changed. Manufacturers have stuffed everything including photo-quality printing into their all-in-ones and everybody wants one. The only thing they can't stuff into their all-in-ones are the big 13x19 printers. The small 4x6 photo printer has been swallowed up along with those old flatbed scanner in today's multifunction device.
-------------------------
But the game has changed in another respect, too.
Unlike either those 4x6 or 13x19 photo printers, the all-in-one has wings to stretch, not just a USB port. Recent models from Canon, Kodak and HP all include wireless connectivity. That includes Bluetooth (which is just a way to print camphone pictures, really) but goes as far as WiFi. These manufacturers figured out that if they can get a WiFi multifunction printer into your house, they'll be able to sell a lot more paper and ink. Every computer in your home will be using the same printer.
Consequently they've paid plenty of attention to printing to these boxes but little else. Kodak's firmware problems are legendary but none of these boxes is blemish free. Kodak may have fabulous printing technology including minute pigment printing. HP may have the most versatile device on the market. But Canon seems, once again, to have delivered the product we prefer.
THREE CONCERNS | Back to Contents
We always love opening a Canon printer box (and we have an unboxing the MP620 gallery to prove it). But right out of the box, three things concerned us about the MP620.
The first was no installation poster. We've applauded Canon for their great installation posters in the past and we were disappointed not to find one right on top of everything else in the box.
Instead there was an errata page for the Macintosh install. So the guys packing the boxes are still doing their job.
Rather than a poster, you get a booklet. And the booklet, which requires skipping around a lot, is accompanied by another booklet for troubleshooting. And, yes, we needed both.
The booklet is a little confused. It thinks it's a poster, relying on big numerals to identify each section you are supposed to go to. In little parentheses, though, you get the actual page number. After all, it's a book, not a poster. You need the page numbers.

Ink Set. One black pigment, four dyes.
The second thing that concerned us right out of the box was the ink cartridges. Oh, they're the same as all the other Canon ChromaLife100 ink cartridges. There's just fewer of them. There's a big black pigment cartridge for text and to print photos there are small black, cyan, magenta and yellow dye cartridges. Just four inks for photos. On the other hand, that could save you some pennies.
One thing that will definitely save you some pennies is the included USB cable. Hurray for Canon. Even if you plan to connect this wirelessly, you need a USB cable for the setup. And Canon has the grace to provide one.
We weren't particularly surprised that transparency scanning was not included in the MP620 but we were surprised that duplex printing wasn't. That was the third thing. Canon's PIXMA printers have been duplex printers, using both sides of the sheet. But apparently in an effort to keep prices down, that's no longer the case.
It's not that Canon has abandoned these features, though. For about twice as much, the PIXMA MP970 adds transparency scanning, a high-fidelity ink set and duplex printing. It also has a larger LCD display but lacks WiFi (although it does have Ethernet). The MP980 series retains WiFi while adding film scanning. It also adds a gray cartridge to the standard CMYK mix. So you have more options, that's all.
If you're buying a Mac at the Apple store, you can get a $100 rebate on the MP620 if you purchase it at the same time. That makes this a $50 investment.
And if you're not buying a Mac, you can still get the MP620 heavily discounted through the Imaging Resource Amazon affiliate link (http://www.amazon.com/dp/B001DJ6C3G/?tag=theimagingres-20) for $114.98.
Let's take a look at what the MP620 can do.
FEATURES | Back to Contents
This $150 multifunction device can print text and photos, perform as a standalone copier, scan documents and read flash memory cards. It can do it wirelessly via WiFi or Bluetooth (with an optional adapter) or wired (via Ethernet or USB). So it can handle not just the computer nearby but any computer on your network, plus a cell phone or two.

Ready. The output tray opens automatically.
With Canon's ChromaLife100 ink system, Canon photo papers and one-picoliter droplet FINE print head technology, photos printed on the MP620 are rated up to 300 years archival storage.
The new Auto-Scan feature detects the type of original you're scanning -- a photo, business card, personal notebook or form -- then automatically scans and saves the image with the appropriate settings.
The 2.5-inch LCD previews images on memory cards inserted in the printer's reader and the control panel features an Easy Scroll Wheel surrounded by a four-way navigator to see what you've got.
A plain paper tray with a capacity of 150 sheet sits under the printer and a photo paper tray is available on the back. The photo tray at the back of the printer extends to accommodate large sheets. The output tray opens automatically (very handy if you're not in the room).
The MP620 starts up very quickly (it's almost instant compared to other printers). And you can combine four or two pages for output on one to save paper.
SPECIFICATIONS | Back to Contents
Printer
Print Speed: Borderless 4x6 color photo in 41 seconds, black 26 ppm and color 17 ppm
Nozzles: 320 black, 2,048 color
Print Resolution: 600x600 dpi black and 9600x24000 dpi color
Auto sheet Feeder: 150 pages
Copier
Copy Speed: Up to 24 cpm back, up to 16 cpm color
Reductions Enlargement: 25 to 400 percent
Copy Features: 4-up and 2-up printing, Auto Exposure/Intensity Copy, Borderless, Face Brightener/Fading Correction, Fit-to-Page, Image Repeat, Intensity, Manual Color Adjustment, Masking Copy, Multiple Copy (1-99 pages), Preset Copy Ratios, Photo Reprint, Trimming Copy, Zoom
Scanner
Scanner Element: Contact Image Sensor (CIS)
Max. Resolution: 2400 x 4800 dpi optical, 19,200 x 19,200 dpi interpolated
Scanner Features: Auto Scan Mode, Gutter Shadow Correction, Network Scan,Push Scan, Scan to Memory
Color Depth: 48-bit internal/24-bit external
Max. Document Size: Flatbed: 8.5x11.7 inches
Card Reader
Supported Media: SD/SDHC/MMC/MMC+, miniSD/miniSDHC, RS-MMC, microSD/microSDHC, Compact Flash, Microdrive, Memory Stick, Memory Stick Pro, Memory Stick Duo, Memory Stick PRO Duo, Memory Stick Micro, xD-Picture Card, xD-Picture Card (Type M and H)
General
Compatibility: Windows 2000/XP/Vista, Mac OS X 10.3.9 to 10.5.x
Dimensions: 14.5 x 17.7 x 6.9 inches (W x D x H)
Weight: 18.7 lbs.
Warranty: Toll-free technical phone support plus 1-year limited warranty with InstantExchange program
CONSUMABLES | Back to Contents
The Canon Web page for the MP620 has complete details, but generally speaking:
- 100 sheets of 4x6 Photo Paper Pro goes for $40 but lesser quality sheets are available for under $20 in packs of 100
- CMYK ink tanks each go for $12.99
- The larger pigment black ink tank goes for $14.99
Just for the record, the ink tank numbers are PGI-220BK for pigment black, CLI-221BK for black, CLI-221Y for yellow, CLI-221M for magenta and CLI-221C for cyan.
And the cartidges seemed to last. We kept checking the ink levels (you can get ink status wirelessly, too) only to be surprised to find they were still full. We were so surprised, in fact, that we popped a few of the cartridges out just to see for ourselves. And indeed they were still full.
IN THE BOX | Back to Contents
The box contains:
- PIXMA MP620 Photo All-In-One Printer
- Documentation kit with Cross Sell Sheet, Getting Started, Important Information Sheet, Network Troubleshooting Guide, Safety Information Sheet, Setup Software & User's Guide CD-ROMI, Warranty Card
- Cartridges: PGI-220 Pigment Black and CLI-221 (Cyan/Magenta/Yellow/Black)
- Power Cord
- Print Head (inside output tray)
- Sample Media (4" x 6" / 5 sheets)
- USB Cable
INSTALLATION | Back to Contents
We try not to make much of this, but in the case of printer installations a little full disclosure goes a long way. We work on a Mac, occasionally testing products on a Windows machine. This usually isn't an issue for reviews, but when you get to sophisticated tricks like wireless scanning, it bears mentioning that our installation was on Mac OS 10.4. Windows XP and especially Vista mileage will vary. Which is why we work on a Mac.
Installing the MP620 took about an hour. It's a slightly more involved process than some multifunction devices because of the wireless setup. But its wireless setup isn't really much more involved than other wireless devices. A little, yes, but not much more.
We managed to make it trying, however.
Pulling all the tape off wasn't too bad. And connecting the power cable was no issue. Canon does not require a brick adapter, fortunately. It's just along power cable.

Calibration Sheet. You find the best bar and tell the printer. Mostly it was bar zero.
Our first trial came when we calibrated the printer, a process Canon recommends if you're going to print photos. It took three sheets. And we had to visually inspect each one, using the control panel to tell the printer which bar had the least lines in it.
Why couldn't the scanner show the page to the printer for it to evaluate? And all on one page? That's how HP does it. Kodak manages to do it during printing, somehow. But Canon's calibration, at least on the MP620, is stone age stuff.
We wanted to print wirelessly to the MP620, so that setup was the next trick. Via the control panel, you tell the printer to communicate wirelessly (it can't do both at the same time), then you install the software on a computer.
Installation on the computer was quick and easy but required a restart. On the restart, it automatically runs the wireless setup program. But you do have to connect the printer to your computer via USB to proceed or the software won't be able to find the printer.
Watch out, there are all kinds of little tricks like this.

WiFi Signal Strength. No problem.
Once it found the printer, it displayed all our neighborhood networks and we selected the one we wanted, which was ours, of course. We entered our password and after a minute or two, the cabled printer was set up for wireless communication. The setup program told us to turn off the computer, disconnect the USB cable, move the printer to its working location and turn it on again to test the wireless connection strength.
And it did that for about two minutes, reporting a good connection (nearly all bars is good). So we were good to go (we thought).
Except the point of having a wireless device is being able to access it from multiple computers. So how do you install the drivers on a second computer?
It wasn't as hard as we thought. We just chose a manual installation on the install CD instead of the Easy Install option. We skipped the documentation and the network application that sets up the printer, but checked everything else.
When we restarted we had to manually Add the printer after using the Canon network browser to find it but that's all it took.
We had to do that to our first machine, too, we found out when we tried to actually print something and the printer could not be found. The installation had activated the USB printer (naturally), not the WiFi printer. The WiFi printer has a lot of gobbledygook in parentheses after the printer name. It's actually the MAC address of the unit. That's the one you want to add when you're ready to print wirelessly.
Dramatic pause. There's more to this story below.
GENERAL OBSERVATIONS | Back to Contents
Size. The printer itself is pretty compact as these things go. Not quite as small as the smallest of the breed, but nearly so.Power. It starts up almost instantly, which turns out to be a real blessing in a WiFi device. You don't want to have to walk back and forth (sometimes using stairs!) from your work station to the printer to see if it's ready.
It shuts down quickly, too, on the first press of the button. Some printers (like HP's, to name names) go to sleep and will only awake when you try to shut them down. You have to wait for them to wake up before pressing the Power button again to shut them down. Not the MP620. It understands.
But you really don't have to turn it off. The only thing that stays on is the blue LED that indicates it's on. The monitor goes to sleep and the printer itself is quiet. Until you want to print something. Then it perks right up. We ended up leaving it on for days. Just because it seemed to be off.
Warm-up. You might think you'd pay for that with a long warm-up time as the cartridges clean the print heads, but that wasn't the case. The MP620 was quite responsive whether it was just turned on or left on.
It does, of course, clean the heads occasionally. But not every time you print something.
Control Panel. After using the HP C8180's touchscreen, we expected to be disappointed with the MP620's control panel. It consists of a 2.5-inch color LCD on a flip-up panel that is much larger to cover the Easy-Scroll Wheel and other buttons on the top lid of the printer.

Control Panel. The LCD is smaller than the window it's in. The Easy-Scroll Wheel was a little loose for us.
The buttons include two function buttons aligned right below the LCD, which labels them depending on which operation you're engaged in. Below them is the four-way navigator and OK button with the Easy-Scroll Wheel in silver orbiting between them. We weren't very fond of the wheel. It scrolls a little too easily so we were constantly overruning our navigation until we decided to rely on the arrow keys instead.
To the left of the navigator is a small Back button to move back a screen (just like in your Browser). Left of that are two large buttons labeled Navi and Home. Navi pops up a list of common functions on the LCD and Home takes you to the signon screen. We rarely used either. Left of them is the Power button (which we used less and less).
On the right of the navigator are two small Copies buttons. One is Plus to increment the number of copies and one is Minus to decrement them. Further right are two large Start buttons, one for Black and White and the other for Color. Those we used a lot. Just to the right of those is the Stop button to cancel operations.

Card Reader. Simple but functional.
Those are a lot of buttons and perhaps not a pretty site. But in actual use, we found them very convenient and, in fact, easy to find. We didn't fumble around looking for a button. But most operations are designed so you just have to use the navigator, OK button and a Start button to get things done. If you need something else, you check the function buttons. If you get confused, you hit the Back button.
The firmware seems to know what you want to do and present just the information you need to get it done. Options are clearly laid out and there really don't seem to be any false steps or sweaty hand holding. It's among the more efficient firmware implementations we've seen.
Card Reader. The card reader is hidden away behind a plastic door. It's pretty rudimentary. You push your card in until it stops. You pull your card our when you're done. No push and click, no release mechanism. It can be a little tight getting big hands in there, but it can be done.
LCD. The LCD does a poor job of displaying color photos. They all looked overexposed to us but when we printed them, they were fine. Don't trust the LCD.

Photo Tray. You can extend the photo tray for letter-size sheets by pulling it up all the way.
Paper Trays. We used the main paper tray on the bottom for plain paper. That works fine. The tray slides out easily enough but sliding it back in can be a little unnerving. We kept trying to hook it on something before pushing it in. But no, you just slide it on the table top all the way in. It may not seem to be suspended, but it is.
Leaving photo paper loaded in the rear tray means leaving the paper path exposed to dust. If we were behaving ourselves, we'd repackage unused paper and close the tray each night. But then, we work nights.
Big sheets of photo paper need a little more support in the rear tray. Just lift it up and, fully extended, you'll get a full tray. That also exposes the rear feed rollers to clear paper jams (of which we had none).
Everything in the rear tray is centered by the guides. Move one guide in and the other moves in, too. That probably exercises the printer parts a bit more than using a common side and sliding one guide only. Which is probably good for the printer.
Conclusion. OK, that sums up our general observations. Absolutely nothing of any major significance, but perhaps we've saved you a few worries.
COPYING | Back to Contents
Our real-life daily use of the MP620 involved using it in a variety of ways. The simplest was making copies (without using the computer). There isn't even a lightness/darkness control to worry about.
Document Copying. High on the list of unattended uses is copying a document. Inkjets make very nice copies (no scumming from toners, no paper warping from the heat) and with a built-in scanner they can perform some useful tricks, too.
For example, we had a pink receipt, a carbon copy really. There was some printed matter on it and some carboned handwriting of various pressure that was legible but just barely.
When we pressed the Black button to Copy it, the scanner dropped the pink background and made a very readable image of the receipt. Better than the original, actually.
Photo Copying. High on the list of attended uses is making copies of old photos. Someone visits, you go through your old albums just for fun, they want a copy of a picture of themselves when they looked good and ... well, you just pop it on the scanner bed, put some photo paper in and make a copy.
The MP620 does make it that easy to copy old photos. Just select the Easy Photo Reprint option and put them on the scanner glass (it will advise you how to lay them out, unlike either Kodak or HP). It scans them and then presents them on the LCD so you can select them for printing (and indicate the number of copies you want).
The process from there is identical to printing from a memory card. But the beauty of the workflow is that you can preview the scan to see before printing if it's all right. Some printers just copy as if they were copying a document, so you don't realize you placed the image in the scanner in the wrong orientation.
The quality of our first copy just blew our socks off. It was a difficult image with a bright red background and a yellow pillow and a child's face in the middle. The skin tones were an excellent match, the detail like eyelashes perfect and contrast just slightly subdued (the blacks were not quite as black). But even though both images were 4x6, the copy was slightly enlarged. We had printed borderlessly but we had also aligned the photo with the paper guides (rather than just off them). So it could be our fault.
PRINTING | Back to Contents
Card Reader. The first print job we did after calibration was a few images from a Canon PowerShot G10. We slipped the SD card in the reader, waited until the LCD told us it had read the card and then scrolled through looking for images to print.
The LCD tells you, "A card is inserted," before "Reading photo data..." is displayed. Then it displays the first image it found.
There are two function buttons just below the screen on the control panel. Two boxes on the bottom of the LCD tell you what they do in any particular application. The options with a card installed are Change the Display or Edit. Change the Display lets you view thumbnails or a slide show. You can also enlarge the image, scrolling with the arrow keys until you press OK, or choose full screen or normal displays. Edit lets you trim an image or search for images by date.
You select an image for printing by pressing the Plus copies button. Deselect it by pressing the Minus copies button. A little yellow check mark appears on the image to indicate its status.
To print, you just press the Color button. And away it goes. Anything selected for printing will be printed after you confirm the print settings.
The print settings (like paper size, print quality and borderless printing) can be changed by scrolling to them and pressing the OK button. A screen of options will be displayed.
It all works very clearly -- perhaps the best workflow of any un-computer-assisted operation we've used.
Importing from Reader. When you pop a card into the MP620 it does not function like a USB card reader to transfer images to your computer unless you have a USB connection.
That's good behavior for a network printer. After all, how would it know which computer to transfer the images to?
Normal Printing. Normal printing duties were shuffled off the MP620 for several weeks with no problems.
Oddly enough, there's no duplex printing on this PIXMA. Nor is there even an option for one. The driver has the double sided printing option but grayed out. But you can still print two to four pages on a sheet.
Besides being able to print photos from the card reader or thumbdrive, the MP620 offers a few other options. It can (with an adapter) print cell phone images. And it is PictBridge compatible as well.
Bluetooth Printing. Printing from a wireless device like a cellphone was simple, too. We popped a D-Link Bluetooth adapter into the USB port of the MP620, turned on our cell phone and copied the image to the printer. The printer printed it on a sheet of 4x6 paper and that was that.
PictBridge Printing. Cabling a digicam to the USB port of the printer lets you use the camera itself as your kiosk rather than the printer. Camera LCDs display images a good deal better than the printer LCD, so that might be an attractive alternative. And if you have several cameras with shots to print, it might even be more efficient, since each camera can select which images to print and how many to print before connecting to the printer.
Computer Printing. But by far the more common operation will be printing from any computer that can access your network.

Canon Print Driver. Here we're looking at the Quality & Media settings.
One option for doing that is Canon's Easy-PhotoPrint EX, an easy-to-use application for creating prints, albums, calendars, stickers and layouts. It provides image editing features, too, including the ability to reduce noise, correct red-eye, brighten and sharpen faces (or even smooth them), remove blemishes and automatically adjust the image. It can also print a date on the image.
Albums offers a number of different layouts and backgrounds for your images and captions, providing rudimentary scrapbooking functions.
Canon also provides a driver for other applications and that's primarily what we used from our computer.
With one-picoliter droplets and 9600x2400 dpi, the MP620 makes very nice prints from just four dye inks: cyan, magenta, yellow and black. To some extent the small droplet size compensates for the inkset, we've been told. But we really had no issues with the image quality.
Our test images were selected from our Chihuly exhibit shots. So we had the intense, bright colors of the blown glass against a jet black background. The black was richly rendered, as were the colors.
SCANNING | Back to Contents
Well, no film scanning at this price, folks. But scanning images was no more trouble than copying photos.
Standalone Scanning. If you've got to load the scanner with your original, you might as well scan at the machine, right? And you can, but once you're there, consider your options.
You can scan to your computer (after setting the computer to accept the scan), but you can also scan to a flash card or a thumbdrive.
Most of the USB thumbdrives we had (about eight of them pilfered from trade shows) were not recognized by the scanner when we plugged them into the USB port. Or at least the printer said it couldn't find one. When we pulled it out, it sure noticed.

The Glass. Note the arrow in the corner to align the top left edge of your original.
Eventually we found a couple of pilfered drives that did in fact work. They were both 1-GB drives formatted as MS-DOS FAT 16.
We were also able to scan to a CompactFlash card in the card reader. But that was a piece of cake.
The process is pretty straightforward. Put the original on the glass using the arrow in the corner to align the top left corner. Attach a thumbdrive. Use the control panel to select Scan and then To Thumbdrive and confirm or change the settings for type of original, size, etc.
The MP620 does a quick prescan and displays the result, setting the function buttons to Rescan and Rotate if you need them. For a PDF, it will not close the document until you indicate, after the scan that there are no more pages to scan.
The lid on the MP620 does lift up about an inch to accommodate thick materials (or even a spiral binding) but it does not come off because the control panel is attached to it.
Scanning multipage documents goes pretty quickly, although we wouldn't wish it on an intern.
WiFi Scanning. We hadn't expected the MP620 to do WiFi scanning so once we had printed to it wireless, we thought we were done with the setup. Not so. Here's the rest of the installation story.
We were actually confused about the MP620's capabilities on this score. Although it appears it can do wireless scanning (from the Solution Menu if no where else), the software told us (repeatedly) that the scanner couldn't be found on the network. Since we'd already been able to print to it, we remained puzzled until we did a restart one day (we rarely restart OS X) and miraculously an icon for the Canon IJ Network Scanning Utility showed up on our menu bar.

Network Scanner Selector. The final step in our installation (at last).
We had to locate the scanner in that utility and then tell Solution Menu about it (it has both the USB and MAC address personalities available). No driver was installed for Photoshop, so we just used Solution Menu to scan. There's a perk to that method, it turns out. You can direct the scanner to compress data it transmits over the network, so the scan happens pretty quickly.
Software. Solution Menu is an intriguing option for other reasons as well. The scanning command can Save to a folder on your computer (any computer on your network with the software installed), save a PDF, Email the scan, do OCR or you can fiddle with the setting manually. And there are a few to fiddle with, including whether the scanner auto detects a document or photo and how it crops (multiple images or various sized images in various orientations).
We've used other scanning aids in the past (notably HP's) without much enthusiasm, but this one was pretty straightforward. It handles everything automatically but lets you chime in if you prefer.
You don't have to use Solution Menu, however (it turns out). You can use Canon's MP620 Twain driver called ScanGear with your image editing software for either a USB connected or wireless setup. Our initial confusion with Photoshop is attributable to having two copies on our system. The install put the Twain driver in the plug-ins folder for Photoshop CS3 but not CS4. We just copied it manually over and we were all set to go in either version.
The driver provides three modes: Basic, Advanced and Auto Scan. The ScanGear driver also provides Preferences for its Scanner, Preview, Scan and Color settings behavior across all three modes.

ScanGear TWAIN Driver. Here we're in Basic mode.
Basic is a good choice if you're new to scanning. You simply tell the driver what you are scanning (a document, color photo, magazine, newspaper), tell it to display a preview, tell it whether you want (a print, image or OCR), pick the output size, crop, correct the image (fade, backlight, gutter shadow for books, color pattern corrections) and finally perform the scan.
Advanced can save settings and is a bit more specific about them so you can set the resolution or adjust the color yourself. Image Settings, for example, can toggle unsharp masking and descreening. It can also set the level of dust and scratch removal, fade correction, grain correct on, backlight correction and gutter shadow correction. It's something like a manual mode for the driver compared to Basic.
Auto Scan lets the scanner figure everything out for itself. You just load the scanner and click the Scan button in the driver.
ScanGear is a pretty thorough scanner driver. Although there's no color calibration for reading IT8 targets, you can specify color matching profiles for the scanner and the target in the Color Settings Preferences.
Third party scanning software like VueScan didn't work wirelessly with the MP620, but that didn't surprise us. But VueScan did work when connected via USB cable to the MP620. So anything you can't find in ScanGear, you can find in VueScan (like calibration).
On the Mac, Image Capture also can control the MP620.
Smart Scanning. The MP620 sports a smart scanning feature that turns out to be a bit more useful than it might at first appear. It can detect, according to Canon, "the type of original you're scanning -- a photo, business card, personal notebook or form -- then automatically scans and saves the image with the appropriate settings."
Some people new to scanning might be confused about those categories, but we came to find it a convenience even if you do know the difference between scanning a photo and a business card. It was a little like auto Scene modes in a digicam. One less thing we had to do.
The scanner can also detect and straighten several images on the scanner glass, correcting up to 10 degrees of skew. So you can load the scanner with prints and let it make image files for you. Another convenience.
And it requires no warm-up time. Pretty smart.
MAINTENANCE | Back to Contents
Inkjet machines have a reputation for being temperamental, but a few simple procedures can just about eliminate the problems. For any inkjet:
- Do not use a power strip to control the printer, use the printer's own Power button. The printer button, unlike the power strip button, initiates a shut down procedure that parks the print head where it won't dry out.
- Use it. Letting the printer sit for weeks between uses will degrade the print head. Print something every week. If you've let the printer sit as long as a month, you may have to run the print head cleaning maintenance utility to flush the print head out. Which just dumps ink through the head, so you might as well print something every now and then.
By following those two simple procedures, you can eliminate many print quality problems and printer performance issue. If you do discover a problem, Canon's printer utility provides commands to check the nozzle pattern, flush the print head, do deep cleaning of the print head and realign the print head.
Our experience with the MP620 was remarkably trouble-free. It became our everyday printer but we don't print every day. The cartridges lasted a long time and we didn't experience any clogs or print defects we could attribute to maintenance issues. Canons and HPs, which tend to use dye inks, tend to clog less than Epsons, which rely on larger pigment inks. But the same rules apply. Kodaks use pigment inks but they are ground much finer than Epson inks, so less frequent use doesn't clog them as quickly.
All-in-ones have a couple of other cleaning requirements often overlooked. The first is to clean the glass. Fingerprints, smudges, hair and dust can all degrade a scanned image. Use a glass cleaner sprayed onto a cloth to avoid any chance the liquid will seep under the glass and into the scanner.
At the same time, gently clean the document cover (the white lid backing), which can pick up all kinds of dirt from the glass and the backs of the items you've been scanning. Use mild soap and water to clean the backing gently without scrubbing.
Exterior cleaning is becoming a real specialty with all the high-gloss surfaces. Canon warns against using "tissue paper, paper towels, rough-textured cloth, or similar materials for cleaning so as not to scratch the surface. Paper tissue powder or fine threads may remain inside the machine and cause problems such as Print Head blockage and poor printing results. Be sure to use a soft cloth."
Canon also recommends cleaning the bottom plate by folding a piece of letter-size paper in half width-wise and running it through the printer from the rear tray until the fold is not smudged with ink.
We didn't need to perform any of this extended maintenance.
CONCLUSION | Back to Contents
Yes, the MP620 lacks a couple of features we'd prefer to have in a multifunction device: film scanning, high fidelity printing and duplex printing. Fortunately, Canon makes a more expensive model (the MP 980) that offers all of that.
But for a price as low as $50, the MP620 is quite a deal, offering WiFi printing and scanning, easy photo copying, document scanning to thumbdrives or flash media, printing directly from flash media, PictBridge printing, plus Bluetooth and Ethernet connectivity.
And operations are more straightforward and more robust than we've seen on competing units. We were particularly impressed with how well the MP620 handles power management tasks.
Designed for home use, the MP620 can handle all your 4x6 (and larger) photo printing, plain paper printing, photo copying and reflective scanning with ease. Applause!