LEMONADE STAND FOR IMAGES
PIXMA MP950 Copies Photos,
Prints Negs & Slides
 By MIKE PASINI
Editor
The Imaging Resource Digital Photography Newsletter
Review Date: July 2006
Two components in the electronics department bucking the miniaturization trend (accompanied by more and more power) are monitors and printers. The advantage of a large monitor is clear enough, let's say. But what about printers?
You can certainly pick up a small printer, but it will only make small 4x6 prints. A large printer can produce prints as big as 13x19, which are big enough unless you have a Sistine ceiling to plaster. As you move up in size, the cost of trouble-free, small dye-sub consumables becomes unreasonable, so you find only inkjet options with either dye or pigment based ink systems with their inherent tendency to clog and spit.
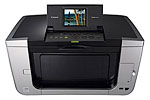
With its $399.99 MP950, Canon has rethought the printer game, producing a rather large box that includes not just a printer but a copier and a scanner, too. Also included is a card reader and PictBridge port. And a generous 3.6-inch color LCD panel lets you run the whole thing without turning on your computer. Built-in intelligence automatically corrects red eye, sharpness and brightness values (or you can fine tune them yourself). Canon has built a photo lab into this box.
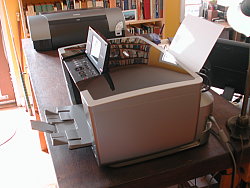
Big Box. The MP950 makes the i9900 at the opposite end of the table look compact.
By combining a printer, copier and scanner into one box, you may find yourself saving a little table space. But with a 8.5x16.5 footprint, it does need a table, not a desk.
The MP950 also distinguishes itself by refusing to make compromises on quality. The ink system is Canon's finest, the new ChromaLife100 set, so the printer can produce photo prints that rival the dedicated photo printers in Canon's line-up. The 3200-dpi scanner handles not only reflective copy but transparencies, too (and well-designed film holders are included). The copier reduces to 25 percent and enlarges to 400 percent and does it in faithfully reproduced color from either reflective or transparent material.
In short, the MP950 isn't simply an all-in-one office machine, but Canon's best of breed in one box. Even its weakest link, the scanner, is more than adequate for making prints. And, like any photo lab, that's what the MP950 is built to do: make lots of prints. Let's take a brief tour of all the features and put it to work.
FEATURES | Back to Contents
- 9600x2400-dpi resolution with microscopic droplets as small as one picoliter using FINE printhead technology
- ChromaLife100 ink system for lasting, beautiful photos
- Borderless 4x6-inch photo in approx. 46 seconds
- Direct photo printing from memory cards and PictBridge-ready devices
- Quick printing, copying and scanning of photos and documents
- Scan 35mm slides and negatives with maximum 3200x6400-dpi optical resolution
- Duplex printing
- Dual paper supplies
- Standalone color photocopying functions of originals up to 0.8-inch thick
SPECIFICATIONS | Back to Contents
Printer features include:
- Printing Method: Color Bubble Jet
- Print Speed [Fn 1]: Color Photo: 4x6 borderless in approx. 46 seconds; Black: 29 ppm (approx. 2.1 seconds per page); Color: 22 ppm (approx. 2.7 seconds per page)
- Number of Nozzles: Black has 512 and Color has 512 x 6 (C, M, Y, K, PC, PM) for a total of 3,584
- Print Resolution [Fn 2]: Black at 600x600 dpi and Color at 9600x2400 dpi
- Ink Compatibility: PGI-5 Pigment Black ink tank, CLI-8Bk Black ink tank, CLI-8C Cyan ink tank,CLI-8M Magenta ink tank, CLI-8Y Yellow ink tank, CLI-8PC Photo Cyan ink tank, CLI-8PM Photo Magenta ink tank
- Paper Sizes: Letter, Legal, Credit Card (2.13x3.39 inches), 4x6, 4x8, 5x7, US #10 Envelopes
- Output Tray Capacity: Auto Sheet Feeder and Cassette each hold 150 sheets of letter size paper or 20 sheets of 4x6 photo paper
Copier features include:
- Mono Copy Resolution: Black at 600x600 dpi and Color at 1200x1200 dpi
- Mono Copy Speed [Fn 1]: Black at 29 cpm (approx. 2.1 seconds per page) and Color at 22 cpm (approx. 2.7 seconds per page)
- Reductions Enlargement: 25 to 400 percent (with a fit-to-page option)
- Copy Feature: AE (Auto Exposure), Auto Magnification, Borderless, 4 on 1, 2 on 1, Fading Correction, Duplex, Fit-to-Page, Film Copy, Image Repeat
Scanner features include:
- Scanner Element: Charge-Coupled Device
- Max. Resolutions: Optical at 3200x6400 dpi with interpolated up to 19,200x19,200 dpi
- Color Scanning Mode: 48-bit internal/24-bit external
- Max. Document Size: 8.5x11.7 inches
Card Reader features include:
- Interface: PictBridge Direct Print Port (cable not included)
- Supported Media: CompactFlash, SmartMedia, Memory Stick, Memory Stick Pro, MagicGate Memory Stick, SD Card, MultiMediaCard. The following smaller cards require a special adapter sold separately: xD-Picture Card, Memory Stick DUO, Memory Stick DUO Pro and miniSD Card
General features include:
- OS Compatibility: Windows XP/Me/2000/98 and Mac OS X version 10.2.4 to 10.4.x
- Standard Interface: USB 2.0 Hi-Speed [Fn 3], IrDA [Fn 4] version 1.2 (JPEG only), Bluetooth [Fn 5] version 1.2 (optional)
- Dimensions: 8.5 x 16.5 x 10.0 inches (WxDxH)
- Weight: 28.2 lbs.
- Warranty: Toll-free technical phone support plus 1-year limited warranty with InstantExchange program. (subject to certain terms and conditions, see http://www.canontechsupport.com for details)
Notes:
[1] PPM print speeds are based on the highest speed printer driver mode. Photo print speeds are based on the default mode driver setting using Canon Photo Paper Plus Glossy paper. Print speeds will vary depending on system configuration, interface, software, document complexity, print mode, types of paper used and page coverage. CPM copy speeds based on fast mode setting using plain paper. Copy speeds may vary based on document complexity, copy mode, page coverage and number of copies.
[2] Resolution may vary based on printer driver setting. Color ink droplets can be placed with a horizontal pitch of 1/9600 inch at minimum.
[3] USB 2.0 Hi-Speed requires Windows XP, 2000 or Mac OS X operating systems. For Windows 98, Me and Mac OS X v.10.2 to 10.2.6 operating systems, the printer will operate at USB 1.1 specifications.
[4] JPEG files 3MB or smaller only. Requires mobile phone with IrDA port and support for IrMC version 1.1 protocol, with phone positioned no more than 7.9 inches from printer.
[5] Bluetooth v1.2 with optional Canon Bluetooth Unit BU-20. Bluetooth operation depends on the devices and software version used. Operating distance is approximately 10 meters but may vary due to obstacles, radio signals, locations where radio interference occurs, magnetic fields from microwave ovens, device sensitivity and/or antenna performance.
SYSTEM REQUIREMENTS | Back to Contents
Windows system requirements include:
- A Pentium class chip running at 300MHz with 128-MB RAM under Windows 98/ME/2000/XP
- Microsoft Internet Explorer 4.01/SP2
- 130-MB hard-disk space
The Setup CD For Windows includes:
MP Driver, MP Navigator, Easy-PhotoPrint, Easy-WebPrint (Windows requires Microsoft Internet Explorer version. 5.5, version 6.0 recommended), Arcsoft PhotoStudio, ScanSoft OmniPage SE (ScanSoft OmniPage SE (OCR software) does not support Windows 98 first edition)
Macintosh system requirements include:
- Mac OS X v.10.2.4 to 10.4.x
- PowerPC, G3, G4, G5
- 128-MB available RAM
The Setup CD For Macintosh OS X includes: MP Driver, MP Navigator, Easy-PhotoPrint, Arcsoft PhotoStudio, ScanSoft OmniPage SE
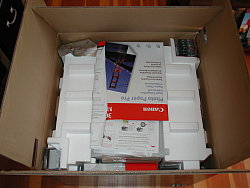
The Box. The first thing you see is the installation poster.
IN THE BOX | Back to Contents
The PIXMA MP950 box contains:
- PIXMA MP950 Photo All-In-One
- Ink Tanks: PGI-5 Black, CLI-8 (black, cyan, magenta, yellow, photo cyan, photo magenta)
- MP950 Printhead
- Canon Photo Paper Pro for Borderless Printing Sample Pack
- Film Guides: one 35mm holder for two six-frame strips (mounted on the removable white back board) and one 35mm mounted slide holder for eight slides (packaged in cardboard)
- Power Cord
- Documentation Kit and Setup CD-ROM
You'll need a USB cable to connect the printer to a computer and another USB cable to take advantage of the PictBridge port.
SUPPLIES | Back to Contents
The 7-color ink system includes six dye-based inks and a pigment-based black ink. The larger black pigment cartridge lists for $16.25. The six dyes (black, cyan, magenta, yellow, photo cyan and photo magenta) list for $14.25. A red LED on each cartridge indicates its status, flashing when ink runs low, and flashing even faster when nearly empty.
Canon 4x6 Glossy photo paper is available at $9.95 for 50 sheets. The higher grade Photo Plus Glossy is available at $12.49 for 50 sheets. The highest grade Photo Paper Pro runs $8.95 for 20 4x6 sheets or $29.99 for 75 sheets. A semi-gloss 4x6 sheet is available at $12.49 for a pack of 50.
Letter-sized versions of all three grades are also available in various quantities with the addition of a matte photo paper.
The advantage of Canon papers is that color profiles for them are installed with the printer driver, optimizing color reproduction, and that they have been, together with the ink system, designed to maximum print life.
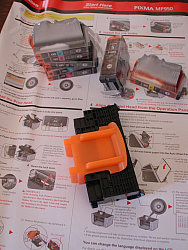
The Parts. We've laid out the printhead and ink cartridges on the poster.
INSTALLATION | Back to Contents
Every Canon printer we've ever installed has been a pleasure. No head scratching, no bumbling, no scrambling around for hidden accessories or parts. Canon provides a poster-sized step-by-step guide that I follow with confidence. And the equipment is tagged with bright orange tape so you don't leave something bound for shipping that should be released for use.
That's not insignificant when you have to install a seven-cartridge ink system and a new print head. But everything snapped easily together and I never endangered the sensitive parts because they were clearly marked.

The Tape. There's a lot of orange tape to remove but it secures the many moving parts during shipment.
The MP950 taxed that well-organized system because it's not just a printer but a scanner, too. Scanners require a little more care, unlocking them only when you've moved the unit to its installation spot. But Canon's system eased even this complex process.
I can't compliment Canon quite enough for how easy they make even a complex installation. Have no fear.
The Printhead. Ready to go in.
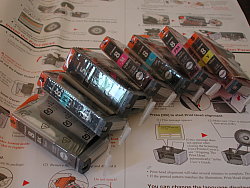
The Inks. They go in quickly.
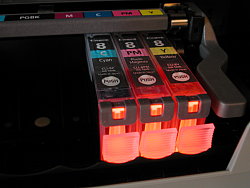
Inks Installed. They light up if you do it right.
The poster needed a little help from a simple sheet that tells you to "remove all orange tapes from the machine." There are quite a few and the three illustrations show you just where to look for them. There's also a paper guard inside the machine that has to be removed before you turn the unit on.
Once that's done, it's back to the poster to perform the actual hardware installation in four steps and the software in no more.
- Turn on the machine after you unlock the scanning unit and connect the power chord. Press the Power button and select your language from the menu displayed on the LCD monitor. The LCD monitor then prompts you to install the print head.
- Install the print head by lifting the scanning unit, which is the rather thick and heavy lid and scanning bed. It locks into place like the hood of your car. To get access to the inside, you pull out the paper output tray extension. Behind it the inner cover comes down, which automatically moves the print head holder to the center for access. You've got 10 minutes before it returns to its corner, but that's plenty of time. Raise its lock lever, unwrap the print head, remove its protective cap and pop the head onto its holder before lowering the lock lever again. You should also make note of the serial number hidden inside the unit.
- Install the ink tanks next. There are labels to show you which tank goes where. Fill from the right. Start by peeling off the orange tab and plastic wrapper, then twist off the protective cap. The tank will click into place and light up. When all the slots are filled, close the inner cover and the scanning unit cover.
- Align the print head. The final step needs a few sheets of paper loaded into upper auto sheet feeder. Open the paper support, pull out the extension and load the paper. Then press OK on the control panel to start print alignment. The machine prints a black and blue test pattern and automatically aligns the print head.
You might also want to load the paper casette. It's a good place for letter-sized sheets, reserving the upper feed system for more delicate photo paper. The driver lets you select either source for any print job.
And if you're planning to use this with your computer, you'll want to connect a USB cable, too. But you'll have to bring your own because Canon does not include one.
SOFTWARE | Back to Contents
The only caveat to installing the software is to make sure you turn on any other Canon printer you have. The universal installer will not respect prior installations, but does include drivers for anything it finds.
|
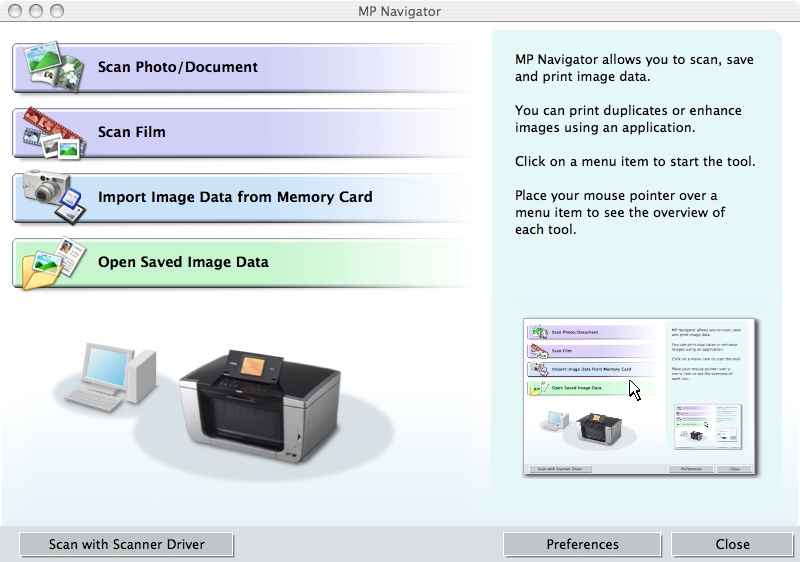
MP Navigator |
|
Sign-on Screen |
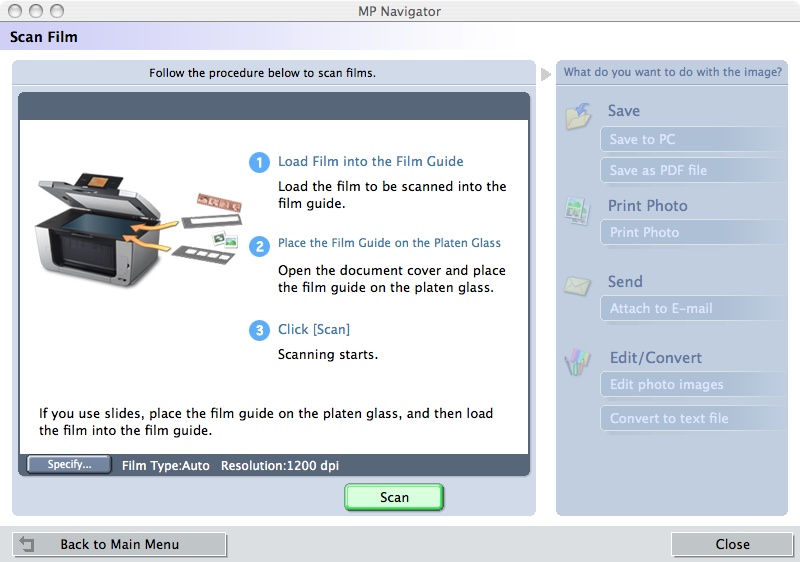
Scan Film |
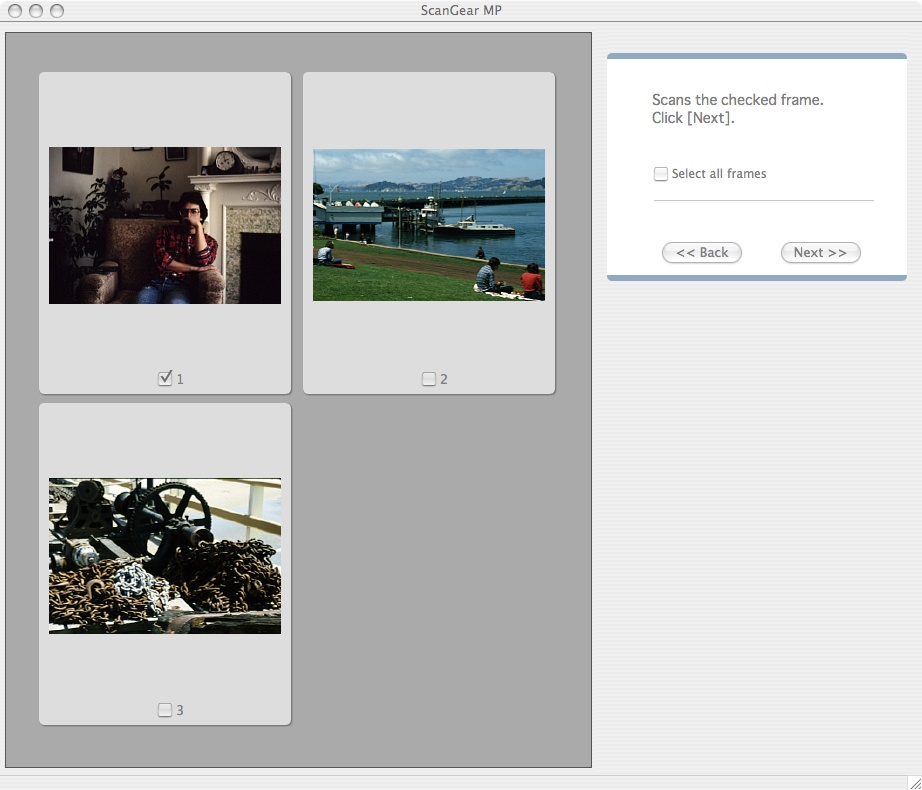
Scanning |
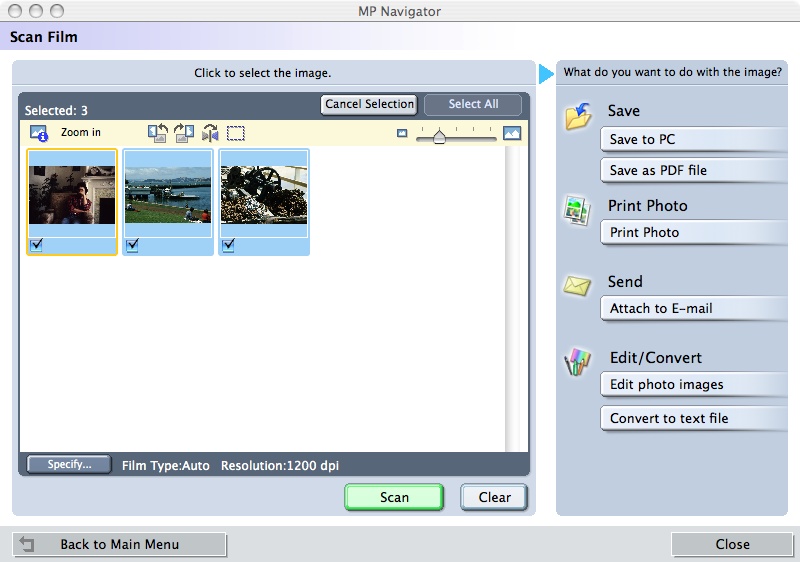
Scanned |
That said, I have to praise Canon again for including profiles for their papers in the installation. The printer profiles are designed to optimize printing with the MP950's ink set on different Canon papers.
Canon's top end Photo Paper Pro, for example, is also known as PR-101. When printing on this sheet, you select the PR1 profile and turn off any color handling in the printer driver's Color Options panel, setting Color Correction to None.
Profiles for Matte and Photo Paper Plus Glossy are also installed in multiple versions (PR1, PR2, PR3, for example), indicating the quality setting (with one the highest).
I also have to applaud Canon's Easy-PhotoPrint software. Also part of the software installation, Easy-PhotoPrint is a printing application that actually does make printing easy, especially batch printing. You just tell Easy-PhotoPrint 1) which images you want to print, 2) on what size and kind of paper and 3) how you want them laid out (four to a sheet, say). No problem. And the looked great, too.
And Canon's MP Navigator extends the simplicity of Easy-PhotoPrint to image capture whether you are scanning reflective or transparent originals.
And I'd be remiss not to note the scanning software Canon supplies. ScanSoft OmniPage SE is optical character recognition software that can turn images of text into editable documents. No retyping.
A TWAIN driver is also installed so you can scan directly from your image editor.
The install CD automatically copies the relevant software to your hard drive.
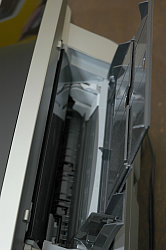
Auto Sheet Feeder. One of the two input sources (the cassette sits under the printer).
HARDWARE TOUR | Back to Contents
There are a lot of covers and lids on the MP950. The LCD itself is one of them, flipping up to reveal the Control Panel. It's built into the platen's lid, which includes the lamp for transparent media behind the white back board (which itself holds the 35mm film strip holder clipped behind it). But the platen is a lid, too, opening to reveal the inside of the unit. And do note the scanner lock switch on the platen.
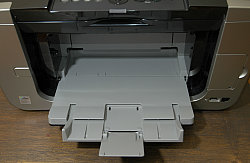
Output Tray. The silver button on the left side opens the tray, but it will automatically drop if you forget.
The paper path is neatly protected with lids, too. The paper output tray folds down (automatically or when you press the release button on the left) and extends a bit (with a flip out catch). Once open you can see the inner cover protecting the print head and ink cartridges. The auto sheet feeder in the back opens with a paper support that extends in two sections. And below it is the rear cover that opens to help you clear jammed paper.
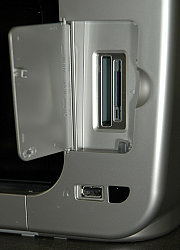
Card Reader. Two slots with an eject button below cover all but the smallest cards (which work with the optional an adapter). Below the reader note the PictBridge USB port and the IrDA infrared sensor for mobile phones.
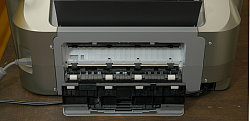
Rear View. Note the USB connection (l), power cord (r) and the rear cover, which opens to clear paper jams.
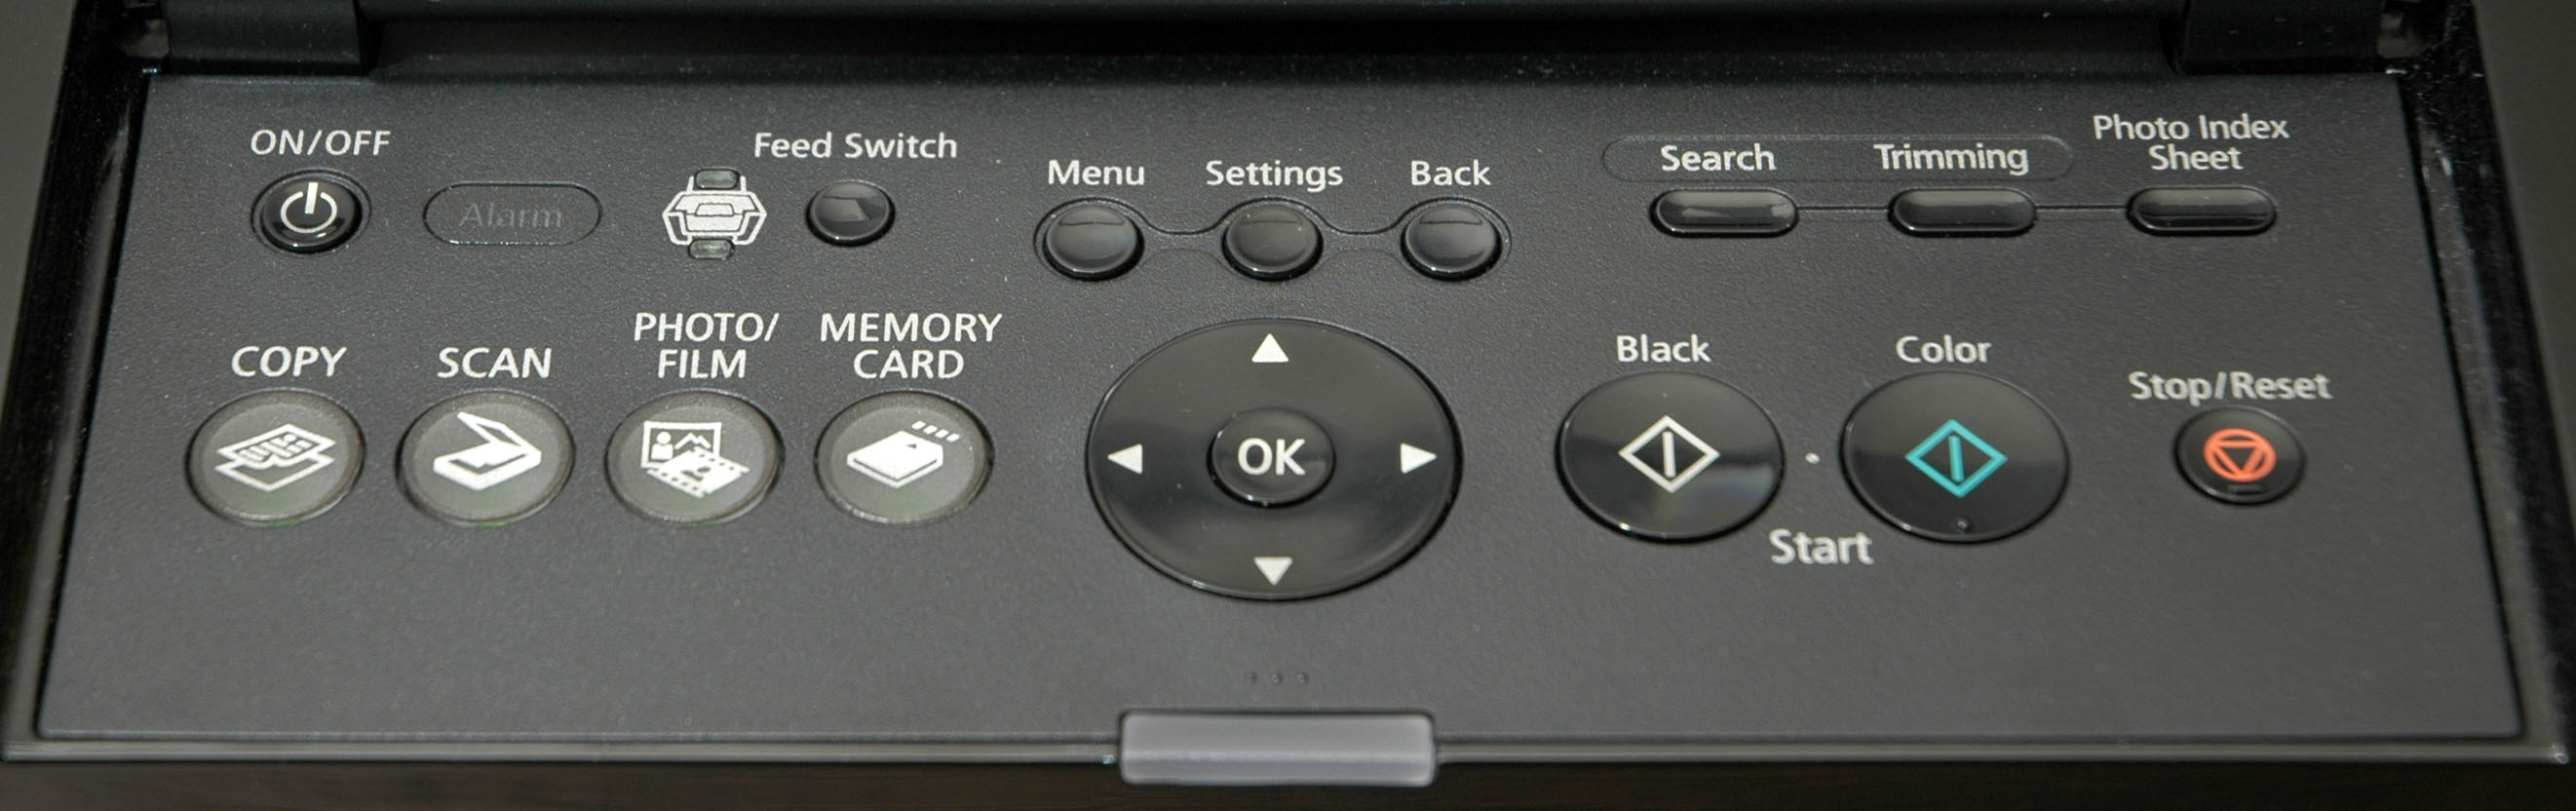
Control Panel. Mostly, you use the big navigator after selecting one of the four options to its left. You can make adjustments with the settings button above it before pressing either the Black or Color buttons to its right. Click to enlarge.
The USB-computer port is on the back, left of the rear cover. The power cable connects on the back to the right of the cover.
On the bottom of the front, the paper cassette slides out. To its right is the PictBridge USB port. Above that is the card reader behind yet another cover.
The control panel itself has a number of buttons.
The Power button is top left. Right next to it is an alarm lamp (which lights or flashes orange if you run out of paper or ink or plug in an incompatible device). Next to that is the sheet feed lamp, which indicates the default input source. To its right is the button that toggles between the top auto feeder and the bottom cassette.
The next set of three buttons are the Menu button, the Setting button and the Back button. Settings lets you change the output page size, output media type and a host of image correction settings.
The top row concludes with another set of three buttons: Search (to find images on a memory card by date), Trimming (to crop a displayed image) and Photo Index Sheet (to print an index of all or a selection of a card's contents).
On the bottom row, the four main action buttons are on the left: Copy, Scan, Photo/Film and Memory Card. Copy turns the unit into a photocopier. Scan makes it a computer-driven scanner. Photo/Film lets you use it as a kiosk with prints and film. Memory Card lets you use it as a kiosk for memory cards.
In the middle of the row is the prominent four-way navigator with an OK button in the middle.
To the left of the navigator is the Power lamp, the Black button, the Color button and the Stop/Reset button. The Black and Color buttons are used to start copy or scanning operations in either black and white or color mode, respectively.
Before we put it to work, let's explore some of the technology under the MP950's hood.
BUBBLE JET TECHNOLOGY | Back to Contents
Getting the ink onto (even "into") the paper is the job of Canon's Bubble Jet technology (http://www.canon.com/technology/detail/bj/bj_mfdt/index.html), which resembles Hewlett-Packards' thermal inkjet technology but differs significantly from Epson's piezo technology.
According to Canon, in a conventional thermal print head, "the temperature and viscosity of the ink when it leaves the nozzle can produce slight fluctuations in the amount and direction of ink discharged. The cause lies in the discharge process, during which pressure is first applied to the ink inside the nozzle and when this reaches the nozzle outlet, a droplet is formed by separating it from the rest of the ink. However, the amount of ink discharged differs with each droplet due to minute fluctuations in timing and the position of the nozzle at separation."
Canon's MicroFine Droplet Technology "heats and vaporizes the ink inside the nozzle to form microbubbles, in an ideal position closer to the nozzle outlet. Under the pressure of these bubbles, ink is ejected out of the outlet in microfine droplets. The nozzle is designed to limit the amount of ink to the space between the heater and the outlet so when bubbles form, all the ink under the heater is forced outwards and not even temperature variations can affect the droplet size. Pressure only needs to be applied to the discharged ink, a task that is efficiently carried out by microbubbles. The result is accurate discharge to the printed surface with almost no air resistance."
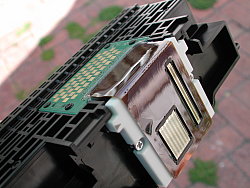
MP950 Printhead. The green board is the electronic interface. The copper panels hold the nozzles. The larger they are, the faster the unit prints.
PRINTING | Back to Contents
Large print heads make printing fast and the MP950's very large head does indeed print quickly. The small droplet size and high resolution deliver very sharp, detailed prints at the same time.
Because the paper swells when the ink wets it, it encapsulates the dye as the ink vehicle evaporates and the paper shrinks back to its dry state. This can go a long way toward obscuring any dot pattern laid down by the print head (and it does lay one down -- a very fine, frequency modulated screen). Even using a 10x loupe, we weren't able to see the droplets even in the highlights on glossy photo paper.
Print speed was indeed snappy and the printer was smart enough to open the output tray if I'd forgotten to drop the output tray down. Which I forget a lot.
Even better, there's something about Canon's color prints that is just dazzling. I am usually so pleased by the first print that I never seem to make any adjustments. And the MP950 doesn't drop that ball. The prints are stunning.
CANON DIGITAL PHOTO COLORS | Back to Contents
There's an explanation for that, of course. Canon calls it "Canon Digital Photo Colors." The company uses panel tests and studies to divine "the colors people prefer" based on actual human perception.
"Our efforts to create gray shades that are as neutral as possible achieve colors such as skin tones with low-chromatic colors pleasing to the eye," the company explains. "Improved contrast was made possible by our improvement of gradation curves. Raising color saturation allowed us to express skin tones and backgrounds more vividly. Canon's inkjet printers were rated highest in panel tests with models reflecting these improvements."
The one picoliter droplet size "successfully reduce graininess in every area of an image, from highlights to mid-density and dark areas. Because dot placement is also controlled at the micrometer level, noise is eliminated even in half-tone areas, which contributes further to outputting extremely smooth images." But the smaller droplets have their technical hurdles, too. The smaller they are, the more likely misplacement will affect image quality and the effects of air resistance (especially in the air currents created by the rapidly moving print head) are more pronounced. As noted above, Canon's FINE technology addresses both concerns, thrusting a very precise amount of ink downwards with a bubble generated at the tip of the nozzle "and the energy created when this bubble is formed is efficiently converted into a powerful ejection force."
INK & PAPER | Back to Contents
There's been a lot of discussion over the relative merits of pigments vs. dye-based inks. Epson has long provided pigment inks while other inkjet manufacturers supplied dyes. Hewlett-Packard recently introduced its first pigment printer, but made an interesting observation when it did so. They've been making pigment printers for years, the company claimed -- black ink is pigment.
Indeed Canon's black is a pigment ink designed to prevent the ink from disappearing from the surface of the sheet, so it sits well on plain paper. Canon's color dye inks are designed for high optical density values and light-fastness of over 25 years, which can "resist fading for up to 100 years."
The paper is part of that equation, too. I tested with Canon's top of the line Photo Paper Pro, which sandwiches several layers together. The large pulp layer is the meat of the sandwich, covered on both sides by an intermediate reflective layer. On the very bottom there's a back coating layer. On top, an ink absorption layer sits below a gas resistance enhancer which is topped by a mirror surface finish.
I also used non-Canon papers (both uncoated text and photo glossy) and was pleased with the results but can't vouch for their longevity. Still, for casual prints not intended for the generations to come, third-party papers work fine.
DUPLEXING | Back to Contents
The PIXMA printers are all designed to handle duplex printing and the MP950's implementation is excellent. Like other compact PIXMA printers, paper can be fed from either a paper cassette below or an automatic feeder on top -- and either source can be used for printing on both sides of the sheet.
The key to duplex printing is the U-turn path. "Special tools were developed to find and simulate the ideal transport route," Canon explains. "Based on high-precision simulation, thorough revisions were made to the curvature, material and detailed movements used in the U-turn guide for making the paper turn around within the printer."
As a result, you can even make borderless prints on both sides of photo paper. "Duplex printing on thick glossy paper, which tends to damage the printing surface and printing with photographic quality in addition to borderless duplex printing were significant issues, but these have been overcome by technology that offers high-precision control of paper movement on a micrometer level. Two motors are used for the paper transport."
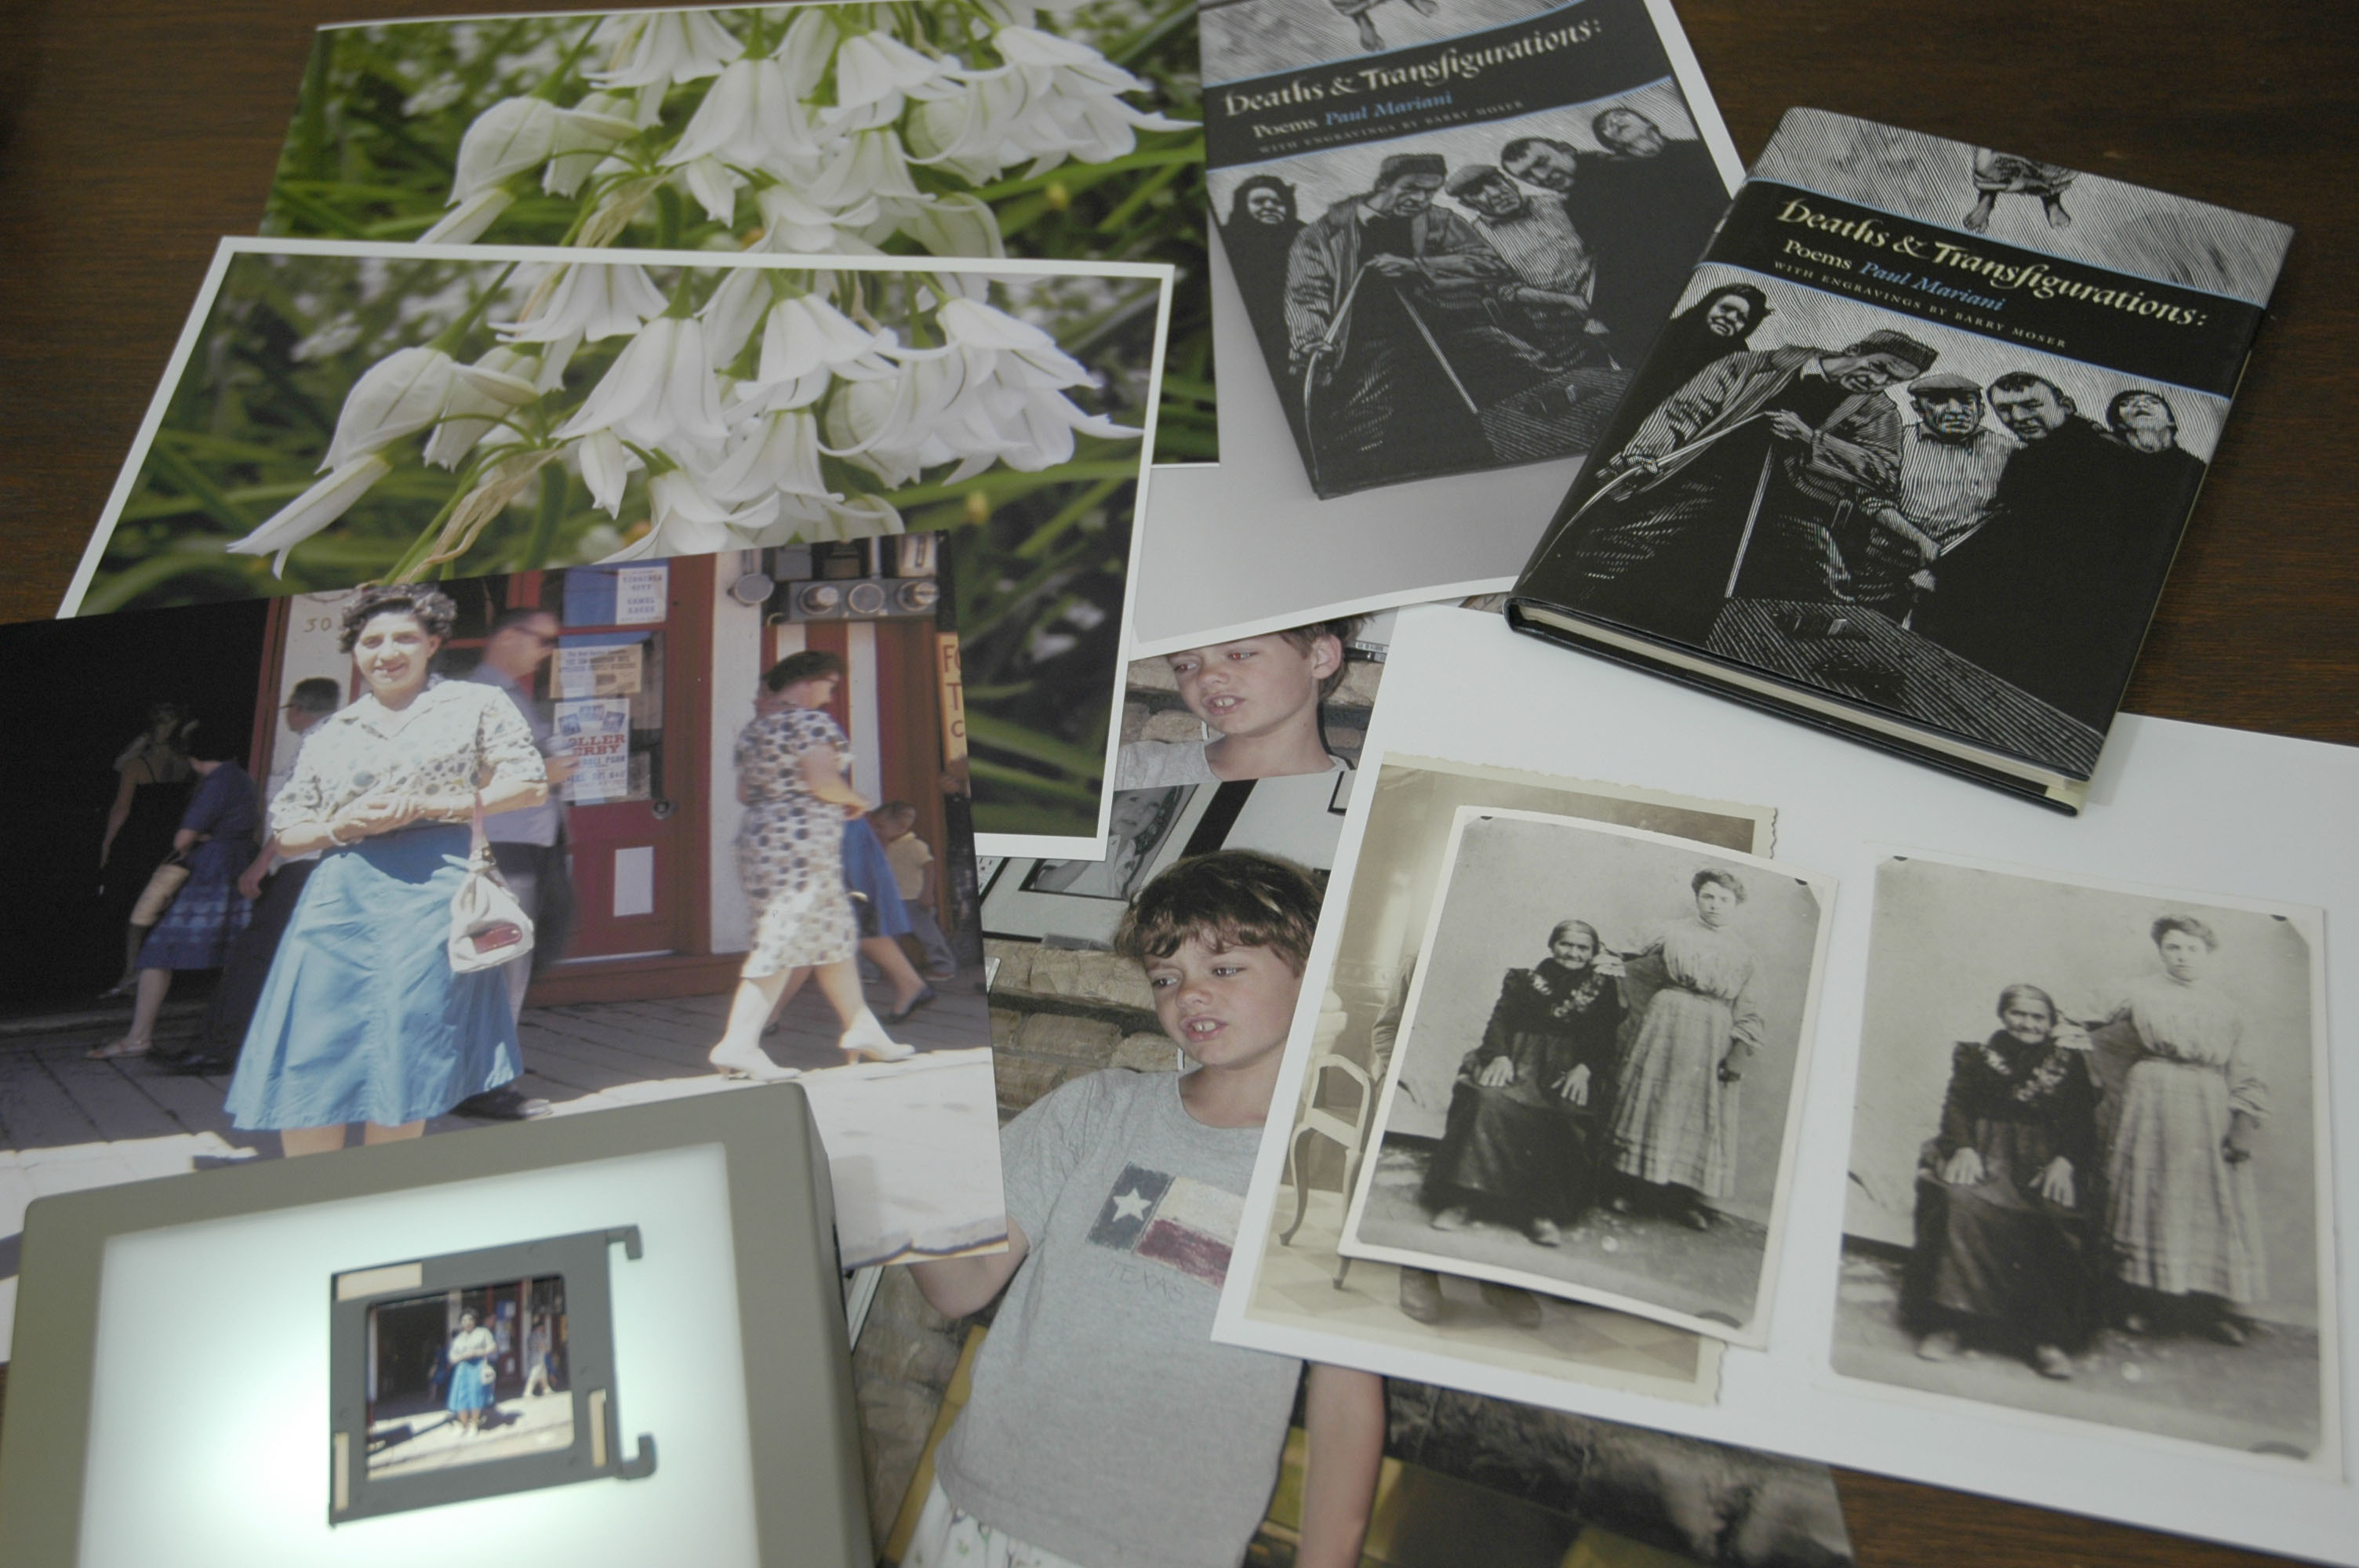
Copy This. A clockwise tour starts with a woodcut illustrating the glossy cover of a book (top), which was just copied on plain paper but even the blue highlight reproduced well. Below it, I copied an antique photo onto glossy photo paper with excellent results. In the middle you can see the effect of red-eye correction in the lower face. The slide on the small lightbox to the left was scanned and printed with image correction directly on the MP950. Finally, we simply copied a color photo of some lillies of the field (top left). Click to enlarge.
GETTING TO WORK | Back to Contents
A multifunction device means lots of testing. Over the course of a couple of months, we ran the MP950 through its paces, relying on it for all our photocopying, text printing, much of our photo printing and some slide and negative scanning. In addition, we printed directly from our cameras through both the PictBridge port and our media cards using the built-in reader. Finally, we printed color negatives and slides directly from the scanner. And still we're not sure we covered everything <g>.
Two tricks stood out, though.
I was surprised how well the MP950 could copy a photograph. Simply putting great grandmother's studio portrait on the platen and pressing the Copy button (with the appropriate settings) made a gorgeous enlargement. And unlike the usual scan-save-retouch-print cycle, I didn't have to really set anything beyond what size I wanted printed and on what kind of paper.
That simplicity extended to film scanning, too. It can be trying to convert a color negative to a positive (even to just properly align it on the scanner bed so the software can find it). But the MP950 converted my color negatives accurately, making prints just as good as anything coming from a digicam. And I didn't have to set anything (other than media type and size).
Same for slides, although here the scanner's limitations were evident. It just doesn't have the dynamic range of a dedicated slide scanner like the Konica Minolta 5400 II (or even a sophisticates flatbed like Microtek's ScanMaker i900). So you don't get as much detail in the shadows. But again, we got excellent prints (directly from the slide scan) with no grain.
|
MP950 Scan Resolution Comparison |
|
|
|
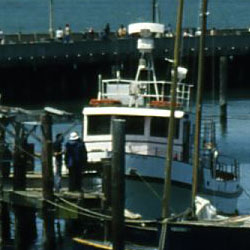
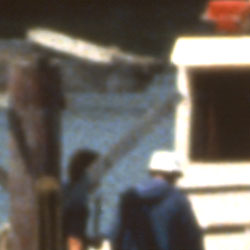
The MP 950 (left) captures a larger area of the original than the Konica Minolta 5400 II. With less resolution, it can't make quite as big an enlargement as the dedicated slide scanner. These are full resolution crops of a much larger image. |
|
The MP950 made us rethink our duplicating process. It's so easy to print from antique originals, color negs and slides, I ran around the house making copies of all my treasures without a thought to storing them on the computer.
Let's look at the MP950's imaging capabilities in a little more detail.
Photocopying. The easiest and earliest test we tried was photocopying. You don't have to have the computer on. Just turn on the unit, open the lid and load your original. That's where it gets fun. Your original can be anything from a photo to a book 0.8-inch thick, which makes this something more than your basic office copier. And you can copy it in color or black and white. The LCD steps you through your options.
Copying simple documents, either in color or black and white, the unit performed as one would expect. Put the original face down on the glass, press the Copy button, confirm the settings and press the Black or Color button. Our test copies were crisp with accurate colors. I dared to push it by copying the cover of a book illustrated with a woodcut and a single color. The fidelity was impressive. The blue highlight color survived the heavy black coverage.
Copying a photo was just as easy. I pressed the Settings button to change the output size (fit-to-page), the quality to High and the output to a photo glossy sheet. The printed output was certainly a photo, but there was a slight tone shift, perhaps from the printer's attempt to optimize the image, which you can turn off.
While you can't set the original crop, we found the unit did a nice job of divining the original's size when we remembered to fit the white back board on the lid. And the picture was nicely centered on the output page, too.
It did such a nice job, you might be tempted to just copy your prints rather than retrieve them on the computer, open your image editor and printing them. I wished the unit was portable enough to take to one relative's house or another to make a copy of some one-of-a-kind precious family photos.
Copy options on the Settings menu include output page size, media type, print quality (Standard or High), reduction/enlargement and brightness. You can also change the number of copies to print.
There are a few slick copying options to consider, too. You can 1) copy on both sides of the paper, 2) copy two pages onto just one, 3) copy four pages onto just one, 4) copy without borders and 5) repeat an image on the page several times.
Printing Photos from Cards. You can print images straight from a memory card inserted in the unit's reader. The slots accommodate CompactFlash, Smart Media, Memory Stick and SD/MMC cards. You need an adapter to insert an xD-Picture Card, Memory Stick Duo or miniSD card. The unit assumes the card conforms with the DCF standard, which specifies in which directories what kind of files are stored on the card.
Once the card has been inserted and the unit has read it, you can print one image, several images or run a slide show on the LCD. If your computer is on, it may recognize the inserted card as a removable device. A device setting option can set the reader to be read only (to just print photos) or read/write (to print photos or copy to/from the computer).
Photos can be optimized by turning on several options under the Settings button's second tab. These include red eye correction, vivid photo (green and blue bumped up), photo optimizer pro (on by default), noise reduction, face brightener, image optimizer, brightness, contrast, color hue. You can also select no effects and no image enhancement.
I found red eye correction useful in minimizing the effect if not entirely eliminating it.
You step through the images on the card by pressing the arrow keys. If you press the OK button, you start the slide show. Press the Black or Color button to make a print. The same options as described above appear. Press OK to confirm them and out comes your print. I found this a very nice way to make a set of 8x10s.
PictBridge Printing. Almost as simple, is connecting a PictBridge camera to the PictBridge USB port in the front of the unit with the USB cable that comes with your camera. That turns your camera into a printing kiosk. Actual options depend on the capabilities of your camera.
Which has some interesting implications. The options under the unit's Setting menu only take effect when the camera's equivalents are set as the Default. That includes page size, media type, layout and optimization.
There's one other interesting implication. Only JPEGs can be printed via PictBridge, no Raw formats.
Otherwise, it's pretty simple.
Printing from the Computer. And just as simple is printing from the computer. The MP950 appears to your system like any other printer. Options in the driver let you control the MP950's options, including paper source and image enhancement options.
Unlike pure photo printers, the MP950 does a very nice job on just text, printing on both sides of the paper at very quick speeds. It can also handle envelopes (but that has always depended on your software setup, too).
In short, fast color text printing with excellent photo reproduction using any program with a Print option on your system or one of Canon's excellent printing applications.
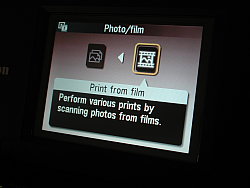
Print from Film. This option steps you through loading the film holder, scanning and printing a frame.
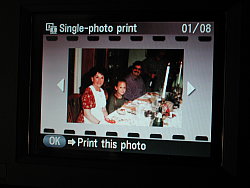
Single Photo Print. After scanning a color negative, the positive version is displayed for printing.
Printing/Scanning Film. Just as you can copy a photo, you can print a frame or more from a strip of color negatives or a mounted slide. You can scan from the control panel to your computer, from your computer using MP Navigator (especially recommended if scanning is new to you) or from your computer's image editing software through the TWAIN driver.
The unit comes with two film holders that have tabs on the short sides to align them correctly to the glass bed so the scanner knows where to find the images.
Behind the white back board you'll find the 35mm film strip holder. You can load one or two film strips as long as six frames in it by pinching the thin frame at the indents in the holder and lifting it. A pair of clips hold the film flat at the lead end until you close the thin frame. It's very simple and very safe (unlike some film strip holders out there). There are no bars across the thin frame, either, allowing for the normal variance between frames from different cameras.
Packed in cardboard with the unit's documentation is the slide holder, which holds eight mounted 35mm slides. A small plastic spring holds them in place, in the well-designed, easy to use and safe holder. Canon recommends you load the holder before putting it on the glass. But I found it a lot easier to put the empty holder on the glass and then insert my slides because they have to sit flat against the glass. Just wipe off the glass when you're done.
Once you've loaded the unit, the fun begins. You can make prints directly from the originals or write the scans to your hard disk. The unit itself takes care of the details if you work from the control panel or use Canon's MP Navigator software. MP Navigator is a software version of the MP950's control panel.
The TWAIN Driver
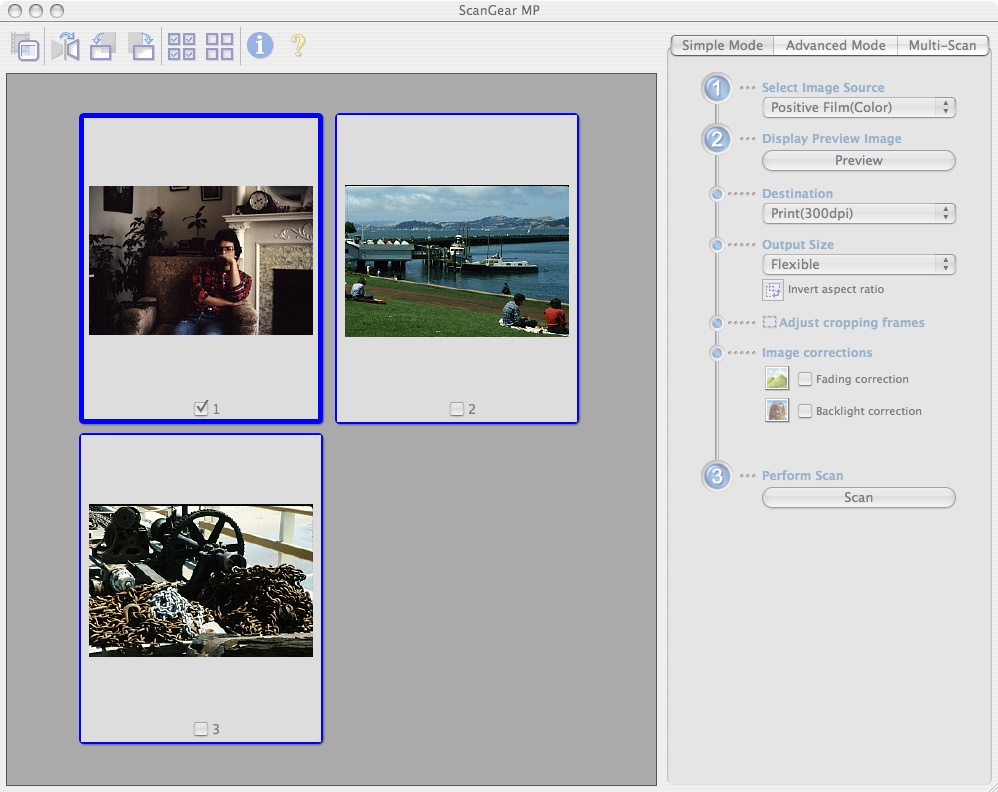
Initial Screen
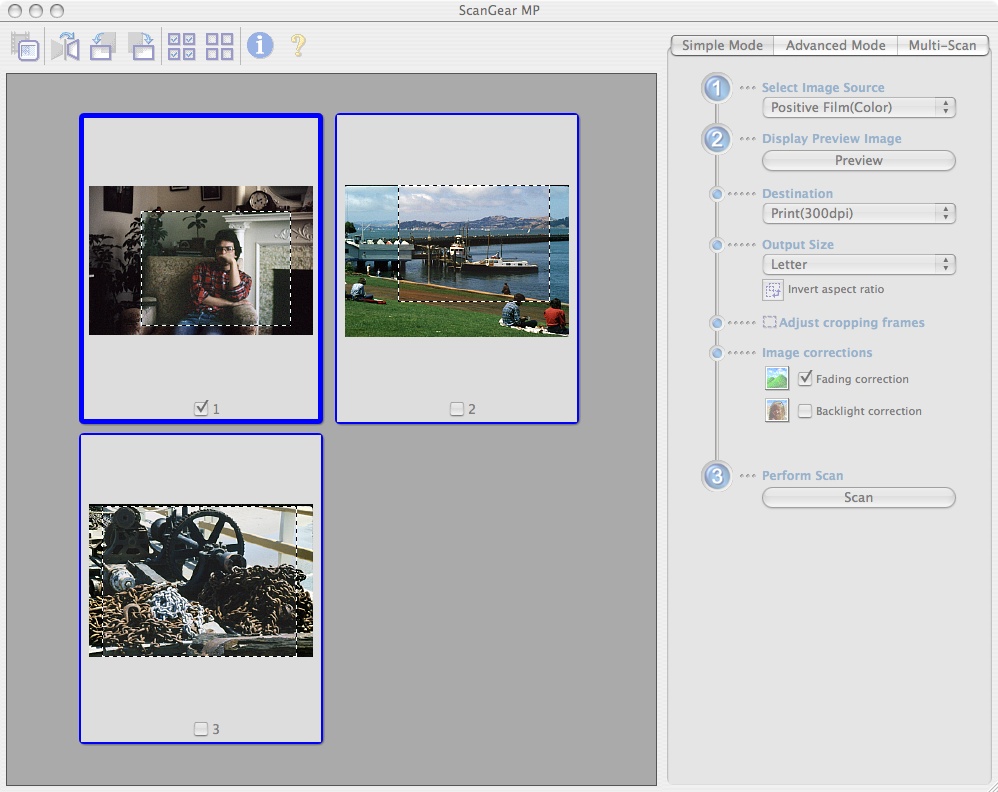
Simple Tab
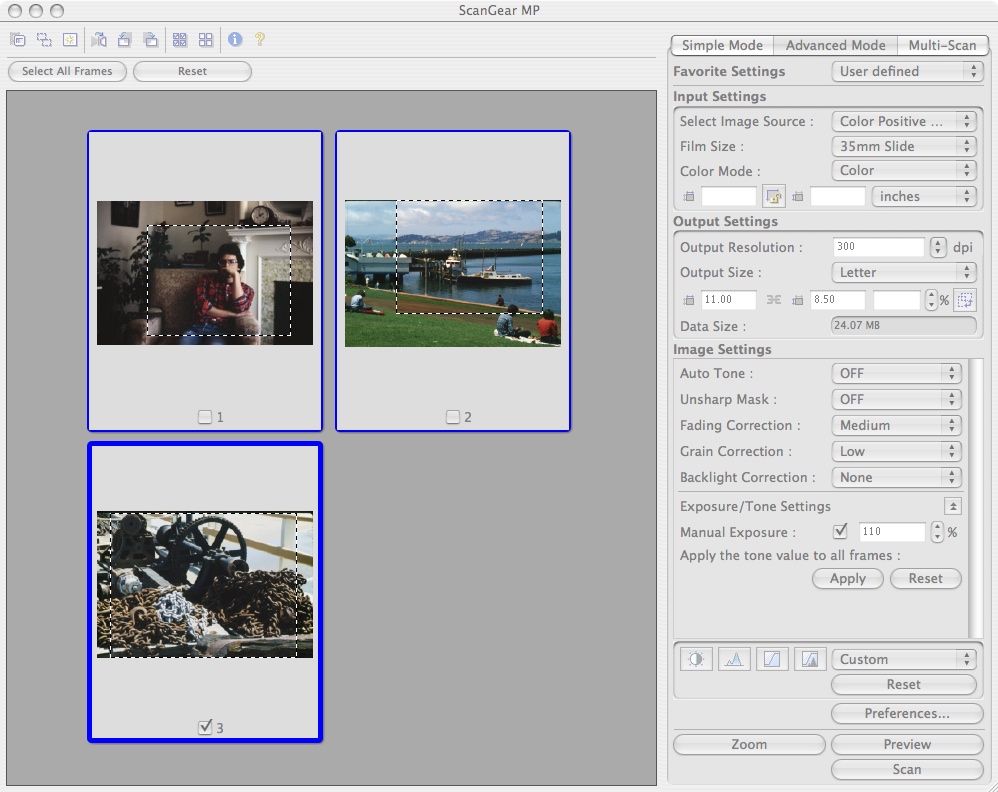
Advanced Tab
The TWAIN driver, however, gives you the option of a simple or more advanced capture. Even with the advanced option, however, you can't capture more than 24-bit color in three eight-bit channels, although the scanner samples 12-bit channels. You also don't get to select a scanning resolution. 35mm slides scanned at a fixed size of approximately 1560x1026 (actual size depended on the crop). But, on the up side, you have both Levels and Curves commands, unsharp mashing, fade correction, noise reduction and "backlight correction."
VueScan didn't recognize the MP950, so that option is out. And you can forget about profiling it, too. It profiles itself, apparently.
But the MP950 isn't really designed to perform scanning tricks. It's more of an automated print making device. You won't spend time rescanning and tweaking parameters to squeeze every bit of detail out of an original because the MP950 has enough built-in intelligence to make kiosk-quality prints all by itself.
You can scan black and white film, color negative or positive film and slides. Press the Photo/Film button to select among them with the arrow keys and then press OK.
My scans seemed to print a bit on the dark side. An Intensity setting lets you correct for that, but that's the sort of fiddling the MP950 is designed to avoid. The final, dry prints looked fine.
Scanning Reflective Originals. What goes for transparencies goes for reflective material. In fact, the photocopying section is the simple version of scanning reflective material. Again, though, using MP Navigator from your computer makes this simple for anyone new to the game.
If you're scanning text, you can also use OmniPage SE to convert the image into editable ASCII text. That's a great time saver.
MAINTENANCE | Back to Contents
Ah, maintenance. Inkjet machines have a reputation for being temperamental, but a few simple procedures can just about eliminate the problems. For any inkjet:
- Do not use a power strip to control the printer, use the printer's own Power button. The printer button, unlike the power strip button, initiates a shut down procedure that parks the print head where it won't dry out. This is the case with the MP950, Canon claims.
- Use it. Letting the printer sit for weeks between uses will degrade the print head. Run a job every week. If you've let the printer sit as long as a month, Canon recommends you run the print head cleaning maintenance utility to flush the print head out. Which just dumps ink through the head, so you might as well print something every now and then.
By following those two simple procedures, you can eliminate many print quality problems and printer performance issue. If you do discover a problem, Canon's printer utility provides commands to check the nozzle pattern, flush the print head, do deep cleaning of the print head and realign the print head. You can also replace the print head, in the worst case.
Canon recommends several cleaning procedures as well. The platen glass, the white protective back and the transparent media lamp cover all pick up dust, dirt and debris in normal use. Wipe them with a clean, soft, link-free cloth dampened with water occasionally.
If paper misfeeds, you may need to clean the feed roller. A Maintenance menu option to perform "Roller cleaning" feeds a few sheets of paper through to clean the rollers.
The interior of the unit may gradually accumulate paper dust and dirt, too. Canon recommends cleaning the interior regularly by using the Maintenance menu option to perform "Bottom plate cleaning" with a folded sheet of letter-sized paper in the auto sheet feeder until the paper comes out of the printer without smudges.
You can also swab the interior clean of ink and dust with a cotton-tipped swab.
None of these procedures are particularly difficult or onerous. Kudos to Canon for spelling them out in detail and providing menu functions to perform them.
CONCLUSION | Back to Contents
It's a big box, but the PIXMA MP950 does a lot of things, all of them well. I was disappointed not to have complete control over bit depth and image resolution while scanning. But you could also look at that as a convenience.
And convenience is what the MP950 is all about. You can put a photo in it and press the Copy button to get another print. And you can put a color negative strip in it to make prints, too, without worrying about what film type it is. Or pop in a faded old slide to get a color-corrected print.
You can scan to disk, too, for those images that need a little more work, but other flatbed scanners outperform the MP950 for that. You won't squeeze all the detail out of the shadows on a slide, but you will get enough for a good print.
So if you want a machine to make prints as large as letter size from images on memory cards, directly from a PictBridge-compatible camera, from slides, from color negatives or from black and white negatives, the MP950 is quite a convenience.
In fact, you could retire the five-cent lemonade stand and, with an orange extension cord, start offering $1 enlargements in front of the house. It would be less trouble than mixing lemonade.