Minolta Dimage 5The "little brother" to the Dimage 7 - same great features, but 3.3 megapixels and a (much) lower price...<<Executive Overview :(Previous) | (Next): Viewfinder>> Page 3:DesignReview First Posted: 9/14/2001 |
Design
The Dimage 5 is similar to traditional 35mm SLR design, but with a slightly
"T" shaped body, due to an elongated lens barrel on the left side
of the camera that extends behind and in front of the body and hand grip on
the right. The camera is not very compact, measuring 4.6 x 3.6 x 4.5 inches
(116.5 x 690.5 x 112.5mm) with the lens at its shortest position, but its magnesium
alloy body is surprisingly lightweight for its size (approximately 17 ounces
/ 505 grams without the batteries or CompactFlash card. An accessory camera
bag would certainly be the preferred method of carrying and storing the Dimage
5, accessorized with the supplied neck strap for when you want to keep it out
in the open for quick shooting.
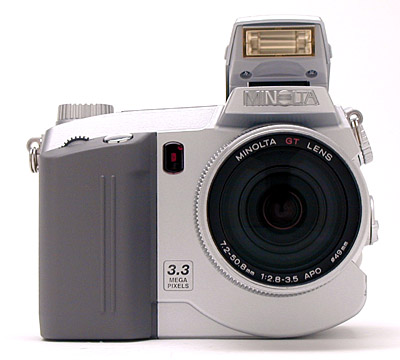
The camera's front panel houses the Minolta GT 7x Zoom lens, Self-Timer light, and the front of the pop-up flash compartment. Encircling the lens are two adjustment rings: a rubberized optical zoom grip on the front end, and a notched Manual Focus ring at the base of the lens. A set of 49mm filter threads on the inside lip of the zoom lens accommodates filters and conversion kit accessories. A second set of filter threads, on the outside edge of the lens, accommodates the accessory lens hood. Also visible from the front of the camera are the Shutter button and Selector Wheel, located at the top of the hand grip. Two vertical, raised ridges on the front of the hand grip give fingers a place to grasp as they curl around the grip.
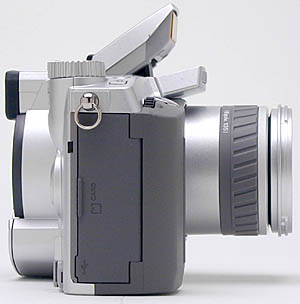
The right side of the camera holds the CompactFlash memory card slot, covered by a hinged plastic door. A diagram on the inside of the compartment door illustrates the proper method of inserting the memory card, and a small black latch on the right is used to eject the card from the camera (the latch must be pulled up from the bottom into a vertical position to eject the card). Next to the eject button is a USB jack for direct connection to the computer. On the outside of the CompactFlash compartment is a tiny red light (near the top left corner of the compartment door), which indicates when the camera is accessing the memory card. (Do not open the compartment door when the light is on.) At the top of the right panel is one of the two neck strap attachment eyelets.
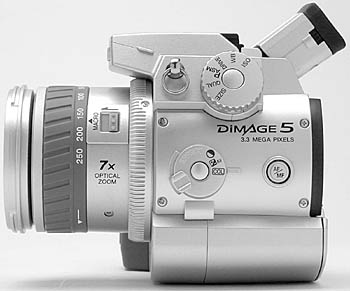
The left side of the camera features a host of camera controls, including the Function dial, Effects dial, Auto / Manual Focus button, and Macro button (on the side of the lens). The Function dial, located at the top of the panel, controls the image Size and Quality, Exposure mode, Drive mode (Self-Timer, Continuous Shooting, etc.), White Balance, and ISO. The Effects button allows users to adjust Contrast, Exposure Compensation, and Color Saturation. The Focus button simply switches between Auto and Manual focus modes. A Macro switch on the lens barrel can only be engaged when the lens is in full telephoto position. The second neck strap attachment eyelet is at the top, next to the Function dial. Also visible on this side, on the very tip of the electronic viewfinder eyepiece, is the Diopter adjustment dial, which adjusts the viewfinder display to accommodate eyeglass wearers.

The top panel accommodates the pop-up flash compartment, with two small tabs on either side to open the flash, and an external flash hot shoe on top, which is protected by a sliding plastic cover that is completely removable from the camera body. The hot shoe features a custom electrode setup for Minolta accessory flash units. In addition, there are a number of controls that access various camera functions, including: the Mode Dial / Main Power switch, with Recording, Playback, and Movie modes, plus Setup and Data-Transfer settings; a Shutter button, a Setting Selector Wheel, and a small Data Panel display that shows battery status, camera settings, and the number of images remaining. Finally, there is a Subject Program button (directly adjacent to the Data panel) that allows you to choose from one of five specialized shooting presets: Portrait, Sports Action, Sunset, Night Portrait, and Text.
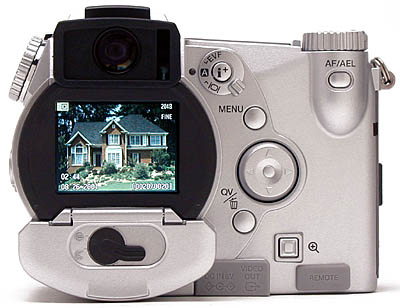
The remaining controls are on the camera’s back panel, along with the electronic viewfinder eyepiece, LCD monitor, and battery compartment. We were particularly impressed with the Dimage 5’s electronic viewfinder (EVF), which features a reflective, ferroelectric display that translates into a very clear and bright viewfinder display. The viewfinder tilts upward about 90 degrees, offering more flexible viewing angles. When the camera is set to the Auto Display mode, an infrared sensor on the right side of the viewfinder eyepiece senses when your eye is near the viewfinder and automatically activates the EVF display. Control buttons on the back panel include the Display Mode switch (near the viewfinder eyepiece), which allows you to choose between EVF and LCD display, or Auto switching between the two; an Information (i+) button in the center of the Display mode switch, used for changing information overlays and alternating between full-image and index displays in Playback mode; a Menu button, a Five-Way controller for scrolling through and selecting menu options, a Quick View / Delete button; a Digital Zoom button near the bottom of the back panel; and an AE / AF Lock button located just below the Mode Dial in the upper right corner. Along the bottom edge are two compartments covered by flexible plastic flaps that fit snugly into place: On the left are the DC In and Video Out jacks, and on the right is the Remote control connector jack. The Remote control jack presumably works with a wired remote unit, available as a separate accessory. We would also like to commend Minolta for including the back panel access to the battery compartment, which allows you to change batteries while the camera is mounted on a tripod (many digicams put this on the bottom panel, too close to the tripod mount).

Despite the slight curve of the battery compartment beneath the lens, the camera’s bottom panel is fairly flat. A metal, threaded tripod mount is located in the front center of the bottom panel.
Reader Comments! --> Visit our discussion forum for the Minolta Dimage 5!

Follow Imaging Resource: