Sigma dp2 Quattro: We post our first batch of real-world gallery images (including RAW conversions)
posted Thursday, July 24, 2014 at 6:08 PM EDT

The Sigma dp2 Quattro is a downright interesting camera. Its unique shape has already divided our readership into two camps - a "wow" camp and and a "no thanks" camp. And its JPEG rendering of our test target has caused some jaw-dropping to occur here in our test lab and by readers, both for its exceptional sharpness as well as the inability of the camera's JPEG engine to resolve our target's red fabric swatch even at base ISO.
Yes, we do realize that the majority of dp2 Quattro shooters will primarily be doing the conversions themselves rather than relying on the in-camera JPEG engine. But not all shooters will, and even those who do most of the time will still want to be aware of any potential issues for the times that raw conversion is either not feasible nor desired for haste (these are large files we're talking about, and the software is doing complex calculations, so we learned not to expect record speed while doing conversions, even with a fairly fast computer).
We therefore decided to break precedent for this unique camera and post some of the gallery images converted by us using Sigma Photo Pro (including one output in Adobe RGB, for those of you who can view it). From our dp2 gallery page you can now see both the in-camera JPEGS as well as the RAW files, and for many of the images you can also access our RAW conversions in order to compare them to the in-camera JPEGS yourself ("SPP" in the title denotes converted by us). As always, feel free to download the RAW files from the gallery page for your own non-commercial purposes and comparisons - the Sigma Photo Pro conversion software is freely available on Sigma's website.
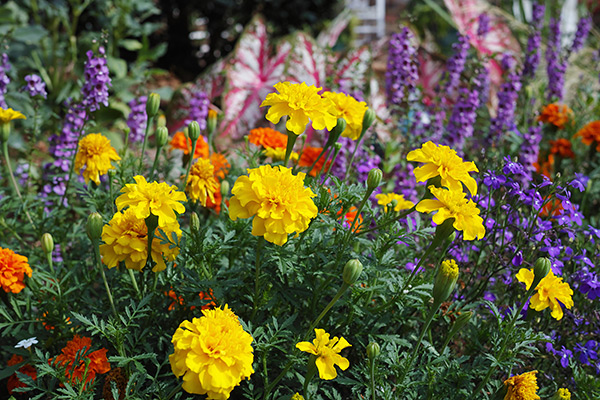
Below are a few examples to whet your appetite for comparing. We'll start with a garden shot that revealed a good deal of difference between the in-camera JPEG and the RAW conversions, especially in an area where the camera JPEGS produced blown highlights on flower petals that were easily reigned in by SPP. We've included two conversions, one using the same color profile as used in-camera ("Vivid" in this case) and one using the "standard" color profile in SPP.
It's interesting to note the blown highlight of the flower petals from the in-camera JPEG, which are nicely controlled via both SPP conversions. Also interesting is that in vivid conversion mode the red-orange flower near the top center loses a lot of shape due to red-channel saturation, which comes back when converted using the standard color profile. (This is the image that we also saved in the AdobeRGB color space, which has a broader gamunt than sRGB, albeit mostly in greens.)
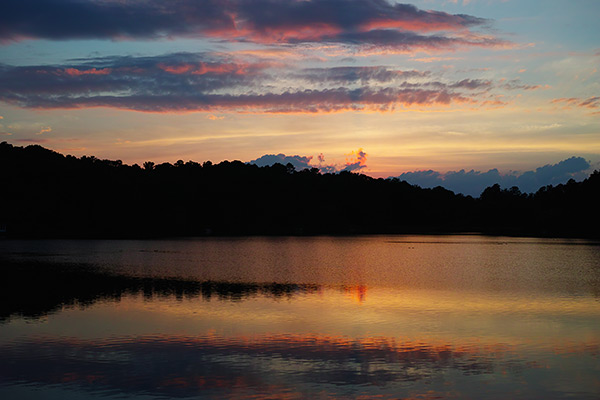
The sunset shot below has a similar area of interest, where the rendering of a cloud is a bit on the "crunchy" side with somewhat unnatural edges from both the in-camera JPEG and the conversion using the Vivid profile used for the shot, while using the standard setting for the conversion largely alleviates the issue.
Now to another comparison example using our ISO-standard Maine Coon cat, we'll explore conversion sharpening settings a bit.
The camera JPEG shows a lot more sharpening than a standard conversion without a sharpening boost, but then dialing the SPP sharpening up to 2.0 sharpens things up more, although without some of the over-sharpening halos seen in the in-camera images.
Also of interest when shooting with the dp2 Quattro is the ability to capture "super-high" resolution images. The camera upsizes the initial image to a whopping 7680 x 5120 pixels, and we've captured several of these for you to pixel-peep as well, including this one below, along with a 1:1 crop to show the full detail. Note that you cannot capture a RAW file while in this special mode, so what you see is what you get with these images, other than post-processing the JPEGs on your own of course. These are straight from the camera, resized to fit this page but otherwise unaltered.
Personally, we're not convinced of the usefullness of the "Super-Hi" in-camera JPEG setting, as we were able to achieve similar or better results upsampling in SPP itself, or after an SPP conversion in Photoshop. It could be useful if you needed a lot of resolution in a time-critical situation, but to our eyes, there isn't really much more detail present in the Super-Hi JPEGs than the normal sized ones. - And of course, shooting in normal resolution mode will let you save both a JPEG and an X3F RAW file at the same time. [All gallery images shot in this mode have SUPR-HI in the title.]
Moving now to additional capabilities, the dp2 Quattro has a few interesting onboard color profiles. We've already seen examples shot with Vivid and Landscape, and below are additional images using the "Cine" setting, which imparts a slightly desaturated, cinematic effect to the images that I rather like.
Because of its stacked-pixel arrangement that relies on the silicon itself to provide the color filtration, the Foveon sensor line has never been known for great images at higher ISOs, but Sigma claims the new Quattro sensor is a bit better in this department. Our forthcoming image quality comparisons will show this in greater detail, but in the meantime here are a few shots at both ISO 800 and ISO 1600 to give you a real world look.
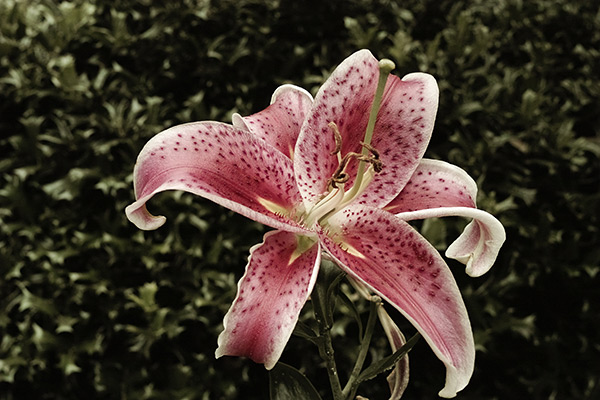
We'll conclude this initial gallery post with a few additional images.
For additional gallery images, access to RAW files and EXIF data please visit our DP2Q gallery page, and for our initial lab sample images please click here. Our publisher Dave Etchells has also shared his take on just how to properly hold the uniquely-shaped dp2 Quattro, and that video can be found here.
Stay tuned for much more to come on the Sigma dp2 Quattro.
[quick links: Sigma dp2 Quattro • Gallery • Lab samples • Hands on video]


