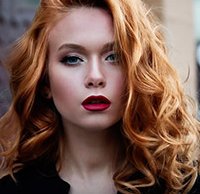
How to make your subject’s hair pop by adding shine, color and volume in Photoshop
posted Friday, December 29, 2017 at 12:00 PM EDT

Your subject's hair can be one of the most important aspects of a portrait image. In many cases it is quite literally framing the face. At the same time, hair is very challenging to retouch and enhance. Aaron Nace of Phlearn has some quick tips for us in the video below to help add pop to hair in portraits.
The first thing we want to do is add volume to hair. This can be achieved through the use of the liquify tool. We want to protect the background and face from our adjustments to the hair, so start by duplicating your background layer. You can then use the freeze mask tool in the liquify toolbox to protect your subject's face from what you will be doing to the hair. To protect the background, use a very large brush and subtle movements, keeping a close eye on the background. By using a large brush, you will move the hair and the background together.
Next up is adding shine and color to hair through the use of gradient maps to ensure that highlights and shadows are colored differently, which helps considerable depth to the image. To learn how, watch the video below.
(Via Phlearn)