=================================================================
To subscribe, unsubscribe or change your email address, visit:
http://www.imaging-resource.com/IRNEWS/index-subs.html
Support the Newsletter!
- Find the best price for anything at http://ir.pricegrabber.com
- Shop Amazon, Adorama at http://www.imaging-resource.com/buynow.htm
========================================================
THE IMAGING RESOURCE DIGITAL PHOTOGRAPHY NEWSLETTER
========================================================
Volume 16, Number 9 - 2 May 2014
----------------------------------------------------------------------------
Copyright 2014, The Imaging Resource. All rights reserved.
----------------------------------------------------------------------------
Welcome to the 386th edition of The Imaging Resource Newsletter!
Welcome to your regularly scheduled Imaging Resource Newsletter for May 2nd! This edition is packed full of reviews, news, interviews and more! To start things off, time's are a-changin' for Imaging Resource, as we unveil some big projects and enhancement to the site. Last week saw a slight tweak to our site's design, and we've now revealed a new, comprehensive camera comparison tool.
For camera reviews, Mike Tomkins has put the finishing touches on the K-3, Pentax's latest flagship DSLR. We've also got a pair of Shooter's Reports: Eamon Hickey's first installment of his Sony A6000 review and Rob Taylor-Case brings us not one but two Shooter's Report sections for the compact Nikon D3300.
On the feature side, Dave Etchells continues with another of his in-depth, behind-the scenes looks at the camera industry from his time over in Japan during CP+. He visited Panasonic's main lens factory in Yamagata, and got the low-down on Panasonic's aspherical lens molding technology, and their ability to avoid the dreaded "onion-ring" bokeh effect.
In the Quick Hits section, Pentax fans will be happy to see our latest review on the compact 35mm HD Limited Macro lens. We also posted a big set of real-world gallery photos from the Canon G1 X Mark II to go along with our lab test shots.
Finally, we share some of the most popular news stories from this past week, including two hot new camera announcements, the Sony A77 II and Leica's new APS-C ILC, the T (Typ 701). Other news stories include a handful of First Shots and Sample Galleries for a variety of cameras, plus a mini-review on a nifty new teleconverter for the Fuji X100/X100S.
Happy reading!
---
EDITOR'S NOTE: New newsletter email address - nleditor@imaging-resource.com
We apologize to all of our reader's who've emailed us for our long-running reader emails and questions section of the newsletter and never received a response. Our old newsletter editor email address got completely overwhelmed with irrelevant PR emails and spam, to the point that it just wasn't workable to sort through the hundreds and hundreds of messages to find the reader queries. The new address -- nleditor@imaging-resource.com -- is pristine, though, so we'll be able to easily see and respond to all of you, just like old times. Have a question or comment? Just ask!
---
TOPICS
------------
- Get Social with IR
- Sponsors
- Site New
- Reviews:
- Pentax K-3 Review, excerpt
- Sony A6000 Shooter's Report, Part I
- Nikon D3300 Shooter's Report, Part I
- Feature:
- The end of onion-ring bokeh? Panasonic beats the curse of aspheric lenses - by Dave Etchells
- Quick Hits:
- Lens Review: Pentax 35mm HD Limited Macro
- Canon G1 X Mark II Sample Gallery
- New Camera Announcements
- Sony A77 II, Leica T (Typ 701)
- Popular News
- Next Issue
- Signoff
GET SOCIAL WITH IR
----------------------------------
If you want to stay up-to-date with the latest camera and photography news, get notified when IR posts its latest camera or lens review, and much more, get social with us on your favorite networking sites by:
By doing so, you'll also be supporting our efforts to deliver the best camera and photography content on the planet. (Google in particular appears to pay lots of attention to Google+ in deciding site/page relevance for its search results, so "circling" us there and +1-ing our site and pages would be an especially big help.) Thanks! We appreciate it!
SPONSORS
-----------------
This issue is sponsored in part by the following companies. Please show your appreciation by visiting the links below. (Visiting our sponsor's links really helps support this newsletter, thank you for your attention!) And now a word from our sponsors:
* Sigma *
---------
Sigma's approach to photographic equipment is based on quality, craftsmanship, value, customization and
responsibility to photographers and the environment. All encompassed in our breakthrough, award winning
Global Vision lenses:
18-35mm F1.8 DC HSM
35mm F1.4 DG HSM
17-70mm F2.8-4 DC Macro OS HSM
120-300mm F2.8 DG OS HSM
USB Dock
All designed to deliver the highest optical quality and performance.
* Imaging Resource*
------------------------
Did you know that anything you buy from Amazon can support IR, if you just use one of our
links to access the site? Here's a link with our affiliate code in it; click on it, and we'll get a credit
for anything you purchase in the next 24 hours!
http://www.amazon.com/?tag=theimagingres-20
No added cost to you, but a nice boost for us, to help us keep producing this content!
Thanks!
-----------------------------------------------------------------------------------------------------
Are you in the digital photo business? This newsletter is read by more than 47,000 direct subscribers (plus additional pass-along readers), all with a passion for digital photography. For information on how you can reach them, contact us at nleditor@imaging-resource.com
-----------------------------------------------------------------------------------------------------
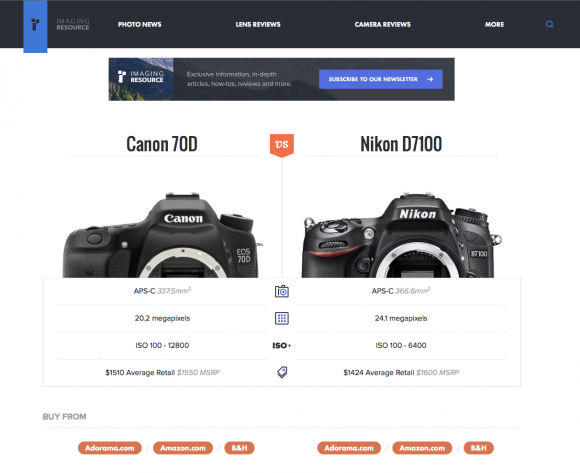
Site News: Imaging Resource launches camera comparison tool!
When we announced a new logo and incremental homepage refresh last week, we told you more was on the way. Today we're happy to reveal a feature we've been working on for a while. We've always gone deep in reviewing and testing individual cameras, but have never provided an easy way for readers to answer the question: "Why should I buy camera x over camera y?"
This feature is designed to answer exactly that question. Take a look:
You can read on below for a brief overview of the relevant product features, but we've also included a tour feature within the app itself, that you'll see on your first visit.
 |
Take a tour of the new tool! |
The first section you'll see is an intuitive display of the advantages of each camera over the other. We've picked the most significant features to highlight and only call attention to a feature if the two cameras are actually significantly different in that regard. We won't tell you one camera is 'better' because it has 39 AF points versus 38 for a competitor. This makes it easy to quickly decide which camera has advantages that matter to you.
 |
Only the most significant differences get highlighted. |
We have rich review information for hundreds of cameras. When comparing cameras, it's helpful to go beyond simple specs and read what our reviewers thought of a camera. That's why we include the pros and cons for each match-up and a link to jump to our exhaustive coverage of each camera we've reviewed.
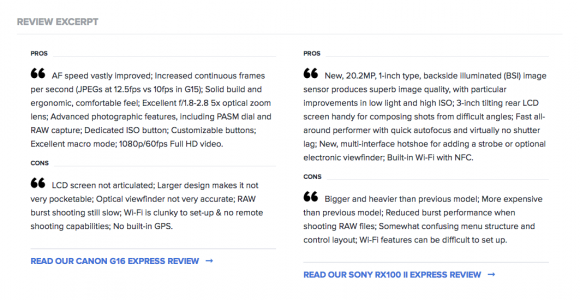 |
Read pros and cons for each camera written by our expert reviewers. |
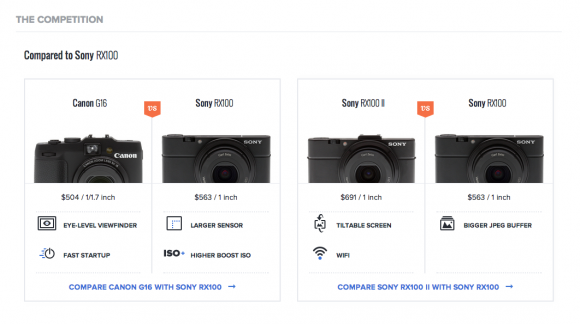
When looking at a camera match-up, it's often helpful to see how other competitors match up against the cameras you're considering. Comparing the Canon G16 to the Sony RX100 II? You might also want to see how each of those compares to the Olympus XZ-2 or the original (and still available) Sony RX100. The competitors section makes this easy. You'll get price information, sensor size info and an at-a-glance view of a couple of key advantages for each camera. If you want to dig deeper, just click on the match-up box.
Features and spec lists don't always get to the heart of the matter, which is why we've written longer comparisons of key competitors. We'll be rolling out more of these comparison reviews next week, but for now you can see an example of what to expect on the Canon 6D vs Canon 5D Mark III comparison page.
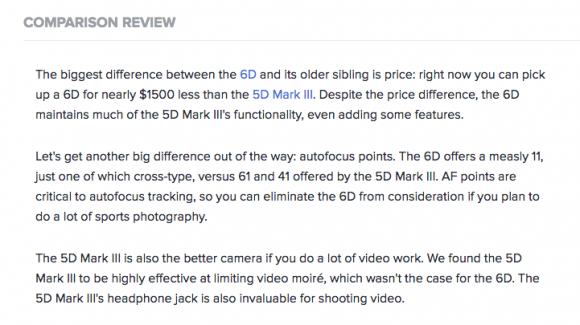 |
Read the whole comparison here! |
We introduced our new logo and incremental homepage refresh last week to preview what was to come. The official release of this feature sees us extending the new design for the site. This is the direction of things to come.
Head over to our page comparing the Canon 70D vs Nikon D7100 to give the feature a test drive. This is just a "first draft" of this new site section, and we plan to add a number of additional feature comparisons over the coming months -- so please leave your comments below to let us know what camera features you'd like us to add to the mix going forward!
Lastly, since our camera database goes back more than 15 years now, and there's a lot of variation in how manufacturers list different specs, you'll undoubtedly find inconsistencies here and there. Please let us know when you do by leaving a comment below; we really appreciate your input!
-----------------------------------------------------------------------------------------------------
Camera Review: Pentax K-3 Review, excerpt
Shooter's Report, Part III - Off to the races!
by Mike Tomkins
And finally, we come to the last section of my Shooter's Report -- and my decision whether to buy the Pentax K-3 for myself. This section has been a while coming, for which I apologize -- every time I've gone to return to shooting and writing, something else has come up. Just one example: The subject I'd chosen for my planned autofocus and burst performance testing didn't cooperate. I'd been intending to shoot with the K-3 and K-5 side by side at a local drag racing strip to get a good sense for how the two cameras' performance compared. Come the day, heavy rains had flooded the pit lane and the track day was canceled.
Off to the races. I went in search of alternatives, and finally settled on a (somewhat) nearby go-kart racing track: Xtreme Racing Center in tourist-packed Pigeon Forge, Tennessee. Their karts are advertised as capable of 40 miles per hour, and while I think that's a bit optimistic -- I'd estimate closer to 25 mph -- they're still faster than the karts at other local tracks. I set myself up at the end of the third-longest straight on the track, with the carts coming towards me and the afternoon sun behind my shoulder.
I had two lenses with me for the test, both consumer-grade. (The only higher-end glass I had access to during my review were the Limited primes, none of which seemed a good choice for this shoot.) I opted for my 18-135mm F3.5-5.6 ED AL [IF] DC WR as an example of a lens with a built-in motor, and my 50-200mm F4-5.6 ED WR as one relying on screw drive. Since go-karts are fairly small subjects, I shot both lenses at their telephoto position almost the whole time, trying to draw the action a bit closer. With the karts passing just 20 feet from my position, it made for a reasonably challenging test of continuous autofocus. Both the K-3 and K-5 were configured with the default Focus Priority, rather than release priority, ensuring the shutter wouldn't be tripped unless the camera believed itself to be in focus.
Just how fast is the Pentax K-3? Find out by clicking here
to see our full battery of rigorous, objective speed
and operation tests conducted in the IR Lab.
The lab vs. the real world. Going into the shoot, I wasn't really sure what to expect. Our lab testing had suggested that the K-3's phase-detection autofocus system was just a little slower to lock focus than its older sibling, likely because of the significant increase in the number of focus points. I hadn't really noticed any difference shooting side by side with my K-5, though. (Live view autofocus is noticeably swifter on the K-3, but subjectively the PDAF performance felt about the same, to me.) The difference in burst performance between the two cameras was subtle but noticeable with focus locked, but would there be perhaps be a bigger difference when the cameras had to focus (and confirm a lock) between frames?
A surprising result. As it turned out, the answer was a little surprising: Both cameras turned in about the same performance, at least in terms of capture rate. Regardless of whether I was shooting the K-3 or K-5, if I held the shutter button down and tracked a kart coming towards me down the length of the straight, either camera hovered at right around five frames per second -- occasionally a little more or less, but only by a frame or so. Of course, the K-3 has a lot more data to handle with each shot, so simply maintaining the same performance is in itself an upgrade, but it wasn't the added performance I was hoping for.
Once I got the photos on my laptop, though, it was clear that there was more to it than that. I sat down and figured out how many of my photos -- I'd shot a few hundred, between both cameras -- were in focus, nearly in focus, or out of focus. Here the K-3 had a clear advantage, especially when shooting with the 18-135mm lens. With my K-5 body, perhaps one in four burst shots with that lens was significantly out of focus, and around a third of the remainder were close, but didn't quite nail the focus. With the Pentax K-3, though, about 90% of my shots with the 18-135mm lens were in focus or very close to it, and for the great majority of those, focus was spot-on.
Not just that, but the K-3 was also better able to handle focusing on the karts as they got closer to my shooting position, where greater focus adjustments were needed between shots. Pretty consistently, I got an extra couple of in-focus frames with the K-3 at the end of each burst, where the K-5 was returning significantly defocused frames. So -- a clear win for the Pentax K-3 here -- even if it wasn't shooting any faster than the K-5, it was giving me more useful results.
How about screw drive? But that was all with the faster-focusing DC motor. What about my 50-200mm lens? I switched and had another go. This was an even greater challenge, given both the stronger telephoto and the reliance on screw drive AF. Subjectively, I didn't notice any difference in screw-drive performance between the two, but once I got the photos on my laptop it was clear that the K-3 still had an advantage, although it too was struggling now. Both cameras had a hit rate of about 40%, with perhaps another 20% of shots nearly in focus, but the K-3 again managed to keep up with focusing after the K-5 had surrendered.
So no real advantage in accuracy for the K-3 with my screw-drive zoom lens, but nevertheless, it got more keeper shots than did my K-5. And while both cameras turned in about the same burst performance after accounting for focus adjustment, the Pentax K-3 also did a much better job following moving subjects with my 18-135mm DC lens. That's enough for me to add this to the list of things swaying me towards a K-3 purchase.
Multi Auto White Balance. This is a new addition to Pentax's DSLR line, inherited from new parent Ricoh's compact cameras. In response to a reader request, I gave it a quick test and found the effects, while probably still worthwhile with difficult subjects, to be quite subtle. Essentially, the function aims to balance complex lighting from multiple sources.
To test it out, I set up a couple of scenes (one closeup, one rather wider), each with uneven illumination from a cheap fluorescent bulb on the left, and an incandescent on the right. Sure enough, the color is balanced a little better across the exposure when using Multi Auto White Balance mode, rather than standard Auto white balance.
If you often use fill flash to balance out sunlight, it could be quite handy, and it's a nice touch that Pentax lets you specify that flash exposures use Multi Auto White Balance through the Custom menu. I don't shoot a lot of portraits, though, so seldom wanted to use the function myself.
Auto White Balance |
Multi Auto White Balance |
|
|
|
|
The images above were lit with a fluorescent bulb on the left, and an incandescent bulb on the right. Although the difference is subtle, Ricoh's Multi Auto White Balance (right) does handle the differing light sources better than does the standard Auto White Balance function (left). |
Flash. Speaking of flash, although it's not significantly changed from that in my K-5, I did give flash -- both internal and external using my AF540FGZ strobe -- a try on the Pentax K-3. Exposures were reasonably accurate, and range of the internal strobe was plenty for typical subjects.
How much help will the Pentax K-3's pop-up flash be
in low light shooting? Click here for our rigorous
flash range and coverage tests conducted in the IR Lab.
And it's nice that Pentax's wireless flash system works with the internal strobe as a master, although I find it can sometimes make my subjects blink. (It communicates via extra bursts of preflash rather than radio, and with some subjects that extra flashing before the exposure is a problem.)
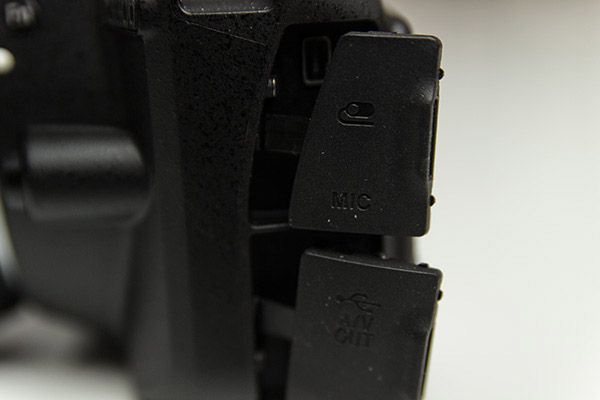
Video capture. One last feature I wanted to test before rendering my verdict on the Pentax K-3 is its video feature set, which has had a pretty radical overhaul. I was pretty pleased to see that Pentax has added a headphone terminal to the K-3, but didn't find it terribly useful for two reasons.
Audio issues. For one thing, my headphones of choice -- Sennheiser PXC 450 cans -- didn't work with the K-3 at all, even though they're well below the impedance required by the K-3. I initially wondered if perhaps the camera body didn't work with TRS (tip, ring, sleeve) connectors, but when I tried some Sony earbuds with a TRS connector, they worked fine. So, too, did some HTC earbuds with a TRRS (tip, ring, ring, sleeve) connector.
More of a problem, though, was that there's no volume control for levels monitoring, just for the audio you're recording. Even with the recording levels set to their maximum, sound on the headphone jack in record mode was extremely faint -- far too quiet to have any idea if the audio was clipping. If I immediately played back the video I'd recorded and dialed up the playback volume control, I could easily hear the audio, so the camera body is quite capable of providing sufficient output -- it just doesn't do so in record mode. That meant the headphone jack was effectively useless to me except for reviewing videos I'd already recorded.
|
|
The Pentax K-3 no longer uses mechanical image stabilization during video capture. Instead, it uses digital stabilization, and while it does do a fairly impressive job of keeping the scene steady, it introduces some unattractive distortions and artifacts. Above, you can compare an unstabilized video (top) with a stabilized video (bottom). |
Digital stabilization. In common with some rivals using sensor-shift stabilization -- and unlike its predecessors -- the Pentax K-3 disables its mechanical vibration reduction in movie mode, and relies solely on software stabilization. I gave it a try, but found it a rather poor substitute. Sure, the mechanical system made noises that could easily be heard in your movie's audio, but that could be resolved with an external microphone or audio recorder. Now, though, you're faced both with a focal length crop when using Movie SR, and with some artifacts of the purely software-based technique. These manifest themselves as distortions and a slight flickering that's very unsightly. I'd very much like to see the mechanical stabilization return as an option, if not the default.
Much better compression. That's the bad news. The good news is that the Pentax K-3 turfs its predecessors' inefficient Motion JPEG storage in favor of MPEG-4 AVC/H.264. In one fell swoop, file sizes have been slashed to just one-quarter of their previous levels, meaning I don't feel the need to re-encode every single clip when I transfer it to my PC, to cut down on storage consumption.
Finally, autofocus! And that's not all. With the K-3, Pentax finally delivers what it first showed us five years ago with the original K-7: autofocus during video capture. Five years ago, that would've been big news. Now, it's a commonplace feature in the competition, yet Pentax shooters have had to do without.
|
Five years after we first saw a prototype Pentax DSLR with the ability to autofocus during capture, the company has finally made the functionality available at retail. It's not the fastest we've seen, somewhat prone to hunting, and only allows single AF operations, but it's still a whole lot better than nothing for consumer videographers. |
Sadly, there's still no full-time autofocus in movie mode, just single-servo AF. It's also a bit slow, and the focus operation will sometimes rack all the way through the focus range, even though only a small change is needed. But for consumers, it's still better than nothing. (And if you don't like it, you don't have to use it, obviously.)
But on the plus side, with my 18-135mm DC lens there's relatively little noise recorded by the K-3's internal microphone. I'd imagine the same will be true with SDM lenses. You'll want to avoid screw-drive lenses, though, as the noise from these will very clearly be recorded.
|
|
Now this is cool: The Pentax K-3 can create 4K time-lapse videos in-camera. If you have a 4K display, you can see the full video (top) above. If you want to get an idea for the detail available in a 4K video but only have a Full HD display, watch a crop from the center of the video (bottom), saved at high quality using Adobe Premiere Pro CS5.5. |
4K video (with a twist.) The Pentax K-3 also adds a new feature: the ability to record 4K video. There's a catch, though: It works only in interval mode, creating 4K time-lapse movies. And likely due to lack of processing power, they're saved using inefficient MotionJPEG compression, rather than H.264. That means truly epic file sizes -- around 50MB/second, or three gigabytes per minute of captured video. You can set an interval time of anywhere from two seconds to to one hour, and the maximum duration varies depending on the interval.
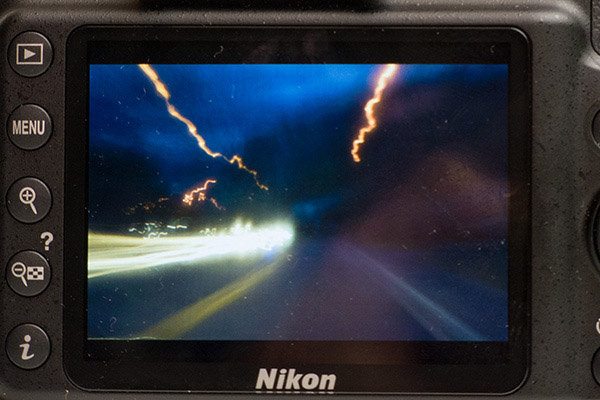
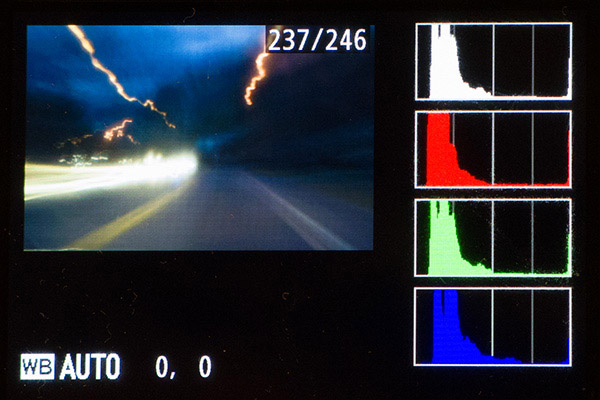
Although I don't have access to a 4K display on which to view the results, I did find the function rather fun. (And you can record at Full HD or HD resolution, if like me you lack a 4K display.) I used it to capture the somewhat clich�d clouds-rolling-across-the-sky that most every timelapse video contains, as well as to shoot a video while driving around town at night. I did find myself wishing for a shorter interval time, though -- something on the order of 1/2 to one second would've been ideal.
Although I couldn't watch the full 4K video without access to a suitable display, I was able to crop just the center 1,920 x 1,280 pixels from a 4K clip, and use that to judge image quality. The verdict: 4K interval movies shot with the K-3 have very good resolution, which isn't surprising considering that they are essentially a sequence of downsampled still images. I'm not entirely convinced that there's a use-case for 4K video at home, with the display sizes and viewing distances in the typical living room, but if you're 4K-ready you'll likely enjoy fiddling with interval videos of your own.
|
You can combine the 4K interval video capture with manual exposure, if you wish. Here, I set the shutter speed for a reasonably sharp exposure from a moving car at night, then cranked the aperture wide open and the sensitivity to the maximum available, ISO 3,200. |
My Flucard has the flu. One last thing I'd hoped to test with the Pentax K-3 was the Wi-Fi equipped Flucard accessory that enables remote live view and control of the camera. (And indeed, I did test it as far as was possible, using both Windows and Android devices.) Sadly, I had several problems that prevented a fuller review of the card's capabilities, and haven't been able to arrange a replacement of my review unit.
The remote live view feed has relatively little lag, and the Wi-Fi range is reasonably good compared to what I've seen from in-camera Wi-Fi on other models, as well as when using an Eye-Fi card. I was able to manage a distance of perhaps 50-60 feet with a wooden floor in between before the signal degraded to the point of unusability.
I was also able to adjust focus by clicking on a specific subject on the live view feed, and to trip the shutter remotely, taking a photo. And once photos were captured, I was able to view them at full resolution.
What I couldn't do, though, is adjust any other settings. The required controls couldn't be accessed on my laptop screen, and my ability to access the Flucard from any Android device was curtailed almost immediately that I first used the card.
Specifically, what happened is that I connected from a Google Nexus 10 tablet using Google's Chrome browser, then attempted to change the password as recommended on first connection. The password change didn't "stick", and on connecting to the card for a second time, I had to log back in with the default password. Shortly afterwards, I received a "400 Bad Request: Unsupported method" error, and from then on, the card simply didn't work with any Android device after the password was entered and accepted. My HTC One X+ smartphone, too, received the "400 Bad Request" error when logging in.
Subsequently, I was able to change the password from my PC, and this did "stick" -- the PC and Android devices had to use this new password to gain access -- but that didn't resolve the Android issue once signed in. Nor did the Reset Transfer Settings option in my K-3's menu system.
So... the long and the short of it is that the Flucard, as was, didn't work very well for me. While it showed promise, I also had stability issues. I'm hoping to revisit this accessory at a future date, as the Pentax 645Z -- which I'll be reviewing -- uses the same card. Once I get the chance to test it properly, I'll either update this review or simply point it to the relevant section in our 645Z review. Watch this space!
My verdict. And now, the moment of decision that you've all been waiting for: Will I be buying the Pentax K-3? I skipped the previous generation because it was too modest an update, but this time around, it's a clear step forward. Although the Pentax K-3 isn't quite everything I'd hoped -- most notably, it trails its burst-shooting performance claims -- it is certainly the most complete enthusiast DSLR I've ever used.
The already great ergonomics are now better than ever (save for the AE-Lock button location, anyway), and there's a quite significant step forwards in resolution, while retaining the previous camera's image quality in other areas. The new autofocus system stands head and shoulders above that in my K-5, and while I never had much trouble with that camera's metering system, the K-3 seems to perform a little better in this regard too. I love the fact that I can now shoot HDR without having to forgo shooting in raw mode. The addition of USB 3.0 connectivity and a second card slot are the icing on the cake.
I've started saving already, and I'll be buying a Pentax K-3 of my very own, just as soon as I can. Now, does anybody want to buy a second-hand Pentax K-5? ;-)
What's our final verdict on the Pentax K-3? Read our pros, cons and conclusion of our K-3 review online to find out! http://www.imaging-resource.com/PRODS/pentax-k3/pentax-k3A.HTM
---
Camera Review: Sony A6000, Shooter's Report, Part I
Getting Things Fixed and Heavenly Light
by Eamon Hickey
When I reviewed the Sony NEX-6 last year, I liked a lot of things about its performance and image quality, but I had some pointed criticisms of its usability. Those usability faults were important enough to me that when I decided to buy a mirrorless interchangeable-lens camera a few months later, I left the NEX-6 off my shopping list. I ended up buying its older brother, a Sony NEX-7, which I've used with reasonable happiness for the last six months or so.
Now comes the Sony Alpha 6000 to my doorstep, and the first question I had was: did Sony fix what I thought was broken in the NEX-6? I'll tackle that issue in this first installment of my shooter's report, and then explore the camera's performance upgrades in later installments.
The fixes. My Sony A6000 came with a standard kit lens, the E PZ 16-50mm f/3.5-5.6 OSS. I also got the new FE 70-200mm F4 G OSS lens, which I'll put through its paces in later installments. I've taken them on walks in the New York Botanical Garden, in Washington Square Park, and along the shore of Eastchester Bay.
One of my major complaints about the NEX-6 was that it did not allow you to separate autofocus activation from the shutter-release button. In fact, this by itself disqualified the NEX-6 from my shopping list last year.
Verdict? Completely fixed on the Sony A6000.
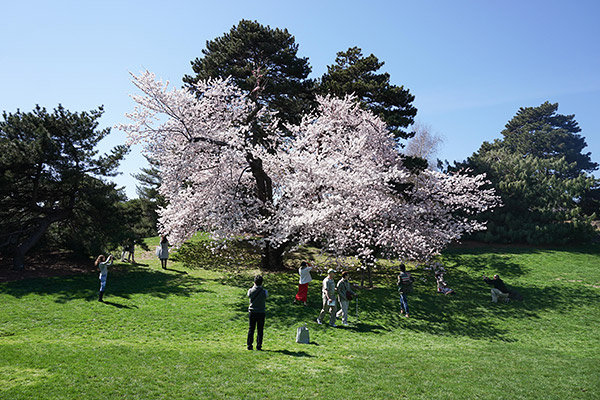 |
| E PZ 16-50mm F3.5-5.6 OSS, 25mm eq., f/8, 1/250s, ISO 100 |
Color rendition. A look at how the A6000 renders so-called "memory colors", like green grass and blue sky. [Brightened a touch from the original JPEG - click here for the original unedited file.] |
My cameras are always set permanently to shoot this way, so the Sony A6000 was ready to go when I spotted a tug boat/barge about to steam in front of some "heavenly light" on Eastchester Bay one morning. Using the AEL button I autofocused on the boat once, then re-composed with the light rays positioned where I wanted them and waited for the boat to sail into the frame. I shot a series of pictures as the boat moved across the frame, safe in the knowledge that the camera would not mistakenly re-focus on the background or a foreground obstacle every time I pressed the shutter. In this particular case, random re-focusing might not have ruined the picture since the boat was almost at infinity anyway, but the principle holds: many times you are better off not having the camera re-focus every time you want to expose an image. That's why I always separate AF from the shutter release, and why I'm delighted that the A6000 implements this so well.
I also complained about the autoexposure compensation system on the NEX-6. Well, to be exact, I called it "bafflingly dumb". It couldn't be accessed directly — it called up a separate display mode — and the live histogram disappeared when you were setting a compensation value.
Verdict? Completely fixed on the Sony A6000.
 |
| FE 70-200mm F4 G OSS, 105mm eq., f/5.6, 1/400s, ISO 100 |
Catching the Light. Heavenly light streaming down on Eastchester Bay. [Edited from the original JPEG - click here for the original unedited file.] |
Exposure compensation on the Alpha 6000 is directly accessible using the rear control dial, and the live histogram shows you what your adjustments are doing in real time. Fantastic! A complete no-brainer (most advanced live view cameras have worked like this for eons), but fantastic nevertheless. I used this when I happened upon a dog in Washington Square Park, evidently waiting with his luggage for the next train out of town. I had already noticed that the A6000's Multi-area meter tends towards underexposure, so I took half a second to spin the rear dial to +2/3 EV and got exactly the exposure I wanted.
Last year, I was equally baffled by the NEX-6's lack of user settings — the feature where a camera can memorize groups of settings that you program, and then quickly recall them when you need them.
Verdict? Almost completely fixed on the Sony A6000.
 |
| E PZ 16-50mm F3.5-5.6 OSS, 75mm eq., f/5.6, 1/500s, ISO 400 |
Traveling light. I like his taste in luggage. A quick +2/3 EV exposure compensation got this one right. |
Total Recall. With the Memory Recall feature, you can memorize three different sets of camera settings and recall them reasonably quickly. It does take a turn of the mode dial, then three button presses, which is why I say "almost" completely fixed. I used this feature when I noticed a guy dozing on the subway one day. I had pre-programmed a low light/high ISO setup for just this situation. It took me not much more than a couple of seconds to select it and shoot — not quite as fast as some other systems, but 90% of what I want.
My last, more minor gripe about the NEX-6 was that it lacked a one-button toggle between manual focus and autofocus. This, too, is completely fixed on the Sony A6000. I've got mine programmed to use the C1 button for this feature.
In essence, Sony has nailed every one of my major usability complaints about the NEX-6. From my point of view, this makes the A6000 a huge step up from the NEX-6 even before we talk about performance, image quality, or anything else.
 |
| E PZ 16-50mm F3.5-5.6 OSS, 75mm eq., f/5.6, 1/250s, ISO 6400 |
High ISO performance. Waking up from a nap on the 6 train in Manhattan. [Default noise reduction.] |
Other quick first impressions. I've shot more than 300 pictures with the A6000 so far, and as I already mentioned, one thing I've noticed is a modest but definite tendency for the Multi-area meter to underexpose. This is probably an intentional decision by Sony and not a big deal to me, but something to note.
I'll have much more to say about performance, but I've also cocked a skeptical eyebrow once or twice regarding how long it takes for the camera to turn on and wake from sleep, especially with the power zoom SEL 16-50mm lens. It's nothing egregious for an electronic viewing camera, but this is one area where there's room for more improvements.
I know that autofocus performance is on nearly everybody's mind with the Sony A6000. So far, I only feel comfortable commenting on single AF in good light, which is extremely fast and sure. As just one point of comparison, the A6000's S-AF in sunlight is functionally indistinguishable from the Nikon D4S that I am also reviewing right now. But single AF on stationary subjects in good light is the easy job. If you can't do that, you might as well switch to making vacuum cleaners. In the coming days, I'll be looking for erratic, fast-moving subjects, not located at infinity, moving towards the camera not parallel to it, using the 70-200mm lens wide open not at f/11. Then we'll get a feel for what the A6000 can really do.
 |
| E PZ 16-50mm F3.5-5.6 OSS, 75mm eq., f/5.6, 1/60s, ISO 400 |
Kit lens magic. A water lily in the New York Botanical Garden shows mid-ISO color and detail. |
Stay tuned for my next installment, and as always, be sure to add your comments and questions below. In the meantime, see more real-world sample images on our Sony A6000 sample gallery page.
---
Camera Review: Nikon D3300, Part I, II
Shooter's Report Part I: A welcome reunion
by Rob Taylor Case
|
Nikon 35mm f/1.8, f/1.8, 1/2000s, ISO 100
RAW processed with ViewNX 2
|
When I was about 12, I got a mid-range Nikon compact for my birthday. It had zoom and autofocus, it could print the date on the film and even had a little LCD screen with information I didn't understand on it! It was far better than my first compact camera that I'd been using for many years at the time, and the best camera I could imagine... Until it died, three days later. I replaced it with a cheap, non-zoom Olympus compact, and I never used Nikon again.
Until now. Twelve years later, I think it's time this dyed in the wool Canon guy gave Nikon a second chance. And so I find myself sitting here with a brand new D3300 entry-level DSLR next to my EOS 40D and T3i, tentatively prodding the back and waiting for it to explode.
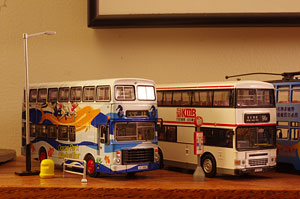
|
Canon T3i, Nikon D3300, Canon 40D |
I jest! It's actually quite a delightful camera. I'm coming at it as someone not only unfamiliar with Nikon controls and ergonomics, but actively accustomed to the opposite. Conversely, I'm also one of those people who can pick something up and use it immediately without instruction, just based on the practical foundations of UI/UX (user interface/user experience) design and technology itself.
|
Nikon 35mm f/1.8 @ f/1.8, 1/25s, ISO 400
RAW processed with ViewNX 2
|
Now that we have an understanding of my background, biases, and perspective, let's get started. First I'll share a list of observations and impressions about the camera, and then in part two of this shooter's report, I'll start to put it through its paces.
Adorable. Marginally more so than its predecessor the D3200, the Nikon D3300 is quite adorably tiny and weighs almost nothing, with or without a lens. It'll happily hand-carry all day around Disney World, Prague or a Burmese temple, whatever's more your thing. It's certainly subtler at school events than a D4S -- unless, of course, you get the metallic red version.
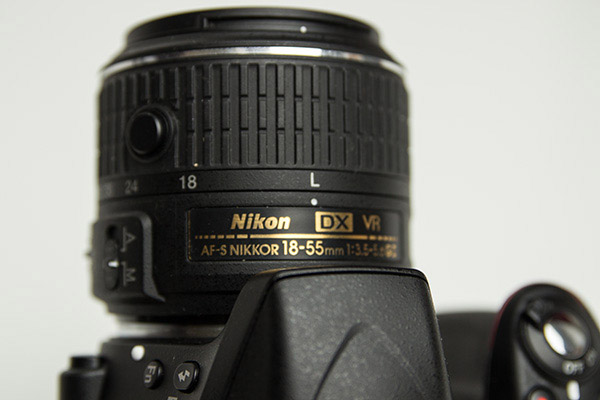
The diminutive body is bundled this time around with an equally diminutive lens, the Nikkor DX 18-55mm f/3.5-5.6G VR II. Like Nikon's mirrorless lens offerings, this new kit optic collapses in order to save on size in purses and daypacks. For this purpose it seems thoroughly useful, since space is almost always at a premium. It does increase the ready-to-shoot time a little, but if it's stashed in a bag anyway, I'm not sure this is a grave concern. Just don't expect it to be fitting in a point-and-shoot case any time soon.
|
Nikon's collapsing lens design allows for a dramatically smaller package when collapsed. |
Instead of the usual polycarbonate body over metal chassis construction typically found in a camera at the bottom of the ladder, the D3300 features a monocoque body made of carbon fiber-reinforced polymer. That means the D3300 derives its structural integrity not from an internal chassis, but rather the carbon fiber-reinforced shell. This allows for a more compact design that is both very strong and lightweight. I was really impressed that Nikon brought this technology from the more expensive D5300 to its entry-level DSLR.
|
The old polycarbonate over metal chassis on the left, the new monocoque body technology on the right. Illustration is for the Nikon D5300, but the construction method is the same.
Illustration courtesy of Nikon.
|
The high-tech body design and swishes that form Nikon's signature style combined to give the camera a bearing well beyond its price bracket. Nikon struck a home run in this department.
|
In this case, strength and beauty really are skin deep. Nikon does away with the metal chassis by relying on a carbon fiber-reinforced shell. Fortunately, they've kept the artistic spackling of yore. |
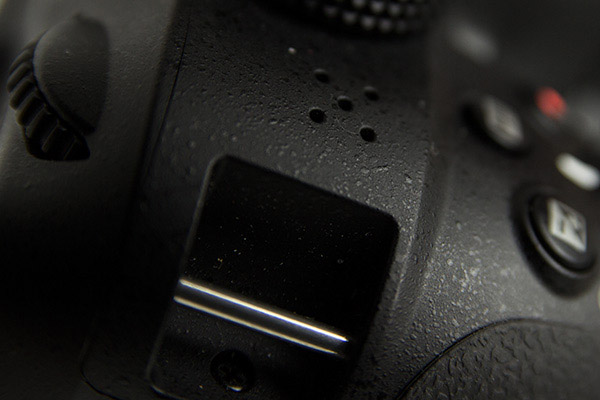
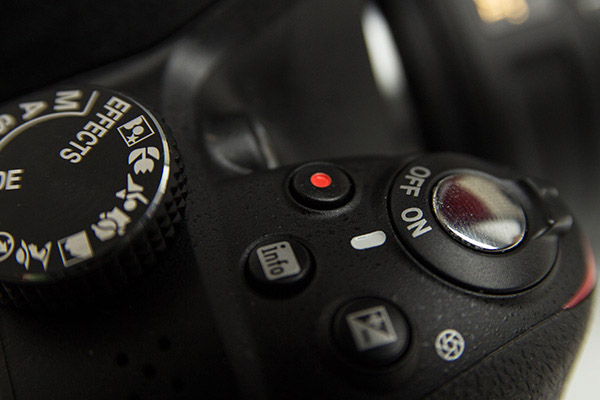
The Grip. The first thing I noticed about this camera in use was that the on-off switch is surprisingly low profile and slippery. Unlike the big slab of a power switch on my T3i, the Nikon D3300's is a fraction of the height and not especially grippy. While this is good for not-accidentally-turning-off, it wasn't quite as effortless to turn on as my T3i.
|
Burly, substantial On/Off switch from the Canon T3i.
Slim, protruding, reach-curl-pull-requiring On/Off switch from the D3300. |
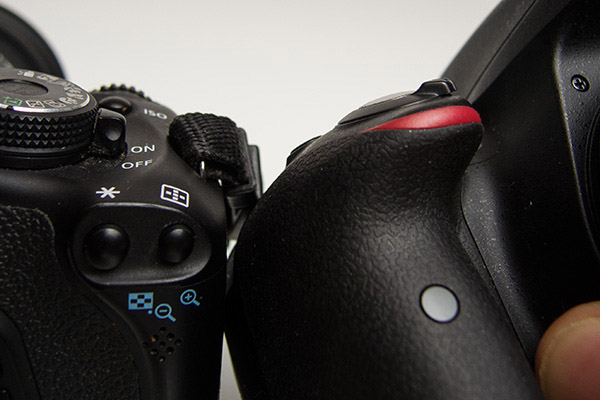
The grip itself is super-ergonomic and fits my hand pretty well, and while its slim, pointy design caused my fingertips to mash back against the body a bit, it would probably fit a slightly smaller hand perfectly. I found that the textured "leather" plastic of the grip and thumb rest was a little less grippy than on my T3i, though it's also a lighter camera, so it probably balances out.
|
Grippy D3300 on right, grippier T3i on left. |
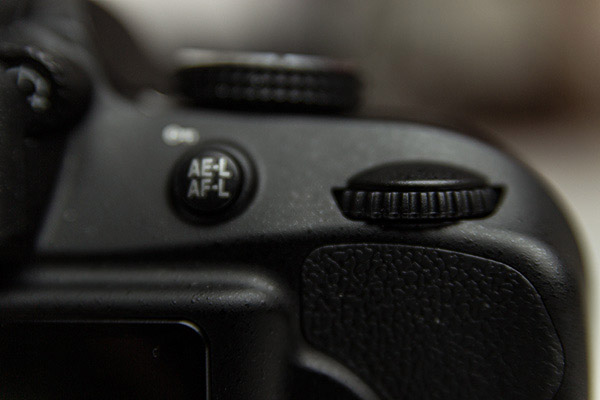
Control Wheel. This might only be of interest to brand-switchers, but since Nikon's shown their willingness to move controls around between generations, I'm looking at the ergonomics carefully. I'm not really a fan of the positioning of this wheel, honestly.
|
I wasn't thrilled with the positioning of the control wheel. |
I shoot with my left brow bone glued to the top of the viewfinder eyecup, and my right eye blacked out by the body of the camera, so the view through the camera becomes my entire world. The problem with the control wheel is that it's exactly eye-width apart from the viewfinder, and thus my thumb knuckle sticking out from the wheel position hits me square in my right eye. Considering how many people shoot Nikon every day without a problem, I tend to think this is just me. [Editors note: Rob's left-eye-dominant, while most of us at IR tend to bring the camera up to our right eye. While the issues Rob had with the control wheel positioning don't affect us, they're certainly salient for the left-eye dominant.]
As for the wheel itself: in manual mode, it's the standard setup of wheel for shutter speed, exposure compensation button + wheel for aperture, which seems fairly intuitive to me on single-dial cameras. So that's good news.
Display and Quick Menu. The LCD screen is very nice, adhering to what seems to be the modern standard of three inch, 921k-dot. It's bright and contrasty -- about all that can be asked for.
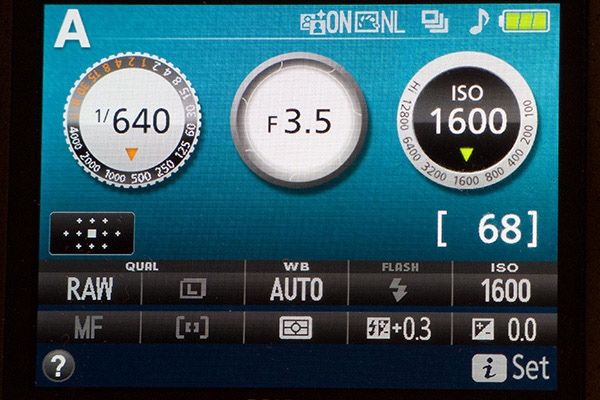
The default information panel is a little glitzy for my tastes, though the skeuomorphism is probably helpful for complete beginners to understand exactly what it is they're looking at and changing in software. I found the monochromatic menu 'theme' to be more to my liking, and there's also a 'Classic' option for a more textual display.
|
The default UI was effective, if a little glitzy. You can opt for a more pedestrian display format and alternate color schemes. |
As a geeky aside, the aperture animation actually uses a photographically accurate logarithmic scale, rather than showing a simplistic linear scaling as might be easier. A small detail for sure, but a welcome one.
|
'?' button and 'i' button pictured. Additional 'info' button not pictured. |
The quick menu is fairly solid, if a little on the small side. It gives quick access to all the usual controls that are otherwise typically under thumb or index finger buttons. Strangely, perhaps, there's no "Q" button, which might logically denote a quick menu. Instead, it's hidden in the "i" button. I assumed the cursive "i" is shorthand for "information," but in fact the information button is labeled "?" as a second function of the zoom-out playback button. As if that weren't enough, there's another button labeled "info." A small quibble from this brand switcher, but a change easy enough to get accustomed to.
Buttons and Layout. It may just be me being used to Canon, but much of the control scheme was unexpected. It's not only limited to the "i"-"?"-"info" strangeness above: the info button is, in practice, mostly just a "display on/off" switch which could be relegated to a shooting menu entry (for dark places) or even just a proximity sensor (to reduce distraction), though it does cycle through different display options in Live View mode.
Nikon hasn't traditionally offered a depth-of-field preview button on its entry-level models and the D3300 is no exception. Notably though, Canon does offer this on their diminutive SL1.
Like most recent DSLRs, there's no dedicated video mode on the dial. There's a record button next to the shutter release, which starts and stops video recording, but you need to be in Live View mode first. Otherwise, the record button does nothing. To snap a quick video, you'll need to turn the camera on using the switch in the front, then press the Live View button on the back of the camera, then press the record button to the left of the shutter. You can also abbreviate the process slightly by switching the camera on while holding the Live View button, but I found I preferred Canon's solution on the SL1: you get a wholly dedicated video slider as part of the on/off switch. Turn the camera on and to video mode, then press record.
As can be expected from the above, the video shooting menu is fairly lightweight, though it does offer 1080p60 video recording, which is quite exciting. I'll be testing that in a coming segment.
|
You get a dedicated movie record button, but you need to enable Live View first. |
The built-in flash release button also serves for internal flash exposure compensation, but only if you think to try holding it in conjunction with the regular EV-comp button, which started feeling like Photoshop keyboard shortcuts to me. This is also only available in TTL-flash mode, which is a shame, since a method to adjust manual flash power on the fly without going into the main menu would be quite nice. Of course, this is just the internal flash, so it's largely irrelevant: anyone using it is most likely shooting in automatic, TTL snapshot mode anyway.
|
This little guy doubles as flash exposure button when you hold it and the regular EV-comp button together. |
In playback, it might be logical to assume that the info button would provide information about the image you're reviewing. Sadly, it doesn't. You just get dumped back into shooting mode. Image info is actually, as I discovered accidentally, accessed with the up and down arrows on the directional pad.
|
Pressing the 'info' button here in playback mode dumps you back into the shooting mode. |
The focus/exposure lock button next to the control wheel can be customized to act as focus lock, exposure lock, both simultaneously, or used for back-button-focusing. Nikon's label on this button is certainly more explanatory than the arbitrary-feeling asterisk on Canon cameras.
|
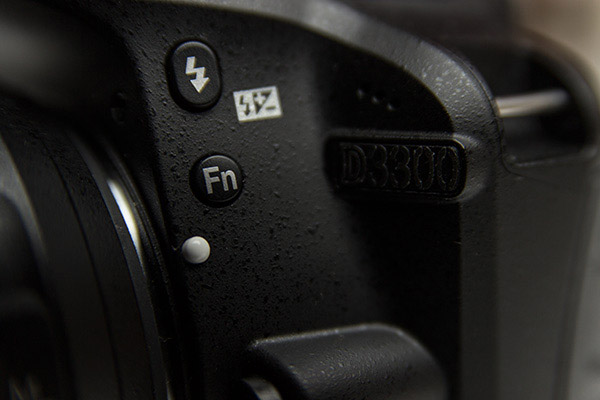
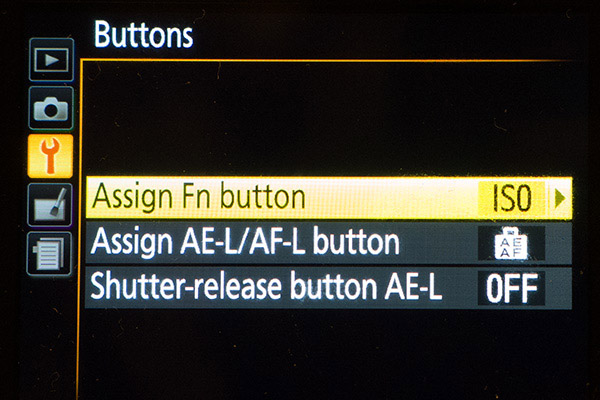
This little menu went a long way to easing my ISO-anxiety. |
The "function" button below the flash pop-up button is very useful and well placed. Rather than having to pull my eye away and my hand off the lens to get into the quick menu (accessed from the left rather than the right), I could adjust ISO on the fly by assigning it to this button.
One welcome advantage of the D3300 sensor relative to that in my aging T3i: restricting the ISO level isn't so strictly necessary, so I could shoot using auto-ISO without remorse. Give the great high ISO performance and the fact that the target demographic isn't scrutinizing noise levels at 100% crop, this could be used for any number of other things instead.
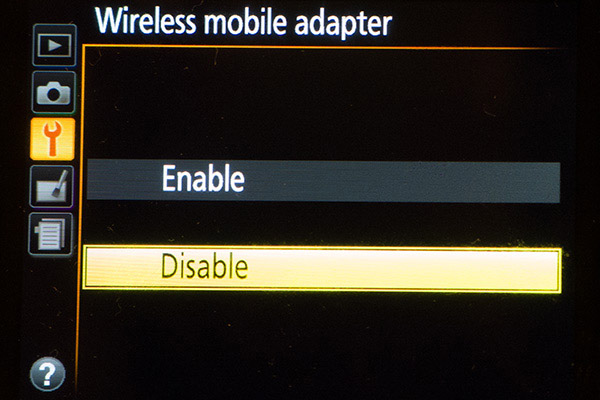
Wireless Services... are only available via an extra module. I found a "Wireless Mobile Adapter" setting in the setup menu, and got thoroughly excited, busted out my iPhone and went online to find out how to hook them up. Not possible. I would need the sixty dollar WU-1a module sticking out the side of the camera in order to send my images to my phone. (Or use an Eye-Fi SD card.)
|
Just because you see 'enable' as an option here doesn't mean the camera supports wireless out of the box. You'll need a special adapter for that. |
As you may have gathered, I wasn't particularly impressed by this lack of built-in Wi-Fi on a consumer camera. In today's instant-sharing online world, this seems like a serious oversight. While no low-end DSLRs offer built-in Wi-Fi, it would seem a no-brainer to include a $3 chip in order to give camera phone-upgraders the connectivity they're used to. For the school-and-vacations target audience of an entry-level DSLR, omitting a $3 Wi-Fi chip makes no sense to me.
If you want built-in Wi-Fi, you'll need to upgrade to the Nikon D5300 and Nikon actually does a better job here than its biggest competitor! If you want Wi-Fi in Canon-land, you'll have to jump way up to the 70D. Of course, Canon and Nikon's intention is to up-sell people and improve their margins, which is understandable. But the decision to defend margins in the DSLR world hampers competitiveness against mirrorless competition and disruptive technologies (cellphone cameras).
If built-in Wi-Fi, interchangeable lens capability and low price are your priorities, you might look towards the mirrorless world, where the excellent Sony A5000 can be had for $150 less than the Nikon.
|
As you'll read, the great sensor and lack of low-pass filter made for some great photos.
Nikon 35mm f/1.8, f/1.8, 1/2000s, ISO 100
RAW processed with ViewNX 2 |
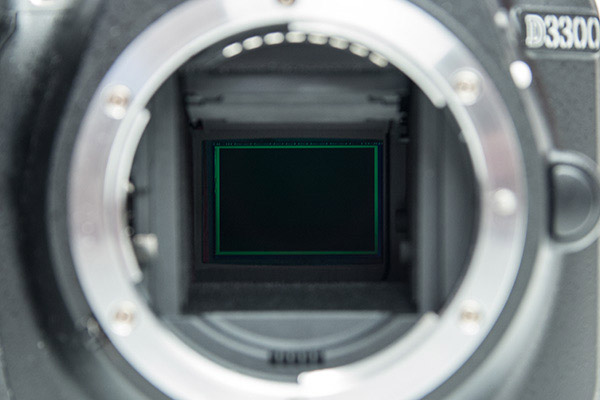
Sensor. Twenty-four megapixels on an APS-C chip. That's a serious upgrade over a smartphone! Not only that, but the sensor found in Nikon's low-end D3300 is superior in many respects to even some of Canon's higher-end APS-C cameras. That's because Canon hasn't meaningfully upgraded the image quality from sensors in budget cameras like the SL1 and T5i since the T3i, released in early 2011. That's a long time in the world of digital cameras and it shows in the image quality achieved by the D3300 in comparison to the SL1 and T5i. While the UI and control quirks of the D3300 sometimes threw this Canon shooter for a loop, the image quality of this pint-sized competitor was largely unassailable.
What's most exciting in the D3300, however, is that Nikon has removed the optical low-pass filter in order to maximize real resolution. That makes the D3300 perhaps the most affordable and beginner-oriented camera to do away with the low-pass filter. This is both very exciting and potentially problematic.
|
That sensor is probably the biggest reason to consider the D3300 over the T5 or SL1: great photos that are tack-sharp. It's also the biggest reason to think twice before recommending this camera to a rank amateur: moiré might rear its ugly head. |
Obviously, upgrading real resolution is a good thing, and filterless cameras have proven quite popular recently. But is it a good thing at the risk of moiré, something much more difficult to remove than the slight blur of an anti-aliasing filter? And, particularly, is this a practical idea on a camera targeted at consumers who may have never heard the term before? Moiré is big and ugly, and measures must be taken to prevent or reduce it. Full-time photographers are aware of this and can adapt accordingly, but those upgrading from compacts and smartphones may have a harder time figuring out why bricks and fabrics look terrible.
|
Sharpness and image quality are the name of the game for the D3300.
Nikon 35mm f/1.8, f/1.8, 1/4000s, ISO 100
RAW processed with ViewNX 2
|
On the other hand, for organic subjects like children and family photos, nature, landscape or macro work, sticking even a moderately sharp lens on the front of this body is going to be quite a coup. The extreme sharpness without the anti-aliasing filter and the ~13 EV dynamic range of the D3300 sensor at ISO 100-200 can produce some really stellar results. While the camera itself may lack features, the sensor certainly doesn't!
I'll see what can be wrung out of it (and if/when/how it artifacts) in a coming segment.
|
Nikon 35mm f/1.8, f/1.8, 1/4000s, ISO 100
RAW processed with ViewNX 2
|
Flappy Flap Hinges. A minor thing, but worth mentioning: rather than the simple rubber indentation that may be expected on a camera in this price bracket, the I/O dust flap hinges on the D3300 are elongated and slide. This means less fatigue on the hinge, and more room at the side of the camera to access the sockets. A nice touch, especially since the D3300 supports clean HDMI-out.
|
These are some rugged hinges. |
Rob's also already published his second installment of the D3300 Shooter's Report! Head over to IR to read about his experience with the kit lens and the autofocus performance, as well as some issues with the camera's controls.
-----------------------------------------------------------------------------------------------------
FEATURE: The end of onion-ring bokeh? Panasonic beats the curse of aspheric lenses
by Dave Etchells
No free lunch: Aspheric lenses mean onion-ring bokeh - until now.
Aspheric lens technology is part of the reason many modern photographic lenses are better in so many respects to models from 50 years ago. Lenses with aspheric elements inside have less spherical aberration and are considerably smaller than similar ones designed without aspherics.
As they say, though, there's no free lunch, and modern aspherics have brought along issues of their own, including something called "onion-ring bokeh".
Until now, onion-ring bokeh has been a more or less unavoidable consequence of using aspherics in certain parts of lens designs, but I learned on a visit to their main Yamagata lens factory in mid-February of 2014 that Panasonic has apparently beaten this problem. There, I met with Hirotsugu Yabuta, Director, Optical Devices Business Unit (the manager of the Yamagata factory), Kazutake Boku, Manager, DSC Business Division (Panasonic's head lens designer), and Koji Fujita, Imaging Team, Communication Group, Overseas Consumer Marketing Center (a member of their global marketing team, who served as translator, facilitator, and general ombudsman for my visit).
Without further ado, let's look at the story of aspheric lens elements, onion-ring bokeh, and the extent to which Panasonic has managed to beat it.
What is bokeh?
Isolating a subject by blurring the background and foreground is a very common photographic technique, helping to focus the viewers attention by removing distracting detail behind or in front of the subject. This works great if the blurred background has a nice smooth and creamy look to it, but if background elements are rendered poorly, that rendering can itself call undue attention to them and interfere with your enjoyment of the image.
|
Bokeh refers to how a lens renders out of focus objects. The shot above compares shots taken at f/22 (on the left) and at f/4 (on the right). This lens has fairly nice-looking bokeh. (Photo courtesy Paul van Walree, used with permission.
|
The way a lens renders out of focus objects is commonly referred to as bokeh. Bokeh (pronounced "BOH-kay", the "kay" part pronounced slightly chopped-off; short like "eh" in English, but with a bit of an "ay" sound to it) was derived from the Japanese word boke (暈け orボケ), which means "blur" or "haze." At least among amateur photographers, bokeh was once a largely Japanese concern, an obscure thing that the Japanese photo dilettantes worried about, but that most amateurs here in the US were hardly aware of. As photographers have become more sophisticated and learned from each other over the Internet though, more and more people have come to appreciate the blessings of beautiful bokeh.
What does bad bokeh look like?
Bokeh can go bad in a lot of different ways, and to widely varying degrees. You can end up with strange doubled lines, odd-shaped blur circles, hard edges, or even colored fringes around objects or colored rings around highlights, and the effect can range from mild to severe. The example above shows one type, so-called "Nisen" bokeh. Basically, any time you see anything other than smooth, creamy-looking (for lack of a better word) blurring of foreground or background objects, that's bad bokeh.
|
This is so-called Nisen bokeh, a form of bokeh so bad it has a name of its own! Nisen bokeh is when out of focus lines appear as multiple light and dark lines. In this case, the lines of the bicycle frames and wheels are doubled.
(Photo courtesy Paul van Walree, used with permission.
|
What is onion-ring bokeh?
One of the more pernicious forms of bokeh is so-called onion-ring bokeh. As the name suggests, the appearance is that of a spiral or series of concentric rings in out of focus highlights.
|
So-called Onion Ring bokeh is particularly distracting, causing concentric circles or spirals to appear in out-of-focus highlights. (Photo courtesy Paul van Walree, used with permission.
|
If you know a bit about optics (well, OK, maybe a fair bit), it's not too difficult to imagine how some kinds of bokeh arise, but what on earth is going on with onion-ring? What optical process or aberration could possibly produce a pattern like that?
As it turns out, onion-ring bokeh is the result of modern Precision Molded Optics (PMO) technology, a technique used to make aspheric lens elements. To understand onion-ring bokeh, then, we need to look at how aspheric lenses are made.
How to make an aspheric lens
Molded aspheric lenses have been one of photography's great technological developments of the last few decades, bringing dramatically improved lens performance at affordable prices. Aspheric lens elements help reduce spherical aberration and other optical problems in complex lenses, and let lens designers create better lenses with fewer elements.
Previously, aspheric lenses could only be created by a very exacting, time-intensive grinding process, that was ill-suited to mass production. As you might expect, this made aspheric lens elements extremely expensive. Because they were formed by a grinding/polishing operation, it was also difficult to make aspheric elements from high refractive index glass, which is generally much harder than conventional glass, and so would wear down the grinding tools quickly. Aspheric lens elements were first brought to practical use by Nikon, in 1968. (According to Nikon, at least.) Aspheric lenses became more common in the 1980s, but grinding was the rule of the day until 1993, when Nikon released their 18mm f/2.8D prime lens. (Again, this is based on Nikon's information in the link above; I welcome any correcting information readers might have, via the comments section below.)
Currently, aspheric lenses are most often made through a process called Precision Glass Molding or PGM, the results being called Precision Molded Optics, as mentioned above. With this approach, a high-precision mold is made of a very high-temperature alloy, with the desired lens profile carved into it in reverse. A rough-ground lens blank is then sandwiched with the mold and clamped under pressure, and the assembly run through through a carefully controlled sequence of high temperature heat treatments that soften the glass, allow it to conform to the shape of the mold, and then gradually bring it back down to room temperature.
|
Precision Glass Molding (PGM) was a breakthrough in the creation of affordable aspheric elements. This illustration shows a simplified version of the process; in practice, both the temperatures of the mold and glass blank and the force applied to them follow a carefully-controlled sequence, moving through as many as five temperature steps and several levels of force application. (Image courtesy Wikimedia Commons) |
Since the heated and therefore softened glass ends up replicating every last detail of the mold's surface, it's important that the mold have a shape as close to perfection as possible. The critical issue is thus how the molds themselves are created, and what artifacts that process leaves behind.
These days, most aspheric lens molds are created using a process called Single-Point Diamond Turning (SPDT), where a minute, incredibly sharp diamond tool is used to turn the desired profile on a nano-precision lathe. While SPDT can generate very precise profiles, the machines used to do this turning have a finite mechanical resolution, so the profiles generated will have very tiny steps in them. As the diamond cutting tool advances across the mold surface, these minute steps form either a spiral or a series concentric rings. Depending on where the aspheric element is in the optical formula of the lens as a whole, this spiral/ring surface pattern can cause the characteristic appearance of onion-ring bokeh. Basically, you're seeing an image of the sub-microscopic ridges on the surface of the aspheric element.
|
Single Point Diamond Turning uses a single-crystal diamond with an incredibly fine point on it, in an ultra-precision lathe, to produce fine optical surfaces. (Image above is from Moore Nanotechnology Systems, a US manufacturer of ultra-precision machining systems.) |
How big are these tiny rings or ridges? While I unfortunately can't share a copy of the image, Panasonic showed me a roughness profile of a mold made using only "stock" SPDT, and if I'm recalling correctly, the peak to valley distance in the graph was less than 100 nanometers (90nm is the size of an HIV virus, 80nm about a 1/6 of the wavelength of green light)
The concentric rings and surface roughness left behind by the diamond cutting tool in the SPDT process is what produces onion-ring bokeh, another example of which is shown below right.
While they were deliberately a little mysterious about exactly how it was accomplished (and asked me to do the same ;-), Panasonic has found a solution to this problem. The level of precision they've achieved in pursuit of this goal is astonishing: At the end of their production process, the final molds have a total peak-to-valley roughness of just 20 nanometers. That's smaller than the smallest viruses, and only about 1/25 the wavelength of green light.
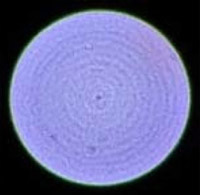
This is a process they developed over the course of about two years, but one I unfortunately have very few images to illustrate, given its proprietary nature. One stage of the process involves manual polishing of the molds. The small image inset right shows a mold being polished by a worker, which gives you a general idea what the setup looks like.
Panasonic was careful to say that this polishing step was only part of the complete process, and that other parts of the process are responsible for much of the reduction they've achieved in onion-ring bokeh, but I found the manual polishing step fascinating, nonetheless.
|
Panasonic has improved the end steps of their aspheric mold processing technology to greatly reduce surface roughness |
Prior to polishing, the shape of the mold is measured very precisely, producing a surface profile plot of the sort I mentioned earlier. The process from there was deliberately left a little vague by the Panasonic factory manager giving the tour (Mr Yabuta), but the general approach is that a computer analyzes the profile plot and spits out a map-like representation of the mold, showing how many "hits" of polishing are needed in what locations to produce the desired smoothing and shape adjustment.
The mold blank is then mounted on a spindle and rotated while a worker applies a small white pad with nano-fine abrasive on it to the spinning surface. Through long experience, these skilled workers have developed "calibrated fingertips," so their polishing "hits" will consistently remove the same amount of material. From what I saw, a single polishing stage might involve a dozen or more hits to make the necessary correction.
Several cycles of this polishing, combined with other proprietary improvements, result in a mold with the aforementioned 20nm peak to valley roughness.
From there, the mold is cleaned, coated with special extra-tough surface material to help it better withstand the rigors of the lens-molding process (the sputter vapor deposition step in the illustration above), and put into service.
Panasonic's refinements of the mold-making process have resulted in a very significant impact on the bokeh quality of their most recent lenses.
Panasonic provided the illustration above, showing the progress they've made in reducing onion-ring artifacts. The image on the far right shows where they started from, a couple of years ago. After a year of development effort, they reduced the onion ring effect to the extent shown in the center image. Finally, after an additional 6 months of work, they achieved the level seen on the left, a remarkable improvement. The final image on the left is an example of a lens made from a mold with a 20nm peak to valley surface roughness described earlier.
As you can see, there's really no sign of onion-ring bokeh in the final image above. Notably, this image is from the recently-announced Panasonic Leica 42.5mm f/1.2 DG Nocticron lens, so it's an example of what can be expected from Panasonic's advanced mold-making technology when applied to a real-world optic.
I don't know whether this advanced mold-making technology will be used to make new molds for existing lenses or not, but I do think we'll see little sign of onion-ring bokeh in Panasonic's new lens designs, going forward.
What might be even more interesting will be to what extent we'll see less onion-ring bokeh in the industry as a whole. It took Panasonic a bit under two years to develop their advanced mold-making technology, but it's something other makers could certainly develop as well, now that Panasonic has led the way.
What's more likely in the short term, though, is that other camera and lens companies may just purchase aspherical elements from Panasonic for critical applications. Panasonic already produces a huge volume of aspheric lenses for other manufacturers, and the people I interviewed for this article indicated that they would indeed sell aspherics made with this process to others ... for a price. In fact, it's interesting to speculate whether this is already happening or not; the 42.5mm f/1.2 Nocticron is the first Panasonic lens to take full advantage of this technology, but who's to say that other manufacturers aren't already doing so as well? Also, as the illustration above shows, the new technology was developed in two steps, the first taking a year, the second another six months. It wouldn't surprise me if Panasonic has already been supplying lenses of that first year of effort to other makers for a little while now.
Summary: The end of Onion-Ring?
This is all great news for photographers, of course, first for those using Panasonic's (or Olympus's) Micro Four Thirds bodies, that can use Panasonic's own lenses. Down the road, I expect it will benefit everyone, as other lens makers develop similar technology (unless portions are patented by Panasonic), and/or as other lens makers buy aspheric elements taking advantage of this tech from Panasonic.
(Be sure to check out the copy of this article on our site; readers have left some very interesting comments!)
Postscript:
I have more coming from my visit with Panasonic, as well as from my meetings with other camera and lens makers during my visit to Japan. Given the volume, the need to digest hours of conversation into something reasonably concise and coherent, as well as the current press of too-much-to-do here at IR, some of this could be a while coming. Stay tuned, though; if you're a geek like me, I think you'll find it interesting!
-----------------------------------------------------------------------------------------------------
QUICK HITS
-----------------------
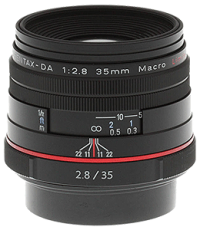
Lens Review: Pentax 35mm HD Limited Macro Lens Review: a high performance optic with classic styling
by William Brawley
Over at SLRgear, we continue our reviews of Pentax's updated HD Limited series, now with the Pentax 35mm f/2.8 Macro Limited HD DA review. As with the recently reviewed Pentax 70mm f/2.4 Limited DA HD, the "HD" version of the Pentax 35mm f/2.8 Macro Limited HD DA gets a modern update with Pentax's new High Definition coating, which aims to allow a higher light transmittance and more clarity, plus a slight facelift with a fancy red ring (as opposed to a green one).
Lens construction remains largely unchanged with a solid all-metal build with 9 elements in 8 groups and a slightly updated 9-bladed aperture diaphragm that's now also rounded. All this is designed into a very compact size with a cool, retro-esque look that's reminiscent of an old film SLR lens.
In terms of test results, the new Pentax 35mm f/2.8 Macro Limited HD DA performs admirably with very good sharpness with well-controlled distortion and vignetting -- though there is a bit of CA, especially in the corners. Of course, the big upgrade is the new High Definition (HD) coating, which as advertised does its job to minimize flare and boost contrast and saturation. The autofocus system also performed decently, though not as fast at the
70mm HD Limited we reviewed earlier, however, and the old-style screw-drive AF motor is a bit on the noisy side.
Jump on over to SLRgear to read our full Pentax 35mm f/2.8 Macro Limited HD DA lens review to see our test results and read our current verdict, which are based on RAW file output.
This updated compact macro lens is currently available in a black or silver finish and ships with a built-in metal pull-out lens hood, metal push-on lens cap, rear cap and soft case for a street price of around $746.95: Adorama: Black, Silver | Amazon: Black, Silver | B&H: Black, Silver. By purchasing this lens, or any other product, by clicking on one of our trusted affiliates, you help keep these reviews coming!
In the meantime, check out some sample photos shot by our senior lens technician Rob Murray. You can view more sample photos, plus download the full-resolution files, over at our Flickr page.
|
Pentax K-5: 35mm, f/2.8, 1/30, ISO 100
|
|
Pentax K-5: 35mm, f/13, 1/2, ISO 100
|
|
Pentax K-5: 35mm, f/2.8, 1/25, ISO 100
|
|
Pentax K-5: 35mm, f/5.6, 1/400, ISO 100
|
---
Canon G1 X Mark II - sample gallery images posted
by William Brawley
Canon's PowerShot G-series has always been a highly popular and stalwart series of compact cameras that cater to the enthusiast crowd and DSLR owners with pro-level features and controls. With the introduction of the G1 X back in 2012, Canon changed up the game a bit by packing in a larger-than-typical "1.5-inch type" CMOS sensor, which is significantly larger than those found in the typical compact camera. While the original was a little rough around the edges, the new G1 X Mark II aims to polish things up a bit.
Keeping a similar (but different) "1.5-inch type" CMOS sensor, the Mark II actually has a slightly lower megapixel count, plus an upgrade to Canon's latest image processor, the DIGIC 6, which should help not only with overall image quality but also speed and performance (the original G1 X was a bit on the sluggish side).
The Canon G1 X Mark II has been immensely popular with our readers thus far, and will soon be in the capable hands of one of our top reviewers, so stay tuned! In the meantime, head over to our Canon G1 X Mark II Gallery page to browse through our first batch of real world images.
Below are a few resized samples to get you started and give you a variety of shots in different settings, including one higher ISO image as well. In the gallery page you can access the full resolution images as well as the complete Exif data.
|
12.5mm, f/2.8, 1/500s, ISO 100
|
|
17.5mm, f/4, 1/1250s, ISO 160
|
|
12.5mm, f/4.5, 1/640s, ISO 160
|
|
12.5mm, f/2.5, 1/25s, ISO 3200
|
|
12.5mm, f/2.8, 1/64s, ISO 409
|
-----------------------------------------------------------------------------------------------------
NEW CAMERAS ANNOUNCED
------------------------------------------------
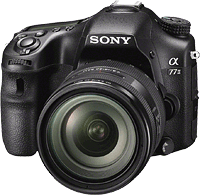
Sony A77 II reaffirms Translucent Mirror commitment with record-breaking autofocus sensor
by Mike Tomkins
If you've been watching Sony's ever-more-impressive mirrorless camera launches with concern, wondering whether the company's commitment to its Translucent Mirror camera line was wavering, you can worry no more. The Sony A77 II is here, and it makes clear that the company is still pumping development dollars into its fast-focusing DSLR camera alternative with a brand-new, record-setting autofocus system, among quite a few other changes.
The 24-megapixel Sony Alpha ILCA-A77 II's new autofocus sensor has more autofocus points than has any dedicated AF sensor to date, with a total of 79 points covering around 40% of the image frame. Of these, 15 points are cross-types, and the center point works at f/2.8. The new sensor is also more sensitive than before, able to work down to -2EV.
The new AF sensor is clearly the big news, but there are many other changes in the Sony A77 II. These include an improved electronic viewfinder and LCD monitor, an updated sensor that yields lower noise levels, and the latest-generation BIONZ X image processor. Sony has also made a huge increase in burst depth, switched to its current Multi Interface Shoe for external strobes and accessories, added wireless communications and tethered remote control, and gifted its new creation with uncompressed HDMI output.
Available from June 2014, the Sony A77 II will be priced at US$1,200 body-only, or US$1,800 with a 16-50mm f/2.8 constant-aperture zoom lens. Find out more in our hands-on Sony A77 II preview!
---
Leica T (Typ 701) preview: The Leica for the modern age is here—but where are the lenses?
by Mike Tomkins
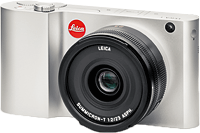
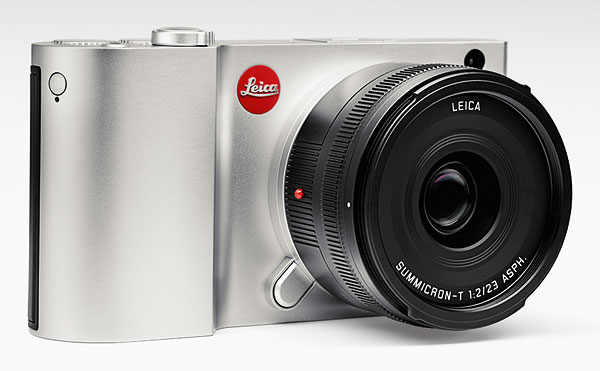
For most people, the Leica brand summons to mind two things: photographic excellence, and top-shelf style. The 16.3-megapixel, APS-C sensor-shod Leica T (Typ 701) is true to type, positively oozing both qualities -- on paper, at least. It's also quite a bit smaller than the company's rangefinder cameras, especially in terms of height, not to mention a whole lot lighter. And its attractive, Audi Design-styled body is milled from a solid block of aluminum -- a first for a camera, claims its maker.
But while Leica's designs are often called retro, the Typ 701 unashamedly bucks that trend. There's no rangefinder here: Instead, the Leica T accepts an optional electronic viewfinder. And while you still get twin control dials, there's also a touch-screen display -- and an unusually large one, at that. The Typ 701 even sports in-camera Wi-Fi wireless communication, although sadly there's only an iOS app. Android fans are, so far, left out in the cold.
|
The Leica T (Typ 701)'s body is machined from a solid block of aluminum.
|
The big news here, though, is the new camera's Leica T lens mount. It's a brand-new creation that -- while it brings Leica up to date, with electronic communication between camera and body -- may initially prove something of an Achilles' heel. That's because until early next year, there will be only two native lenses to choose from: one 23mm f/2.0 prime, and one 18-56mm f/3.5-5.6 zoom. There will also be an M-mount adapter, but this will of course mean focusing manually, even though you have an autofocus-capable camera body.
|
Got a while? Put your feet up and watch the Leica T get lovingly polished, start to finish.
|
In the US market pricing is set at around US$1,850 for the Leica T camera body. The first two lenses are priced at US$1,950 for the 23mm f/2.0 prime, and US$1,750 for the 18-56mm f/3.5-5.6 zoom. The electronic viewfinder accessory is priced at around US$600, and the Leica M-mount adapter is the most affordable item at US$400 or thereabouts. Although availability hasn't yet been disclosed, ordering will be possible from May 26th though Leica Stores, Leica Boutiques and select dealers.
For a whole lot more on the most modern Leica camera yet, read our in-depth Leica T preview!
-----------------------------------------------------------------------------------------------------
POPULAR ON THE SITE
--------------------------------------------
At http://www.imaging-resource.com/news you can keep track of the photo news on our main site. Among the most popular stories over the last couple of weeks:
- Fujifilm TCL-X100 review: Is this partner to the X100/X100S the new king of teleconverters? (http://www.imaging-resource.com/news/2014/05/02/fuji-tcl-x100-review-the-new-king-of-teleconverters)
- Canon SX700 HS Doubleheader: First Shots and sample gallery images posted(http://www.imaging-resource.com/news/2014/04/23/canon-sx700-double-header-sample-gallery-images-and-first-shots-posted)
- Samsung NX30 - First Shots from Samsung�s flagship (http://www.imaging-resource.com/news/2014/04/28/samsung-nx30-we-post-first-shots-from-samsungs-flagship-camera)
- Canon T5 First Shots posted - Time to compare Canon�s new entry-level DSLR to the competition (http://www.imaging-resource.com/news/2014/04/29/canon-t5-first-shots-posted-time-to-compare-canons-entry-level-dslr)
- Time-stack photo technique paints the sky like Monet (http://www.imaging-resource.com/news/2014/04/30/time-stack-photo-technique-paints-the-sky-like-monet)
- Anti-drone bill thrown out by Louisiana House committee (http://www.imaging-resource.com/news/2014/04/29/anti-drone-bill-thrown-out-by-louisiana-house-committee)
- A photojournalist�s Sochi, through a 4x5 view camera (http://www.imaging-resource.com/news/2014/04/30/a-photojournalists-sochi-through-a-4x5-view-camera)
- Sony World Photography Awards winners announced (http://www.imaging-resource.com/news/2014/05/01/sony-world-photography-awards-winners-announced)
- Wall Street Journal picks Flickr as the top photo-storage service (http://www.imaging-resource.com/news/2014/04/23/wall-street-journal-picks-flickr-as-the-top-photo-storage-service)\
- Lytro takes light field photography to the next level with the Illum camera (http://www.imaging-resource.com/news/2014/04/22/lytro-takes-light-field-photography-to-the-next-level-with-the-illum-camera)
----------------------------------------------------------------------------------------------------
NEXT ISSUE
-------------------
We'll see you next on May 16, with a regularly scheduled edition (and lots more news and analysis to share)!
SIGNOFF
--------------
That's it for now, but between issues visit our site for the latest news, reviews, or to have your questions answered in our free discussion forum. Here are the links to our most popular pages:
Newsletter Archive: http://www.imaging-resource.com/cgi-bin/dada-nltr/mail.cgi/archive/irnews
Daily News: http://www.imaging-resource.com/news
SLR Gear: http://www.slrgear.com
New on Site: http://www.imaging-resource.com/new-on-ir
Review Index: http://www.imaging-resource.com/camera-reviews
IR Photo Contest: http://www.dailydigitalphoto.com
Google + http://plus.google.com/+imagingresource
Facebook: http://www.facebook.com/imagingresource
Twitter: http://www.twitter.com/IR_Lab
Happy snapping!
Dave Etchells & the IR Editorial Team
nleditor@imaging-resource.com
|