A NEW DAY FOR PHOTOSHOP
Photoshop CS5 Preview --
'Abracadabra' Optional

By MIKE PASINI
Editor
The Imaging Resource Digital Photography Newsletter
Review Date: April 2010
Call it whatever you want -- Photoshop CS5 (officially), White Rabbit (its code name), Photoshop 12 (who's counting?) -- it's here. We've been playing with a Dec. 12, 2009 build for about a week on a unibody MacBook Pro. And it's such a fast combination, we finished this preview early enough to tell you all about it just as Adobe is announcing Creative Suite 5.
Sidebars
You may know quite a bit about it already, of course.
Adobe has been publishing a stream of videos showing off Photoshop technology "from the labs" for the last month or so, beginning with the Just Do It teasers from Photoshop Product Manager Bryan O'Neil Hughes. Bryan took an hour or so to chat with us about the new release late last month.
The JDI concept was borrowed from the After Effects team, he said. The idea was that Adobe programmers would take a week off from the tough stuff (like migrating to 64-bit code) to focus on the little aggravations. Tweak after tweak after tweak.
JUST DID IT | Back to Contents
The list, compiled from trade show feedback, forum entries, emailed suggestions and howls in the night when the moon wasn't out, started out close to 1,200 items. In twenty years, you pick up a little criticism.
The team folded that into 300 unique items and listed 50 as a priority (they had only a week, remember). By the end of the week, they'd resolved over three dozen.
They may seem like precious little things to lead a review with, but who hasn't (repeatedly) sighed over some quirk in Photoshop's interface, knowing there was (maybe in Lightroom) a better way?
This led to something as simple as popping up a dialog box the first time Mac users hit cmd-H to ask whether to Hide Photoshop with the command or Hide Extras.
Or a Straighten button on the tool bar for the ruler tool, so you can just draw a line across the horizon and click the Straighten button to rotate the image and crop it, too. That used to require (if you knew the trick) going to the Image Rotate command and choosing the Arbitrary option, which secretly knew the angle at which the line had been drawn. Unfortunately, at least on the build we were running, you can't Undo the Straighten command completely.
Or how about saving that Raw capture with 16-bit channels as a JPEG, automatically downsampling it to 8-bit channels so you actually can save it as a JPEG. If you didn't know you couldn't save a 16-bit channel JPEG before, you had no idea why JPEG was disabled in the File Save dialog.
Or take changing the opacity of more than one layer at a time. Now you can select a group of layers and adjust the opacity on all of them at the same time.
Or what about adding a layer style (say for a drop shadow) and fiddling around with the size and opacity and direction until it's just right. You have to recreate those settings to apply them again, but in CS5 there's a checkbox to make the settings the default option. That checkbox shows up a lot, too. Unfortunately, it won't travel with you to CS6 or another machine. Bryan confirmed the defaults are baked into the application.
Or what about just leaving the program with a bunch of files open? You have to close them one at a time or save them one at a time now but with CS5 you have the option to close or save them all at once.
Or just dragging an image file from the Finder to Photoshop to open it. It may have taken twelve versions but drag and drop is now supported.
There's more but you get the idea. As Bryan put it, whenever one of the programmers would pop into his office to ask if one or another fix should also do something else like support Smart Layers, he just said, "Yes."
Great as that is, we couldn't help but observe that it's necessary because Adobe doesn't release interim updates. We've been told it's an accounting thing, but these are just the kind of little fixes dot releases are made for.
THE PROTEIN | Back to Contents
OK, so where's the protein, you want to know. So far it's all vegetables. They're good for you, but you need protein to survive in this business.
That takes us to the end of our chat with Bryan when we asked him, our head swimming, what made the dramatic changes you'll see below possible. Was it, we wondered, just moving to 64-bit code? Was it GPU processing?
In fact this is the first version that ships for both platforms that includes both 32-bit and 64-bit versions of the software. You can install either, although our beta didn't offer an option.
That helped, he confirmed. The 64-bit version eliminates the 4-GB RAM ceiling (so there's no disk swapping with large files). A maximum of 32-GB RAM is accessible on a Mac Pro and well over 100-GB on a Windows PC. And 64-bit even speeds up day-to-day operations about 10-12 percent, he said.
But that's not all. From tight integration with graphic tablets (including tilt and swivel awareness with Wacom) and more pressure sensitivity to Smooth Zoom in and out with that marvelous Bird's Eye View introduced in CS4 (hold down the H key to zoom out to the full image view and move the navigator box showing the zoomed in area where you want to land), Adobe has tapped into the graphics processor to take the load off the CPU.
There's even a Configurator-built GPU Utility profiling tool to configure the hardware for optimal performance. We turned on the MacBook Pro's faster graphics performance (Energy Saver preferences) to enable its faster Nvidia GeForce 9600M GT GPU for Photoshop.
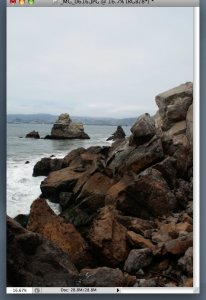
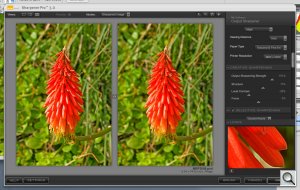
One-Click Level & Crop. A menu bar option straightens the image and crops it at the same time (mouse over image).
Then, too, CS5's system requirements leave older versions of both operating systems behind. Bryan said Photoshop CS5 will actually run on a netbook, but it seems to us you'd be missing some of the magic that a lot of RAM and a GPU bring to the party.
That magic includes features like Content-Aware Fill and Puppet Warp, which have been widely demoed recently. But it also includes less well-known features like the Mixer Brush that simulates mixing paints rather than averaging pixels. In fact, the painting engine is a complete rewrite. And the new horsepower also extends Content-Aware Fill to the Healing Brush, where it's particularly helpful with sensor dust. Selections and Masking all get beefed up with the new technology as well.
Our sidebar links to Photoshop-related videos by Adobe that highlight many of these new technologies.
We dove into Photoshop CS5 with a thumbdrive of our images to explore these features. So let's take a look at a few of them -- including a few we haven't even mentioned -- from the point of view of a photographer.
AUTO LENS CORRECTIONS | Back to Contents
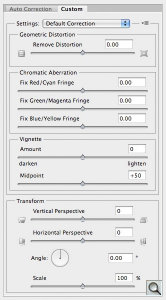
Lenses aren't perfect, whether you're using Canon's L glass or an iPhone lens. The faults are well known: distortion, vignetting, chromatic aberration. And Photoshop has had a Lens Correction filter (buried in the Distort menu under the Filters command). But it has largely been a manual operation.
One of the JDI projects was to move it out of the Distort menu where it could more easily be found directly under Filters. But Adobe didn't stop there.
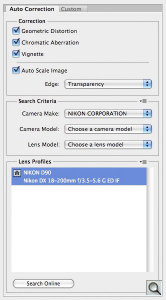
It realized if Photoshop just read the Exif header for the lens maker, the lens model, focal length and f-stop and looked up those variables in a database, it would know how to correct the image for distortion, vignetting and chromatic aberration.
In short, Adobe realized they could automate lens corrections. About as fast as our rollover example can illustrate them, too. The settings read from the image file can be seen in the top panel to the right.

Auto Lens Corrections. Distortion, vignetting, chromatic aberration all automatically (mouse over image).
What Adobe can't do, however, is build the database or profile for each lens. "We're going to lean on the community to generate the profiles that we don't have and allow them to make profiles of their own," Bryan said. You can quickly and easily get to share them directly from within Photoshop.
The mind adapts pretty well to slight lens distortions. It even finds them amusing. But in group shots the folks on the end may find the joke goes too far. And there's something about flattening the horizon that's always reassuring.
We weren't able to run the lens profiler but Bryan described the process. You print out a pattern from the profiler, take a few shots of it (not every focal length of a zoom lens, not every aperture) and the application reads the images to build the profile.
We've worked with programs like this (Acolens) and marveled not only at the complexity but also the difficulty of taking a well-composed shot of the target. It isn't easy. We wouldn't be surprised if this is a lightweight solution that will take a few revisions to evolve. We'll be trying it out as soon as it's available.
HDR & HDR TONING | Back to Contents
"We have completely reinvented HDR," Bryan told us. Adobe had several goals in mind. "We wanted to give you a quick and easy in-road to the feature, which you have in the File menu, in Bridge, in Mini Bridge and in Lightroom. We wanted to give you much easier control and a much more pleasing initial image."
Dynamic range is one reason photography is an art. Neither film nor sensor can capture the full brightness range of the scene you see before your eyes. A choice of what to capture is always made.
The High Dynamic Range technique composites images shot for the shadows and images shot for highlight detail much like the multi-exposure of scanner software. So it packs more detail in the shadow and highlights of an image, one or the other of which would normally have to be sacrificed.
The HDR style is another matter entirely. It can turn a bland bozo into a rock handsome dude (kick the Detail slider up). Or make a flat landscape glow with radiation.
To accomplish the technique, there were at first plug-ins like Optipix to composite bracketed stills into a single image. Then Photoshop got in on the act. And other companies like Photomatix devoted themselves to the process, carving out a niche of their own.
With CS5, Adobe has redoubled its efforts, making the HDR tool easier to use and more powerful at the same time.
Part of that new power involves solving one of HDR compositing's biggest problems: ghosting artifacts. If a subject moves before the sequence of shots completes, like a flag flapping in the wind, the final image will show a ghosted image. Adobe is able to identify the ghosted elements and simply avoid them in the final image.
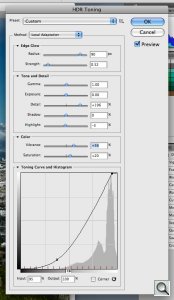
But wait. Why can't an HDR effect be applied to a single image? If it could, you could apply it to moving images. And CS5 does just that with HDR Toning. You can move from photorealism to surrealism with HDR Toning.
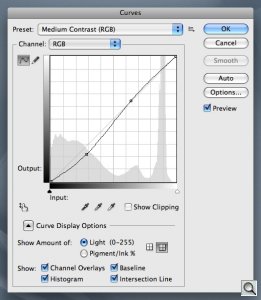
We manipulated a single handheld image taken from a digicam with HDR Toning. It was easy to make dramatic changes to both tone and color with the nine sliders and the curve tool provided in the dialog.
CAMERA RAW | Back to Contents
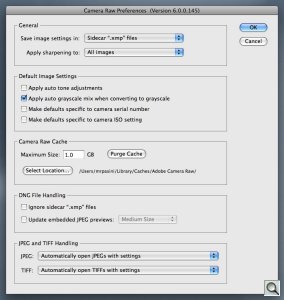
Our beta build of Photoshop CS5 didn't have the latest version of Adobe Camera Raw so we weren't able to test the new Luminance noise reduction feature, but Bryan gave us a peek.
ACR now supports over 300 proprietary Raw formats -- and it's still among the first third-party applications to support them, which is pretty important if you've bought a new camera.
It also brings its magic not just to Raw files but to JPEGs and TIFFs. That's particularly nice news for digicams with unbearable noise above ISO 400 or even just a photo taken by your cell phone.
ACR will let you know if you are opening an older image that has been processed with the original rendering engine so you can either maintain that result or process the image using the new code. "We've completely rewired how we convert Raw images," Bryan said.
If you update the processing, Bryan said, "you'll get better Raw demosaicing, better tonality, color, much better sharpness, superior noise reduction and things like additive grain and better post-crop vignetting."
Noise reduction was particularly impressive. See the Adobe video for a demo or download the Lightroom 3 beta 2 where you can tap into exactly the same noise reduction technology that can also preserve detail.
And not just to preserve detail, Bryan said, but to do just the opposite, softening detail in the image, just as clarity is often used not to punch up the midtones but to knock them down to soften skin tones. "I'll bet a lot of people end up using noise reduction in a slightly different way than we first intended," he predicted
Bryan said that additive grain isn't just a special effect to make the image look like a Tri-X film image. It can also be used to standardize two images you want to composite that were shot at different ISOs and have, therefore, different noise levels.
"We've made changes to Post-Crop Vignette to prioritize highlight detail or color detail," he continued. You can control the brightness of the lighter tones in the vignette area with the Highlights slider in the Highlight Priority and Color Priority styles rather than the Painting Overlay style. Prior versions just lightened or darkened the corners.
Lightroom users will find that not only do their images look the same but the controls are the same in Camera Raw as well.
CONTENT-AWARE FILL | Back to Contents
Content-aware fill is the poster boy for Photoshop CS5 but, like HDR, the more flamboyant applications of it have been getting all the attention.
You may have seen the figure removed from a stone wall only to fill the space with random not cloned stones. You may also have seen the seated figure under a tree before the tree was removed. Or the highway taken out a desert scene. Or a panorama whose irregular border was neatly filled out with credible foreground and sky where only the white background had been.
Those are all Adobe demos of content-aware fill.
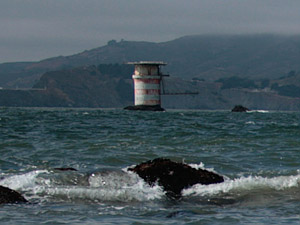
Content-Aware Fill. We just drew a loose selection around the lighthouse and hit the delete key (mouse over image). This is a very small crop from the larger image.
But it's also the new default mode for the Spot Healing Brush. The Healing Brush does a remarkable job of matching texture and color, a significant advance over mere cloning. But, as Bryan pointed out to us, it didn't do very well when it encountered an edge. It couldn't maintain the edge, blurring it, distorting it, ruining it.
With content-aware fill, however, the edge is maintained. That makes the tool our new favorite for removing sensor dust. Which should even appeal to image purists.
In fill mode where you draw a rough selection and delete it, it's great for handling lens flare and removing small items you don't want in the final image.
But how does this magic happen? What's the secret? How does it create stones and sky and desert?
"What's it's doing is looking all around the image and comparing it to the edge," Bryan explained. "It's making a whole bunch of guesses really really really quickly and it's comparing those against others. It's really a fast way of guessing what the rest of the image looks like."
We tried that on an Adobe black and white image and on a seascape of our own. On the Adobe image, we removed light fixtures from an exterior wall leaving no evidence of our theft. But we ran into trouble trying to take a chair. The background was simply too complex, with the chair falling partly in shadow. The chair was removed indeed, but the fill split between dark and light, rather than recreate the wall and doorway.
On our seascape of the Golden Gate, we wanted to remove Mile Rock Lighthouse. It was the only man-made object in the frame and because it was painted with a red stripe around it, it didn't go very well with the ocean, sky and cliffs. We drew a very loose selection around the lighthouse (as if we were working for ESPN) and hit the delete key. The result -- in just the blink of an eye -- was astonishing. The mountains behind the structure seemed to have been revealed not reconstructed.
Even if it hadn't been perfect on the first try, though, we could have reselected the problem area and run it again. Two guesses are always better than one.
So, we asked Bryan, is this an issue for image forensics?
Hany Farid, Dartmouth professor of computer science, has been working with Adobe to develop tools for detecting when an image has been doctored. And his technology, Bryan confirmed, can tell when content-aware fill has been used to alter an image. "We are synthesizing content, so under scrutiny you can figure out that it's been changed," Bryan said.
Farid's paper Photo Tampering Throughout History cites examples of ambitious retouching starting in the 1860s.
There are a lot of snapshots that could stand removing some protruding element that could not have been avoided at the time. In fact, don't be surprised to see this show up in Photoshop Elements. "We have a pretty good history of sharing technology between the two applications. That certainly goes both ways," Bryan admitted when we asked. "I will tell you we all talk to each other and we're all friends. There's certainly that possibility."
So from the casual photographer to the professional retoucher, content-aware fill represents magic that needs no secret incantation. Although nobody will blame you if you whisper, "Abracadabra!" while you hit the delete key.
PUPPET WARP | Back to Contents
"One of Photoshop's core competencies," Bryan began his discussion of Puppet Warp, "is manipulation." Liquify, warping, transformation all come to mind. But traditionally that has meant some sort of pixel math, the sort of thing any filter does.
Puppet Warp takes manipulation to a new level. Under the Edit menu, Puppet Warp lets you anchor parts of your image and move others in relation to the anchored parts. The anchors or pins can be rotated or made more rigid or more distorted and change layers but they don't work like Bezier curves with handles.
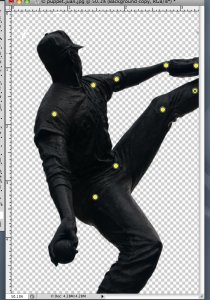
Adobe illustrates this feature by repositioning an elephant's trunk. We tried it with a shot of Juan Marichal's statue outside the Giants' ball park.
The first trick is to create a new layer with the element you want separated from the background. There shouldn't be anything but the "puppet" you want to manipulate on a transparent background. White won't do, it has to be transparent.
Once you're set up, you select Puppet Warp and mark the subject with pins to represent points around which elements of the image will rotate. For Juan, we pinned his two shoulders and the wrist of his gloved hand. We also pinned his angle, knee and hip to have a second element to move.
Then we moused over the wrist pin, saw the cursor change state and dragged the wrist up. The whole arm moved up just as if the statue had come to life.
We cut the opacity of the layer and turned on the original background layer and had a double exposure of Juan that made it appear as if the bronze could bend.

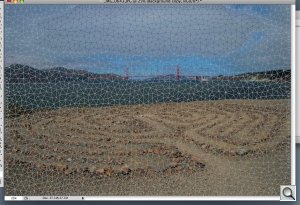
Puppet Warping Distortion. Our horizon was bowed, so we set a couple of points on either end and one in the middle we dragged down to fix it (mouse over image).
That kind of manipulation hasn't ever been possible before. But you don't have to be so dramatic to appreciate Puppet Warp.
It turns out to be one of the easiest ways to unbow a horizon, for example. Or straighten lines on a grid. No need to create a transparent background. Just set your anchor points and grab one to distort away the distortion.
We did it with an image of a maze near the Golden Gate.
And we found it a lot easier to use than Liquify or Transform. It's very quick.
SELECTIONS | Back to Contents
The Refine Edge command for selections to build masks has been around a while, too, but with the horsepower of modern computers, Adobe felt they could ask it to do more.
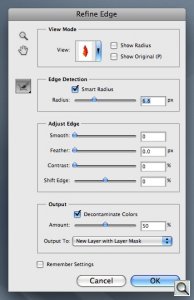
Refine Edge. Smart Radius, decontaminate colors, output options greatly enhance this tool. Note also the new 'Remember Settings' checkbox, which appears on many dialogs.
What everyone understands about masking is that it means drawing a line of indeterminate precision around subjects in the image to include or exclude what you want to work on. That's masking in about 20 words.
Drawing the line has always been painful. And many third-party solutions (Vertus Fluid Mask comes to mind) have been developed to anesthetize the poor retoucher. No solution can be perfect because there's always a gray area in any selection. But it could be a lot easier than penciling around someone's hair flying in the wind.
The new Refine Edge dialog uses your own image for the preview and an "entirely new underlying algorithm," Bryan said.
Bryan demonstrated the power of the new command with a photo of a cat he had drawn a selection on. The imperfections of the mask were familiar. To fix it with the new Refine Edge, he first widened the radius. Then he applied the Smart Radius command to invite Photoshop to examine the path and intelligently refine it, making it soft where detail is fuzzy and hard where it isn't. Finally he used a brush to touch up problem areas not by manually revising the selection, though. Instead, it was more like using a healing brush for selections. He was asking Photoshop to take another look at these areas.
Once you have a selection you can live with, what do you do with it? A popup menu provides a selection of popular output alternatives including a layer mask, new document, all sorts of things. "This came from watching users and seeing the next step. This really speeds up their workflow," Bryan explained.
And because so much more is known about the edge, the tool can also decontaminate colors by comparing the foreground to the background. Another time saver.
PAINTING | Back to Contents
Photoshop CS5 represents the first revision to the program's paint engine since Photoshop 7. That's five versions, if you're counting.
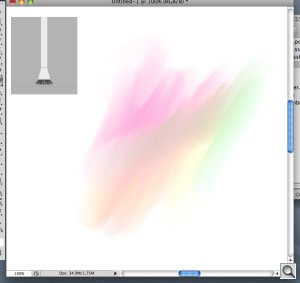
Mixer Brush. The gray inset box shows the status of the brush (here raised off the surface). We mixed a few colors on the canvas so you could see how the new paint engine blends them.
"When I first heard we were going to do paint features in Photoshop," Bryan said, "I was really excited because we hadn't done this since 7.0 and I thought of it as painting features for painters. But what was implemented is much more than that."
The new Mixer Brush tool displays a graphic representation of the brush position in an overlay on the document. It can show if the brush is pressing against the support, how hard and at what angle. And even what the rotation is (as you twirl it in your fingers) if you have the Wacom Intuos4 Art Pen that transmits rotation.
"That's all cool and it's powerful," Bryan continued, "but the shortcoming of Photoshop has always been that if I took green paint and moved it onto blue paint, I had green pixels over blue pixels." But if you do that in Photoshop CS5, you are "truly mixing the color." Take red and mix it with yellow and you don't have yellow over red, you have orange. "We're treating paint just like paint."
Sounds a bit like art class, no doubt, but let's shift into photographer mode. Your images become underpaintings. You can brush over them to create painterly effects, changing hue and texture.
This is probably a more direct and intuitive process than using a filter or an application like Synthetik Software's Studio Artist. It's more like fingerpainting, except you can reshape your fingertip into any tool you need.
Put this one in the fun column, although we imagine it might sell a few more portraits.
WORKFLOW | Back to Contents
We'll note three improvements to the CS5 workflow: Suite standardized tools, Mini Bridge and Workspaces.
Standard Tools. It's a small thing, but we noticed the tool icons are becoming standardized across the Suite at last. Photoshop is included in every one of the Suite bundles, so having a standard icon for a tool is one less distraction. The toolbar itself is a bit reorganized, too.
"They continue to be more and more consistent," Bryan said, "not only in the look and feel but in the behavior." Panels, iconography all are becoming standardized. "We have an underlying framework that supports all of our applications now," he said.
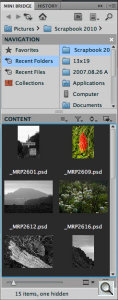
Mini Bridge. While Bridge itself picks up new Web Gallery options (like Lightroom's), Adobe realized switching applications to manage your files is a little like puddle jumping. "Some people just don't want to leave Photoshop," Bryan observed.
The solution was a new panel called Mini Bridge that puts much of the power of Bridge's file handling into a small window you can iconize to get out of the way and pop open when you want to browse your assets. It simply calls Bridge in the background so Bridge itself "never gets in the way at all."
Bryan ran his demo for us from it, searching for images, grabbing a handful of images to throw at the HDR tool or just opening another image rather than resorting to the File Open command.
Workspaces. Workspaces aren't new to Photoshop but Live Workspaces are. A Live Workspace can auto-save any changes you make to a workspace. So if you switch out of a custom workspace and back to your auto-saved workspace, everything will be exactly where you left it.
Workspaces are very flexible, working across multiple monitors and different orientations, and wiring common workflows to panels, calling up panels and tools with just a click of the mouse.
PLUG-INS | Back to Contents
Seismic Photoshop events like the move to 64-bit code naturally make us wonder whether our plug-ins will all need updates.
We tested our favorite indispensable plug-in, Nik Software's Sharpener Pro 3.0. Sharpening is an essential step in image editing and Sharpener Pro is the most intelligent approach we've found.
We installed the latest available version (3.004) and gave it a whirl. Everything seemed to work just fine, except for the buttons along the bottom of the dialog. Help, Settings, Brush, Cancel and OK just didn't work. We were able to work around OK but pressing the Return key. And Escape worked for Cancel.
So it looks like plug-ins may indeed need a revision, although this was an early beta of Photoshop CS5. We'll keep tabs on the issue, though, and report what we find out.
April 13 Update: onOne Software will "provide free compatibility updates for all of the current versions of our plug-ins," according to Craig Keudell, president of onOne Software. onOne products include Genuine Fractals 6, PhotoTools 2.5, PhotoFrame 4.5, Mask Pro 4.1, PhotoTune 3 and FocalPoint 2. The company promised the updates "within 30 days of Photoshop CS5 and Photoshop CS5 Extended availability" as updates from within each application or a download from the onOne site. Adobe has previously said Create Suite 5 will ship mid-May.
CONFIGURATOR | Back to Contents
We asked Bryan if Configurator was still alive and kicking and he confirmed it was. We were worried when we saw simple things like the Straighten button, which would be a candidate for a Configurator panel.
When we tried to load our CS4 Configurator panels into CS5, they didn't function. No surprise, really, since Configurator is version-specific, relying on the menu commands and tools of a particular version of Photoshop to do its magic.
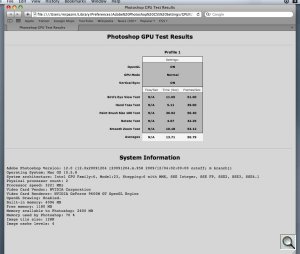
GPU Utility. The utility runs through a few tests to measure the effect of GPU processing on heavy-duty operations like Bird's Eye View and Smooth Zooming.
But we did notice that the included GPU Utility and the Watermarking panel are both Configurator creations. And Photoshop Product Manager John Nack has promised to show off "a new version of Configurator" at the 2010 Creative Suite Develop Summit in Seattle May 3-6.
We'll just have to wait for Configurator 2.0, which will allow you to embed video and Web content. Again, we'll be testing that one as soon as it's available.
PRICE & AVAILABILITY | Back to Contents
Upgrade pricing for the $699 Photoshop application is $199 for owners of CS4 Extended or Photoshop CS2-CS4 and $599 for owners of Elements 6-8 [W] or 4-8 [M]. An upgrade to CS5 Design Standard from Photoshop CS2-CS4 is $849.
Upgrade pricing for the $999 Photoshop Extended application is $349 for owners of CS3-CS4 Extended or Photoshop CS2-CS5 and $899 for owners of Elements 6-8 [W] or 4-8 [M]. An upgrade to CS5 Design Standard from Photoshop CS2-CS4 is $1,499.
Adobe has made a Flash-based Upgrade Eligibility Tool available to clarify specific cases as well.
The company said the suite will ship in all configurations within 30 days of announcement (April 12).
We didn't get a chance to test CS Live, a new feature that brings the Web to each application in the Suite.
CONCLUSON | Back to Contents
In his nearly 11 years at Adobe, Bryan said, "this is easily the most innovative release. We've borrowed from the advanced technology lab and we've leaned on our innovators here at Adobe more than we ever have before. Part of that is because we had a big mountain to scale with the 64-bit migration. We knew we were really going to have to get some help from our friends around here. And so you're going to see a lot of magic."
Magic indeed. But magic, we all know, isn't real. It's an illusion. And much of what Photoshop CS5 brings to the table is new tricks for photo retouchers more than for photographers.
At first glance, that is.
After Bryan's briefing, we attended a multi-speaker press conference covering the more of the suite (although not all the applications) and we also had the benefit of using an earlier beta for a week on a spry MacBook Pro. As we worked with the product our impression of it evolved.
The first thing we had to admit was that it was familiar. Despite moving a tool or two around and changing its icon, we were never lost. We immediately felt at home in the application.
Second, it was a smoother experience than it has been. Those JDI fixes matter. We didn't always know we were enjoying them (wasn't it always this way, we kept wondering) but we sure missed them when we went back to our current working version of Photoshop.
Third, new hardware and new software do make a difference. We gave up coffee to write this review. We had no time to make it and none to drink it either. Enabling the faster GPU was part of it. We weren't running the 64-bit version, but we can't wait to try it. We still saw a progress bar now and then but it only came up when the program was attempting the impossible. And it managed that pretty quickly.
Fourth, this is just one application in Creative Suite 5. We were not so much impressed as shocked by what Premiere can do (if you're shooting dSLR video, we advise you to investigate this further), especially with Adobe Story. Huge time savings such that a few UCLA film school professors asked Adobe if they could hide a feature or two from their students. It's like having a calculator instead of a scratchpad for your math test. Bridge, too, has evolved and Flash Catalyst (and to some extent InDesign) attempts to put a programmer in the box for those who only know design. Dreamweaver also impressed us with built-in support for Joomla, Drupal and WordPress, among others.
Fifth, there's a lot here for the photographer apart from the retoucher. Adobe Camera Raw, for one, processes Raw files with a new engine improving demosaicizing and adding improved noise reduction. HDR Toning opens the game up to images with subjects in motion and HDR processing is more powerful. The automatic Lens Correction function is to die for and you can profile your own lenses, as well.
Fifth, some of that magic is actually quite utilitarian. Content-aware fill may sound like a plot against realism until you realize it's a superior algorithm for removing sensor dust. You want it for that, at least. And the Spot Healing Brush taps into that magic, too, providing a level of blemish removal we expect to see on Dr. Oz.
Toss in 64-bit processing and a new Suite architecture and you realize the same sun may have come up 18-months after it came up for CS4, but it's a whole new day for Photoshop and the rest of the Creative Suite. What's for breakfast? That's what we want to know.
(A very special thanks to Joseph Pasini for his generous equipment loan, which made this review possible. -- MRP)
