NEW JPEG POWER
Living With
DxO Optics Pro
By MIKE PASINI
Editor
The Imaging Resource Digital Photography Newsletter
Review Date: July 2011
Some reviews take a long time. It seems like we've been working on this review of DxO Optics Pro for years. And, if we do the math (with some old calendars), we have. That's a credit to the product. It's a moving target.
Case Studies:
No sooner had we completed our review of DxO Optics Pro v6.5 than DxO let slip it was just about done with v6.6. So once again, we postponed publication to cover the latest, greatest features.
But these delays are not a reflection of Optics Pro's complexity. On the contrary, we've always found it straightforward. And its approachable interface makes it easy for anyone to plum its depths, unlike a few other sophisticated tools we could (and have) mentioned.
And Optics Pro is deep. It's also unique.
No other image editing software (the general class to which Optics Pro belongs) relies on sensor data to guide its default, automatic edits. And until recently no other product relied on lens data either. Adobe Camera Raw and Lightroom now make room for lens data, but it's not quite the same thing as DxO's lens data.
The advantage of DxO's approach is that you start your subjective image edits from an optimized image. In other software, you first have to tweak the corrected image before taking flight with it. Optics Pro knows what's wrong with the image based on the sensor and lens used to create it, makes the edits it knows it can safely make to correct the image and leaves the rest to you. It gives you something of a head start.
On the other hand, Optics Pro doesn't do a lot of things you may expect of an image editing program. There's no Print command, for example. And you can't remove red-eye.
So rather than thinking of Optics Pro as a competitor to Photoshop or Lightroom among image editing programs or as a competitor to Bibble or Camera Raw or Phase One among Raw file processors, we've come to think of it as competing with the image processor built into our cameras.
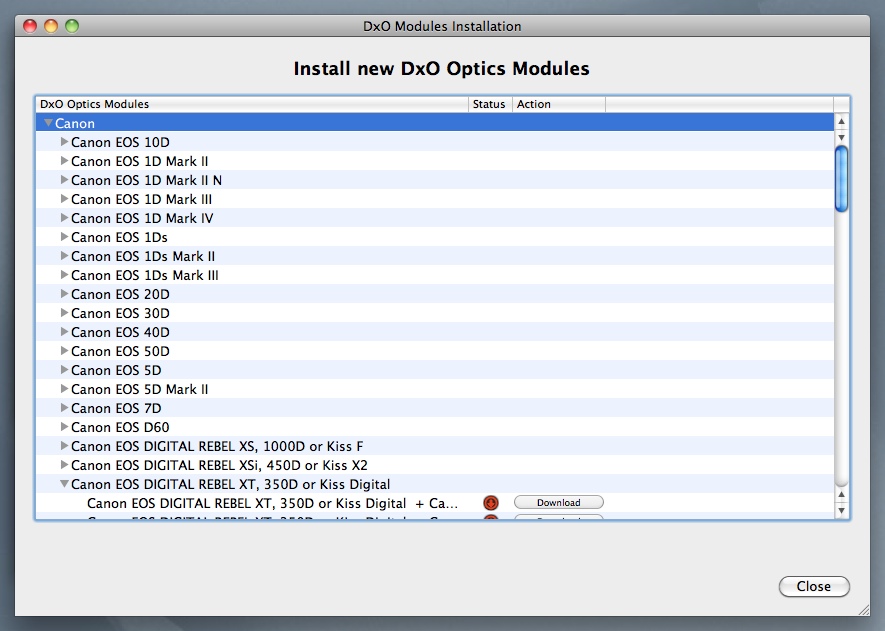
Module Installation. Check your gear on the list.
We're comfortable with that because all the cameras we use are supported by Optics Pro. DxO has released a flurry of Optics Pro upgrades in the last year (not reflected in the version number) to keep up with the new hardware -- just as it promised. And -- at least up to v6.5 -- you'd be wise to make sure your gear is supported before relying on it.
The latest version, however, brings many if not all of Optics Pro's power to JPEG images from any camera. You'll still be able to go further quicker with supported hardware (one of the key benefits of Optics Pro, after all, is that it knows the characteristics of the sensor and lens). But you can apply some of the new features to any image.
With supported hardware, you'll find as we did that Optics Pro does for your images what no other software can. To illustrate that, we've chosen a few case studies over the past year to discuss after a brief tour of the software. And we've added some unsupported JPEGs to show what you can do with unsupported hardware, too.
Optics Pro features include:
- Geometric Corrections. Correct distortions at the edges of the frame as well as vertical and horizontal perspective (see Case Study 2).
- Raw Conversion. While Optics Pro can convert your camera Raw files like Adobe Camera Raw, Bibble or Phase One, its conversion is specific to your camera sensor. So you can push the ISO and rely on it to reduce noise, render detail and hold color (see Case Study 6).
- Exposure Optimization. Optics Pro optimizes local and global exposure separately, enhancing local contrast in shadows and recovering highlight detail with single-image HDR processing, as explained below(see Case Study 3).
- Ease of Use. There are four basic steps to the Optics Pro workflow: Select, Correct, Process, Evaluate. While Optics Pro automatically optimizes each image, you can go a bit further with a helpful range of presets in addition to tweaking the various corrections applied to the image (or turning them off).
- A Personalized Interface. No learning curve, either. Just pick the effect you want or the correction you want to change. Hints are optionally displayed throughout the process and the workspace can be configured for different levels of expertise.
- Color Controls. You have complete control over color rendering, enhancing color brilliance, reducing it, adding a patina or transforming color.
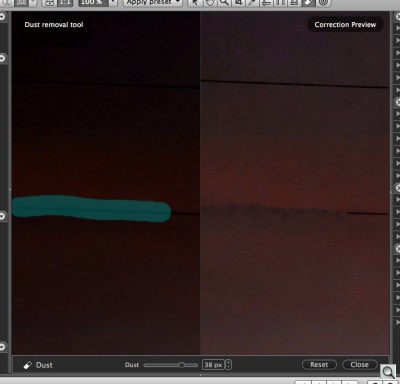
- Dust Removal. Set a dust correction on one image to be applied to all images processed in the current selection. DxO suggests this local correction feature can also be applied to remove telephone wires, but that wasn't our experience (see Case Study 1).
With the release of v6.5 last year, a few new wrinkles were added. Those include:
- Single Shot HDR. Accessed via HDR Presets, this feature lets you see detail in blocked shadows and recover blown highlights in a single Raw or JPEG image file, making it applicable to moving subjects (see Case Study 6).
- New Raw Converter. The new converter enhances noise reduction, especially useful when you can only capture the shot at high ISO. The company claims the improvement is significant not just between ISO 400 and 1,600 but even up to ISO 100,000 (see Case Study 3).
- More Optical Modules. Late last year as production surpassed 2,500 Optics Modules, the company announced it would increase the rate of production "to achieve 5,000 modules by the end of 2011." Updates this year have been fast and furious as a result.
- Revised Interface. Version 6 is friendlier to beginners without bottling up previous owners. Workspaces are configurable by the user to display controls as First Steps, Essentials, Power User, etc. Lightroom 3 integration is better, as well.
- More. Other improvements in the latest release include manual optical corrections where there is no DxO Optics Module available, expanded library of processing presets, a First Steps Assistant to guide you through the workflow, automatic Project saves in Windows, improved Projects window, automatic download and installation of DxO Optics Modules.
And with the recent release of v6.6, Optics Pro now features:
- More control over noise in the JPEG images of supported cameras with a newly-extended range of the chrominance noise slider (see Case Study 5).
- Noise can be manually reduced from JPEG images taken with any camera. With this new capability, all corrections available for supported equipment are now available in manual mode for any unsupported equipment.
- A new color control slider has also been added to preserve the depth and colors of objects with certain saturated colors.
Finally, DxO FilmPack has been upgraded to v3, increasing the number of film simulations from 50 to 60, reproducing the style, color and grain of familiar silver halide films from Fuji Reala to Polaroid to Tri-X. It's the only way to "shoot Kodachrome" now, too. And you can even mix and match the effects. FilmPack works as either a standalone application or an Optics Pro and Photoshop plug-in.
We'll review FilmPack 3 separately.
SYSTEM REQUIREMENTS | Back to Contents
In general we found Optics Pro's hardware requirements on a par with other demanding image applications like Photoshop and Lightroom.
Our earliest attempts to run it were on equipment that was minimally supported while our latest were on equipment that exceeded the recommendations. Even on the latest equipment, though, Optics Pro's batch processing, key to its work flow, got the fans whirring.
Running in 64-bit mode to access more RAM and tapping into the GPU for processing are two keys to improved performance in Optics Pro.
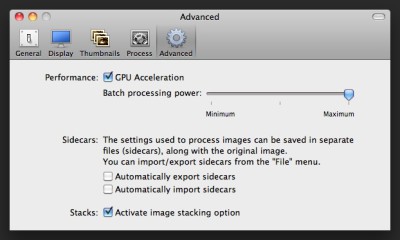
Advanced Preferences. Note the checkbox for GPU acceleration.
General requirements for Optics Pro include:
- 400-MB available disk space
- 2-GB RAM minimum
Windows System requirements:
- To process Raw images larger than 20 megapixels, a 64-bit operating system with 4-GB RAM is strongly recommended
- Microsoft Windows XP 32 or 64 bits, Windows Vista 32- or 64-bits, Windows 7 32- or 64-bits
Windows installation notes:
- In general, install the latest Microsoft updates for Windows before installing any application.
- If not present, the .NET 4.0 Framework will be installed and will require a reboot.
Macintosh System requirements:
- Intel-based Macs only
- To process Raw images larger than 20 megapixels, 3-GB RAM is strongly recommended
- Mac OS X 10.5 or 10.6 only (until 10.7 is released, anyway)
Camera system requirements:
While Optics Pro will open and process any JPEG image, it does so with greater authority if your camera and lens combination is supported by the application. And for Raw processing, that's even more true.
You can find a list of compatible equipment (http://www.dxo.com/us/photo/dxo_optics_pro/for_your_equipment) and learn more about your camera and lens combination at DxO Mark (http://www.dxomark.com), the company's free online resource for lens and camera image quality data.
OPTICS PRO WORKFLOW | Back to Contents
Optics Pro launches with an optional dialog box asking you if you want to continue with the launch, look for new modules, view the online help or import an old project. Those options are available from the Menu bar as well, so it won't hurt to disable the box.

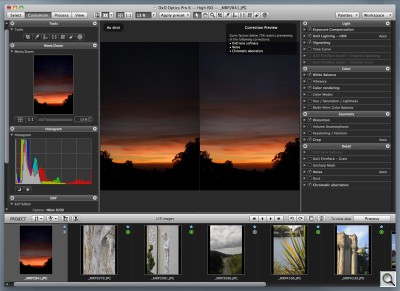
Four-Step Workflow. Select, Customize (edit), Process, and View.
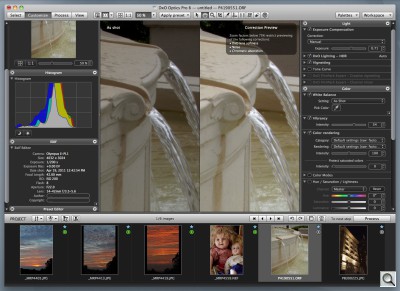
The application uses one full-screen window with four panes plus a toolbar. In addition the First Steps Wizard optionally guides you along in a popup of its own.
There's a left dock and a right dock framing the main image window. Below them is the Project pane with a toolbar of its own, which can be undocked to float freely.
Projects are simply collections of images you select from various sources. Selecting them is the first step in the workflow.
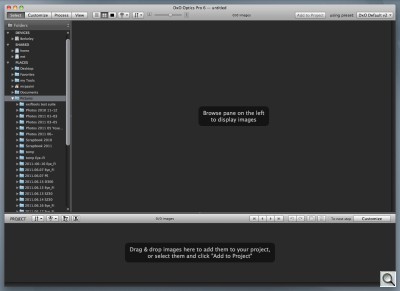
Select. The toolbar has four buttons that navigate the Optics Pro workflow: Select (the default at launch), Customize, Process and View.
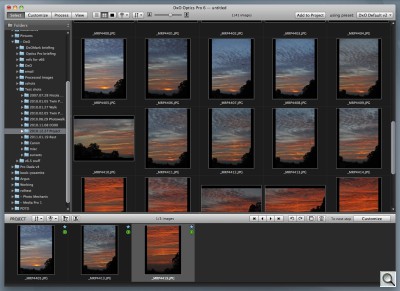
You select original images from a variety of sources including Lightroom catalogs, other Projects and mounted media. These sources are shown in the left-hand panel in a familiar tree display. A popup at the top selects between Projects, Folders and Lightroom catalogs.
As you navigate the sources, thumbnails are displayed in the large middle pane. From the toolbar, you can adjust the size of the thumbnails, change the sort order and filter file types.
We were surprised when we weren't able to see our DNG files in the Select module. It's been our preference to convert Raw files to DNG on import from the card, discarding the original Raw files in most cases.
But the Paris-based company explained it only "supports Pentax and Samsung cameras with DNG. Others are not supported because the policy in the past has been that the DxO Optics Pro software will not process files that come from other software due to information such as speed setting, aperture, type of lens, that they can't rely on. To support those would require additional coding, using development resources that DxO cannot fully support at this time due to other priorities."
So if you convert your camera Raw images to DNG, Optics Pro won't be able to process them. You'll need the original camera Raw files.
It's an odd limitation certainly, particularly since Optics Pro supports DNG as an output format.
To add an image to your project, you simply drag it to the Project pane. You can sort the images there, rotate them, filter them and continue to the next step Process.
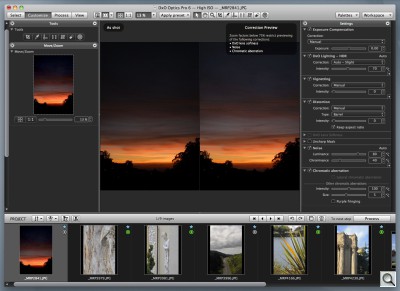
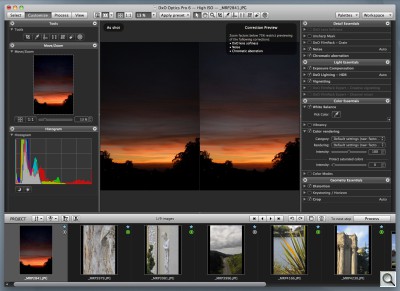
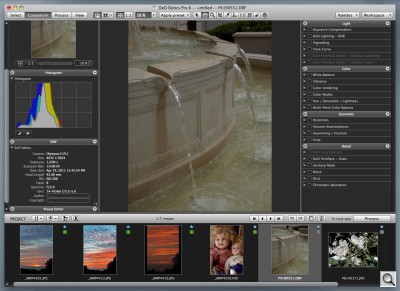
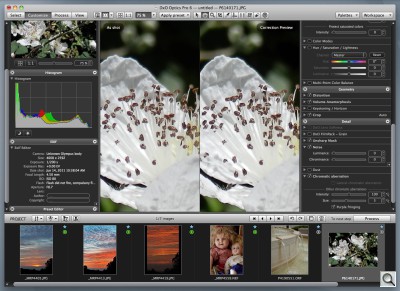
Customize. In the Customize module (where you do your image editing), the left and right panels show various tools and settings depending on the Workspace setting in the main menu bar. The large middle pane shows the image selected in the Project pane.
Three workspaces are installed by default and you can configure your own as well. The three set the right and left panes:
- First Steps shows the Tools and Move/Zoom palettes in the left pane and the Settings palette in the right pane. Settings includes: Exposure Compensation, DxO Lighting - HDR, Vignetting, Distortion, DxO Lens Softness, Unsharp Mask, Noise and Chromatic Aberration.
- Essentials adds the histogram palette to the left pane and reorganizes the right pane into Detail Essentials (DxO Lens Softness, Unsharp Mask, DxO FilmPack Grain, Noise and Chromatic Aberration), Light Essentials (Exposure Compensation, DxO Lighting - HDR and Vignetting), Color Essentials (White Balance, Vibrancy, Color rendering and Color Modes) and Geometry Essentials (Distortion, Keystoning/Horizon and Crop).
- Advanced User adds the Exif palette and a Preset Editor palette to the left pane and reorganizes the right panel. The right panel displays palettes for Light (Exposure Compensation, DxO Lighting - HDR, Vignetting and Tone Curve), Color (White Balance, Vibrancy, Color rendering, Color Modes, Hue/Saturation/Lightness and Multi-Point Color Balance), Geometry (Distortion, Volume Anammorphosis, Keystoning/Horizon and Crop) and Detail (DxO Lens Softness, DxO FilmPack Grain, Unsharp Mask, Noise, Dust and Chromatic Aberration). Additions are in italic.
As you can see, you can select any combination of palettes, group them however you like and rearrange the order to suit just by dragging and dropping them. You can also dock any of them in the right or left pane. And you an create your own palette, too. If you have too many to display at once, a double click on the palette title bar collapses it.
Presets. It's getting hard to find an image editing application or even a plug-in these days that doesn't offer a set of presets. And with good reason. Presets in the Customize module instantly apply a range of edits to create a specific look.

Normal. Here's what we started out with after straightening the horizon and before applying any of the presets below.
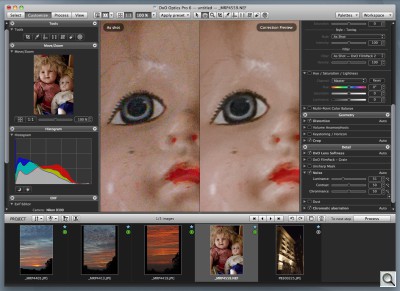
You can set the view for that image to toggle between the original image and the corrected one or to show them side by side. But as soon as you select an image for display, Optics Pro automatically corrects it. Unless you make an effort, you are addressed to the corrected preview.
In some cases, we preferred to view the corrected image alone because we wanted to make adjustments to some of the settings. The original didn't have much significance in that situation.
But often when evaluating the automatic correction it was helpful to refer to the original image. In that case, we preferred to see a side-by-side display. And to get the most from that approach, we preferred a 100 percent rendering of the image. Below 75 percent, the softness, noise and chromatic aberration optimizations Optics Pro makes are not detectable on your monitor -- and Optics Pro reminds you of that salient fact.
But it is just a preview. Nothing happens to your original in Optics Pro. All the corrections and subsequent edits are not written back to the original but processed on a working copy that is then exported in any number of formats (and more than one at a time, if you wish).
Before processing the corrections and edits, however, Optics Pro provides a healthy selection of recipes or formulas for different looks or styles under a preset menu on the toolbar.
Some presets are only available for Raw files. But a large number of them can be applied to JPEGs. In v6.6, we applied Black & White, Old Postcard, Vivid, and HDR Effect. The thumbnails below show just the default settings.
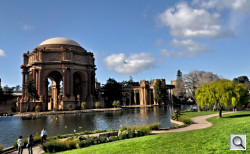
Process. Once you've corrected and adjusted your set of images, you batch process them. Optics Pro really cranks through them. It's the one application that can turn on fans, although processing a single image doesn't always call for that. It took 1:12 to process the image of the dolls but 0:35 to turn a JPEG of the Palace of Fine Arts into a postcard.
Because it's a batch, you can walk away or switch to another process while it's working. The other main advantage, of course, is that your edits in the Customize module are instant. So you can get your work done without delay and then do the processing later when you need a break.
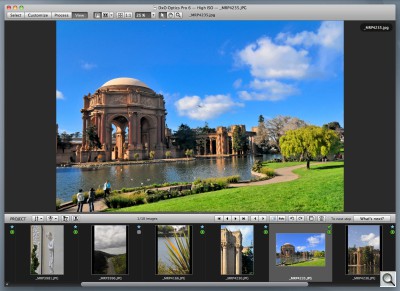
View. The View module shows you the processed image but it can also upload it to Flickr (after authorization). You can also return to the Customize module to further refine the image.
CASE STUDY: LOCAL CORRECTION | Back to Contents
Optics Pro isn't strong on local edits. While there is a Dust Removal Tool, we had no success using it to obliterate electrical wires from a sunset. It's more of a spotting brush.
As DxO explained it to us, "The Dust tool is not a cloning tool like Photoshop or Lightroom, but it's more of a 'filling' tool. The software constructs areas you are looking to cover with neighboring pixels. You need a uniform area that is larger compared to the area you are looking to cover. A point to note, the DxO Optics Pro software allows you to save some dust removal operations as pre-sets to save you time, for example, if you know your sensor has dots on it."
CASE STUDY: PERSPECTIVE | Back to Contents
But Optics Pro is strong on correcting distortion. After all, it knows all about your lens and what sort of problems it has at various focal lengths (if it's a zoom).
And it's very good at two of the simpler but inevitable corrections in this class. It can easily straighten a horizon with the Horizon Tool. Just draw a line along the horizon (or where the horizon might be) and the image will be straightened and cropped.
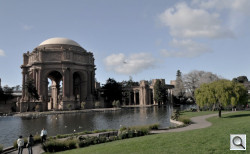
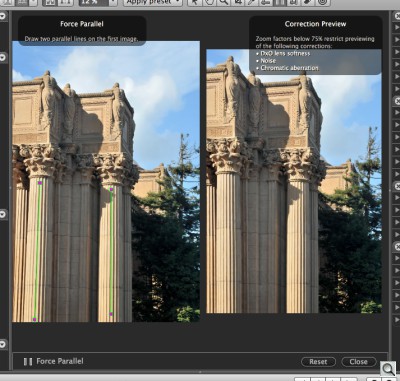
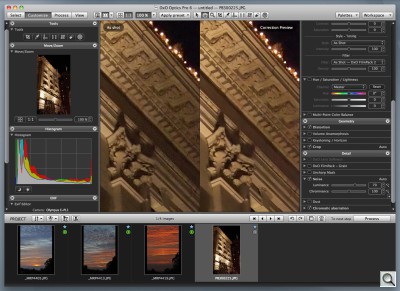
More impressive is that it can square up an image with converging vertical lines. If you point your camera up at a pair of columns, as we did at the Palace of Fine Arts, the columns will seem to come together at the top. Sometimes that's no problem at all. But when the view is not dramatic, more head on, it can be disturbing to see that geometry in the image.
The Force Parallel Tool requires you to draw two lines on an image. Optics Pro then makes them parallel. That quickly straightened out our columns.
So while you can't do local corrections as a rule, you can make some significant improvements to the image geometry.
CASE STUDY: TONE & COLOR | Back to Contents
Raw conversion is one of Optic Pro's strengths, based on DxO's camera sensor data.
If you've ever opened a Raw file in any other application, you may have been bewildered by all the sliders and options. Generally you start at the top and work your way down. But you can easily make a mess of things.
Optics Pro uses what it knows about your camera's sensor and the lens you used to capture the image to automatically optimize all of those settings. You start from a finely-tuned improvement, not a generic one, as in most programs.
We have to say, though, that this can be more than a little disconcerting. You've rolled up your sleeves to get to work on an image only to find there's nothing left for you to do.
Of course there are a few things you can do. Whatever you like, actually. But the task becomes one of creatively manipulating the corrected image rather than refining generic corrections.
CASE STUDY: JPEG | Back to Contents
With v6.6, more of the power of Optics Pro has been extended to cameras and lenses the program knows nothing about. There are limits to this. You'll get further with a Raw image from supported hardware. But for correcting a preprocessed image, this is pretty exciting.
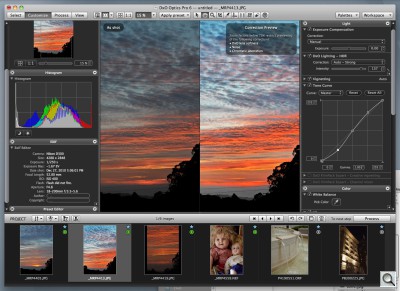
JPEGging I. We manipulated the tonal curve, changed the HDR effect, increased vibrancy to make this sunset come alive. Optics Pro recognized the camera and lens.
JPEGging II. Optics Pro didn't know this camera. We tried to get rid of its notorious purple fringing. Note the slight mis-alignment of the two images.
CASE STUDY: HIGH ISO | Back to Contents
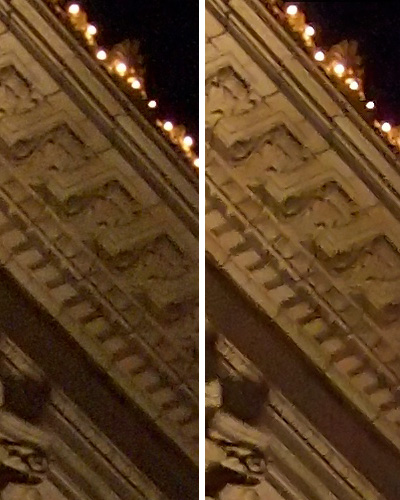
One of the chief advantages Optics Pro brings to processed images is noise reduction of High ISO images. You can, the company pointed out in a press briefing, get there from Lightroom or Photoshop or Aperture. But Optics Pro starts there.
That's a pretty big jump on the competition.
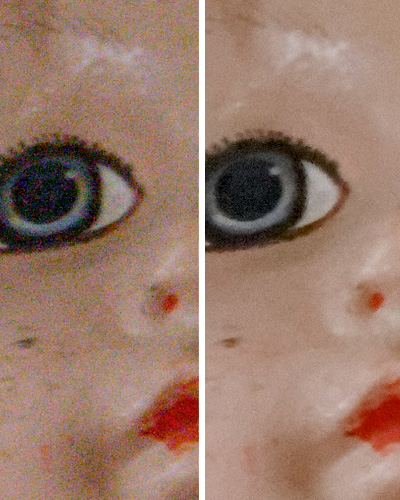
And you can see it in this Raw image, an ISO 3200 image shot at 1/15 second with an f/8.0 aperture. The original in-camera JPEG isn't bad (as far as noise goes) but the Optics Pro version is a significant improvement, as the 100 percent crop shows.
CASE STUDY: HDR | Back to Contents
High Dynamic Range imaging means different things to different people.
To some it simply represents an extension of the dynamic range of an image. Shadows reveal detail rather than plugging up in darkness while highlights retain some detail as well instead of burning out to white.
To others it's a way of turning middle tones on their head, churning out an image you can't find otherwise.
Optics Pro starts from the more realistic approach and dips into the more artsy approach.
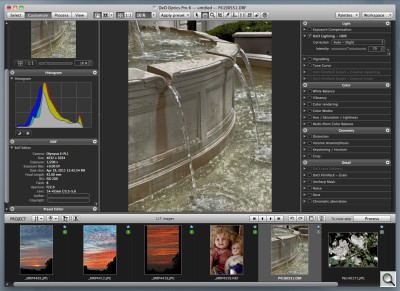
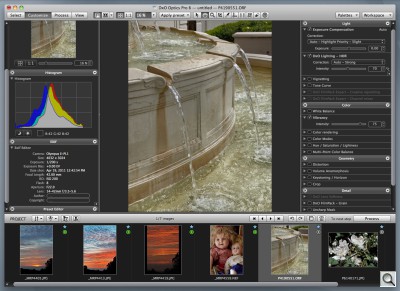
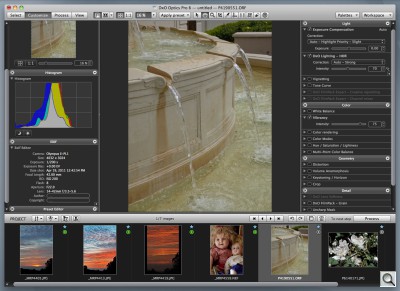
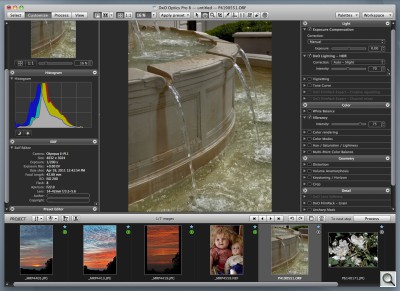
No matter which workspace you use, the DxO Lighting option provides three automatically set levels of HDR toning: slight, medium and strong. These can be adjusted with an Intensity slider.
We found them to be indispensable, much like dynamic range extending options on digicams that preserve highlight detail and open up the shadows. We didn't find them to be very extreme at all. So we can recommend them for enhancing the tonal range of most images safely.
There are, however, a number of HDR presets (and more if you are processing a Raw image) that offer a wider range of options.
The HDR preset options include: HDR Effect, HDR - Artistic (Raw only), HDR - Realistic (Raw only), HDR - Slight. We've applied them to our Olympus Pen E-PL1 .ORF Raw image:
We had one persistent issue with the new version of Optics Pro that, it turns out, illustrates a feature rather than a defect.
It was a slight misalignment the edited image in the two-up view, as illustrated above.
DxO suggested two possible reasons, both of which affect the shape of the edited image:
- "Crop is on auto, if you made some horizon or another correction like this, the 'after' image is cropped a little which will make it look like it is misaligned with the 'before' image."
- "If you have some distortion correction to compensate for the lens distortion, the 'after' image may be a little smaller than the 'before' image."
We did experience a couple of other glitches earlier in the course of testing but we weren't able to reproduce them after installing the FilmPack 3 update and an operating system update.
Unique among image processors, Optics Pro draws on its proprietary knowledge of sensors and lenses to automatically correct both Raw and JPEG images. In its latest version, it extends some of that processing power to JPEG images from cameras and lenses it knows nothing about.
We find it a valuable tool. Whenever we process images in Optics Pro, we're delighted by the instant, automatic improvements.
But we don't stop there. Starting from an image that has been automatically corrected to a higher degree than other image editing software tends to achieve, we find it easy to take the image in different -- but pleasing -- directions.
It's as if someone has done the tough job of getting the plane airborne before we get to fly it wherever we want.
That's a liberating feeling, especially if you've been laboring to fix your images the hard way. And it's a feeling we can live with, too.
Images and text copyright © 2011 by The Imaging Resource unless otherwise noted.
