16-BIT CHANNELS FROM 8-BIT CAPTURES
Optipix Plug-ins Enrich Your Images
By MIKE PASINIEditor
The Imaging Resource Digital Photography Newsletter
Review Date: October 2002
 Blown highlights. Noise in the shadows. A density range only a mother could love. Ah, the common pitfalls of digital photography.
Mostly that's because digicam exposures are usually happy to record 8-bit channels. They only have to yield a 24-bit image, after all -- eight bits each for red, green and blue data. Your printer can't print more and your monitor can't display more either.
But to work with tonal and color correction in Photoshop, you want more than eight bits per channel. That only gives you the final 256 possible output values, so when you compress them as you edit you lose detail and when you expand them you get banding (or gaps between tones).
But switch to 16-bit channels and those 256 tones blossom into 65,536 grays. Take your pick.
Or try to take your pick. Most image editing software is severely taxed by doubling the number of bytes needed to manage a 16-bit image. Even Photoshop restricts operations for 16-bit images.
DO WE HEAR A BUGLE?
But riding to the rescue is Optipix [MW], a suite of Photoshop-compatible plug-ins from Reindeer Graphics (http://www.reindeergraphics.com) that provide indispensable tools for 16-bit channel editing -- and even some magic to turn your ordinary 8-bit channel images into 16-bit beauties.
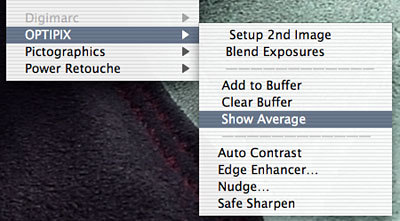 |
| The Optipix Menu |
The Optipix suite of image-enhancing plug-ins handles:
- Contrast Control
- Auto Contrast
- Edge Enhancing
- Sub-pixel Nudging
- Safe Sharpening
The exciting news is that each one works with both grayscale and RGB images in both 8-bit and 16-bit mode. You might not think that's such a big deal if your digicam or scanner only captures 8-bit channels for 24-bit color. But the real exciting news is Optipix will help you build 16-bit images from several 8-bit images of different exposure. Very cool.
Chris Russ, Reindeer Graphics president, said the company expects the Blend Exposures and Auto Contrast plug-ins to appeal to digital photographers but he also noted a few less obvious attractions:
- You can average a movie clip in Premiere to build a 16-bit scene average that you can use to reduce noise in the clip.
- By integrating the total amount of light from some fluorescent dye in a sample, you can reduce noise in microscopy.
- Astronomers can similarly integrate the total amount of light coming into the camera.
SYSTEM REQUIREMENTS & INSTALLATION
The $99.95 Optipix suite works in Photoshop 5, 6 and 7 on Macintosh OS 9 and OS X or Windows 95/98/ME/NT4/2K/XP.
Reindeer Graphics said the plug-ins conform to the guidelines in the Photoshop Developers' Tool Kit and have a very small memory footprint. Photoshop compatible programs that do not support 16-bit channels will run the plug-ins in 8-bit mode only.
Installation simply requires running the installer, which writes to the folder you identify as your Photoshop Plug-in folder. The 11 plug-ins installed are AddToBuffer, AutoContrast, ClearBuffer, EdgeEnhancer, Exposure, Nudge, SafeSharpen, Separator2, Separator3, Setup2nd, ShowAverage.
But you don't see 11 obscure plug-in names under the Optipix fly-out menu under the Filter menu in Photoshop. Instead, you see three groups of options. The first group includes Setup 2nd Image and Blend Exposures. The second group consists of Add to Buffer, Clear Buffer and Show Average. The third group adds Auto Contrast, Edge Enhancer, Nudge and Safe Sharpen.
They can all be scripted with Actions. And an example Action that demonstrates the Blend Exposures plug-in is included on the CD.
DOCUMENTATION
Excellent documentation for using Optipix is available on the Web (http://www.reindeergraphics.com/optipix). The suite also ships with a lavishly illustrated PDF that includes an intriguing essay by photographer George DeWolfe arguing that contrast control is the "supreme technical problem" of photography.
DeWolfe explains how the limited range of print imaging led to the invention of the Zone system and on to the breakthrough of the "Lightroom." The Lightroom (image editing software) provides not only more control over global contrast but greater control over local contrast than was ever practical in the darkroom, he adds. And that's just the first paragraph. But, boy, ain't it the truth.
Clearly, DeWolfe is a photographer.
So he wastes no time explaining how to use Optipix. Take two pictures with your tripod-mounted camera, exposing one for the shadows and the other for the highlights, changing only the shutter speed.
This requires overexposing one image to get shadow detail and underexposing another to keep highlight detail. Some digicams will bracket exposures for you automatically or you can do so manually. You need the tripod to maintain alignment (and it won't hurt if the wind isn't blowing). Most importantly, as DeWolfe points out, it's better to vary the time than the aperture (which would change the depth of field). The images must be identical.
BLENDING IMAGES
The Optipix Blend Exposures plug-in will let you blend the perfectly exposed shadows with the perfectly exposed highlights in one image. It can handle about six stops difference between images. Good-bye burned-out highlights and muddy shadows!
And it's pretty simple to do. Open both images in Photoshop. Convert them to 16-bit mode to build a 16-bit mode image from your 8-bit exposures. Select the underexposed image and choose the Setup 2nd Image plug-in. Now that Optipix knows which image is underexposed, select the overexposed image and choose the Blend Exposures filter. Finish off by duplicating the result and saving it with a new name.
Everything but the first step can be automated as an Action and Reindeer Graphics includes one as a sample.
Russ told us that "the blending works by looking at the luminance of the two images within each pixel neighborhood [and we played with quite a number of neighborhoods] and seeing how 'extreme' they were -- how far from the center of the bi-cone. We're doing a weighted average between the two images and shoving values toward the center (128) to make room for the stuff at the extremes."
The Blend Exposures function was written by Russ' father, John Russ (http://hometown.aol.com/DrJohnRuss), a noted authority in image processing whose Image Processing and Measurement Cookbook is available online at the Reindeer Graphics Web site under Documentation.
In actual use, we sometimes wished we had a slider to set the "blending point." Where, that is one image leaves off and the other begins. But that's probably because it was so simple to blend the images, we were looking for odd jobs to do.
| The Original 8-Bit Channel Shots |
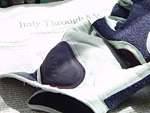 |
| f5.0 at 1/30 sec. |
 |
| f5.0 at 1/100 sec. |
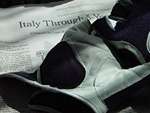 |
| f5.0 at 1/200 sec. |
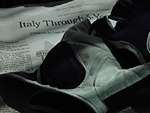 |
| f5.0 at 1/500 sec. |
 |
| f5.0 at 1/1000 sec. |
But DeWolfe notes the blend may soften contrast in either the highlights or the shadows. So he describes how to select them with Color Range using the Eyedropper tool and Fuzziness slider to isolate the problem. For highlights, he copies that selection to a new layer and uses the Soft Light Blending mode to locally adjust contrast. For shadows he simple adjusts the Curve of that selection.
GOING CRAZY
Optipix doesn't limit you to working with just two images, though. In fact, you can average up to 32,767. You might want to do this to average all of your bracketed exposures or to eliminate noise in the blue channel or build a 16-bit channel image from 8-bit channel images.
"This process works with up to 30,000 images and both 8 and 16 bits per channel, including a mixture of both. It can even be used to 'average' a series of video frames using Adobe Premiere," according to the Web site documentation.
To average more than two images, open them all and select the Clear Buffer plug-in to start with a blank canvas. Then, for each image, select the Add To Buffer plug-in. When you've cycled through the images, just select the Show Average plug-in. Finish off by duplicating the resulting image and saving it with a new name.
Easier than pie.
REAL WORLD RESULTS
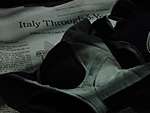
So we tried it. We shot four images of some fingerless bicycle gloves tossed on the morning paper strafed with sunlight. Lots of contrast.
We exposed two stops under to two stops over, varying the shutter speed so the image would not be affected by any change in depth of field. Pretty ugly stuff.
And the middle shots, which is what we would normally have gone home with, had either muddy shadows in the gloves or burned out highlights in the sunlit newspaper.
A nightmare. The kind you try to correct in Photoshop -- but can't. Not even with a contrast mask. That's because the information just wasn't captured in the image.
But when you expose individual shots for the highlights and shadows to blend them with Optipix, you do indeed get the best of both worlds. We actually blended four images to get our richly-tone result.
Beautiful.
 |
| The 'Averaged' Image Isn't Average Note the full range of tones from the dark cotton of the gloves to the white newspaper, holding the type in the shadows under the glove and the leather highlight of the glove itself. This image has actually been reduced to 8-bit channels, too. |
ALIGNMENT
Things get a little more complicated if your original images aren't perfectly aligned. They get even more complicated if they are 16-bit images.
You can easily check the alignment of 8-bit images before blending or averaging them by copying the second image to the first on a new layer and setting the Layer Mode to Difference. You'll see the misalignment pop out like an embossed filter effect.
Reindeer Graphics describes an elaborate method of aligning 16-bit images on the Web site (http://www.reindeergraphics.com/optipix/guide/align.shtml).
To align images, you might use Photoshop's nudge but that limits you to whole pixel moves. Optipix's sub-pixel Nudge provides a dialog window with X and Y distance fields. Positive values move the active layer down or to the right, negative ones in the opposite direction.
Reindeer Graphics recommends setting up four Actions to move your image, layer or selection up, down, right or left in 1/3 pixel increments (0.3333), the recommended sub-pixel distance to minimize noise. Assign a keystroke to each action and you're in business.
Sub-pixel nudging is a nice thing to have, but it doesn't guarantee alignment. You may still have to rotate your image and there's no sub-pixel rotation. Yet.
AUTO CONTRAST
Optipix's Auto Contrast will set the highlight and shadow at the ends of the histogram, enhancing underexposed images without affecting color. You will get banding in 8-bit images, of course.
But with so many auto improvements built into Photoshop (Auto Levels, Auto Color), why do we need Auto Contrast?
Russ explained, "Auto Contrast is different from the built-in AutoLevels in that the colors are not shifted. Also, we throw away a tiny portion of the tails -- much less than Adobe's 1/2 percent. You will get slightly different results as you continue to reapply it, but we tried to minimize how much gets clipped. Yes, some of the image data gets clipped, but on the luminance scale it is somewhere on the order of 1/10 percent on the tails."
DeWolf recommends Auto Contrast as a "final contrast tweak" for images with a full tonal scale. We prefer the control of using the Levels command directly (nothing automatic) in Photoshop, but you can think of this plug-in as a very safe, smart alternative -- particularly useful in batch operations.
EDGE ENHANCER
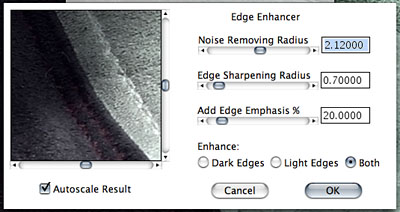
The Edge Enhancer plug-in provides unsharp masking (16-bit, too) while reducing noise, distinguishing between texture and edges with three main controls:
- Noise Removing Radius dampens the noise in an image. As you move the slider to the right, the noise in the image disappears. So can the edges, however. Digicam images tolerate a setting between 0.2 and 0.4 while film scanners tolerate 1.0 to 1.4.
- Edge Sharpening Radius describes the width of edges. Recommended values are 2.5 to 7.5.
- Add Edge Emphasis fades the pure effect of the noise reduction with the sharp edges of the original image. Values indicate how much of the edge is added back, with a recommended range of 70-120 percent.
These three values are easily set with sliders and their effect quickly seen in a small actual-size preview.
 |
| The Edge Enhancer |
In addition, an Enhance option limits the edge sharpening to one of three options: Dark Edges, Light Edges or Both.
Enable the Autoscale Result checkbox to automatically run the Auto Contrast plug-in after the Edge Enhancer.
You should use the Edge Enhancer plug-in before Safe Sharpen.
SAFE SHARPEN
The Safe Sharpen plug-in restricts sharpening to a small, safe amount, somewhat enhancing noise dampened by the Edge Enhancer but sharpening without a color shift. In fact, Reindeer Graphics claims it even tries to "fix" color as it sharpens. And unlike Photoshop's sharpen commands, Optipix's Safe Sharp works with 16-bit images.
CONCLUSION
We've been shooting with the same camera for a while now. We think we know what it can and can't do. And we fudge exposure this way or that to try to get what we're looking for.
But Optipix has turned our old iron into a new fire-breathing beast. Suddenly we're looking at what we can only describe as richer images.
That richness is a result of having 16-bit channels to work with -- even though our digicam records only 8-bit channels. It can be hard to convey in an ASCII review and even in an illustrated HTML version. But we've actually enjoyed working with Optipix, adding image after image to the buffer or fiddling with the Edge Enhancer -- because the results were always a pleasant surprise.
This is a great suite to add to your toolkit -- and it's even more affordable if you take advantage of our Imaging Resource special deal. Through the end of October 2002, just mention our name when you order directly from Reindeer Graphics (828/252-7515 or fax 828/252-7516 or sales@reindeergraphics.com) to get $10 off the list price of $99.95.