D7000 dissection: What lurks beneath the skin of a modern DSLR?
posted Tuesday, April 10, 2012 at 12:26 PM EST
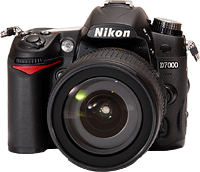 Everyone seemed to enjoy my destruction of an NEX camera a couple of weeks ago. I made the statement in that post that it was amazing how simple and clean the camera was compared to even a small SLR. So, of course, a number of people then wanted me to open up an SLR so they could see the difference. Having matured only marginally since 3rd grade, I had no choice except to rise to the challenge once someone said “bet you won’t take an SLR apart like that”.
So, yesterday a D7000 got a nasty scratch on the sensor. It was already an older camera and Nikon has upped prices on sensor replacements to the point it wasn’t economically worthwhile to replace it. So it was time to go get some useful parts. Why? Because with the Nikon parts shortage we can sell the parts for more than the camera. (Anybody besides me seeing the coincidence of “Nikon will no longer sell parts to independent repair shops” and Nikon repair prices going up? Just me? OK, well I’ll up my medication again.)
The Usual Disclaimer Stuff
Like I mentioned in the last article, there’s a curse against people who take their cameras apart. This time it’s more than just a warning that you might screw things up. Inside an SLR with built-in flash like this one is a very powerful flash capacitor that has a very strong electric charge. If you don’t know where it is, and you don’t know how to discharge it, then when working on the camera you may well get a nasty shock. Big shock. Makes-putting-your-finger-in-the-120-volt socket-seem-pretty-fun kind of shock. So don’t do this. And, no, I’m not going to show you where it is and how to do it, because then you’d blame me for whatever damage you did to yourself. I’m married. I get all the blame I need at home, thank you.
Now Let’s Take Stuff Apart!
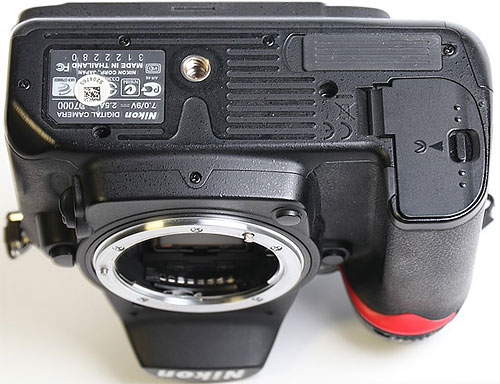
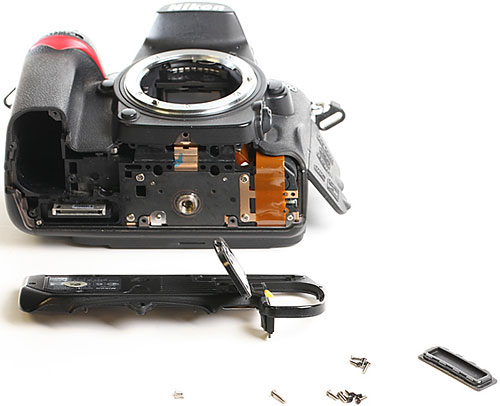
There’s some pretty obvious screws on the bottom of the camera and that makes the bottom plate pretty easy to remove:
There’s a few more obvious screws on the side of the camera. You’re thinking they’ll let us take off the side, right? Nope. They don’t let us do nothing, at least not yet. But they have to go.
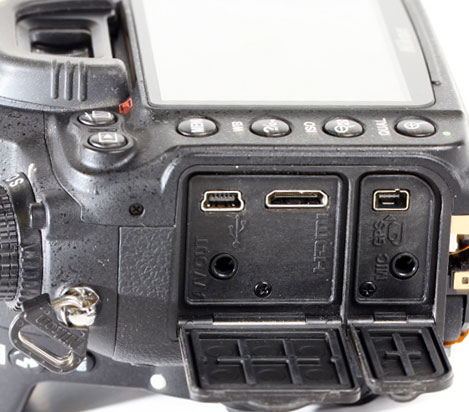
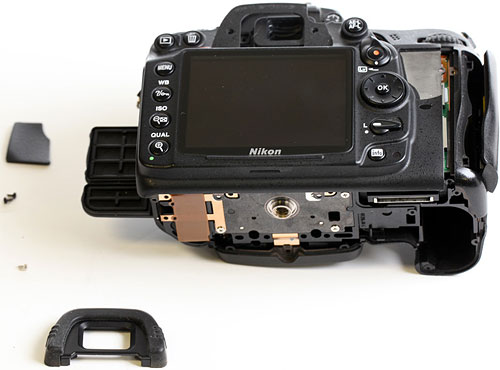
Kind of like a Nikon dissection club secret handshake: We have to remove the eyepiece and a bit of grip to find a few more screws that are asking to be removed. It still doesn’t let us take off the side, but the back assembly and LCD are now loose.
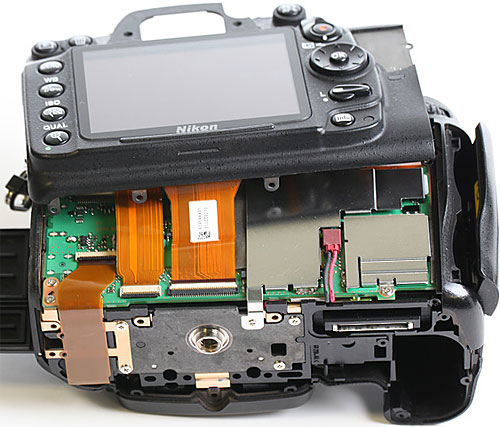
Lifting the back assembly just a bit reveals the flex cables attaching it to the main board. Rule number one for disassembling cameras: when something comes loose just peak under there before yanking it off. Actually that’s rule #2. Rule #1 is keep the screws separated and labeled. Nothing inspires less confidence than having 3 screws left over when you finish putting one of these back together. If it happens, though, I recommend saying something like “I found the problem: there were extra screws inside shorting out some circuits”.
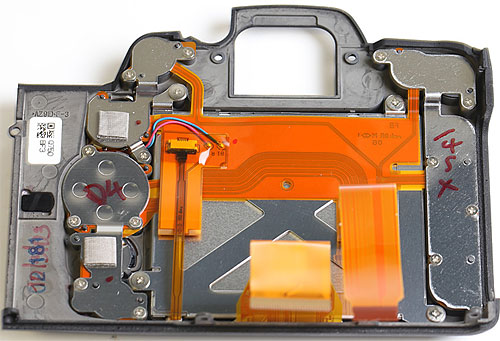
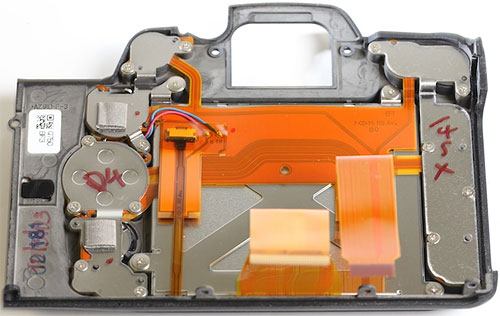
OK, now we disconnect those flexes and we can separate the back / LCD assembly. Here’s the inside view of the back. We’ll be back to visit it again later.
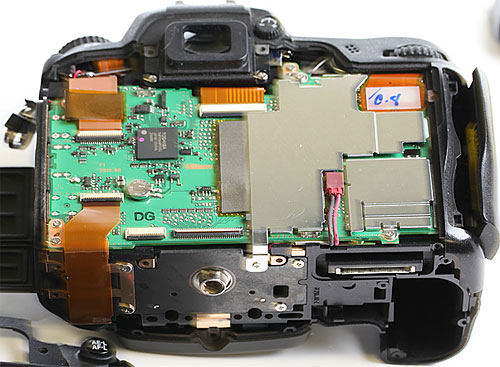
And here’s a look at the rest of the camera, which now has the main circuit board and its shielding uncovered.
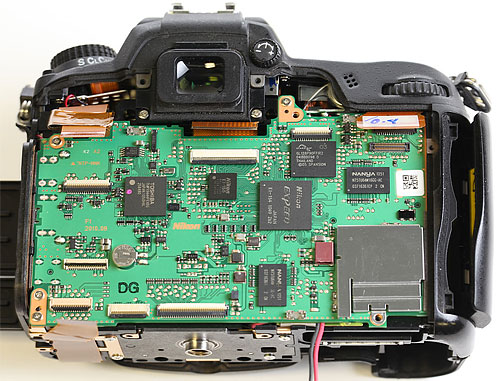
Remove the shields, undo the half-dozen other flex connections, take out a couple of screws and the board is ready to remove. Notice the Expeed processor there in the center. There are also two Nanya DRAM chips, a Spansion flash memory chip, and a Toshiba Control chip. Plus some little chips that I have no idea about.
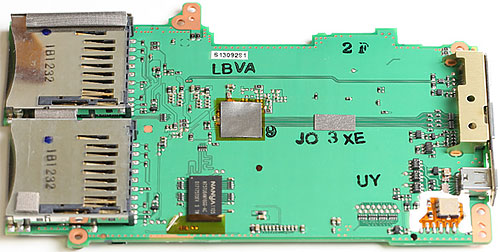
When you remove the board, flip it over, and remove some taped-on shields, we see that the two SD card slots are conveniently soldered to the main board. Which is why if you mess up a card slot (not very common with SD, but happens all the time with CF) the repair can be quite expensive.
We could have done this before, but with the main circuit board out of the way, we’ll remove the tripod plate from the bottom.
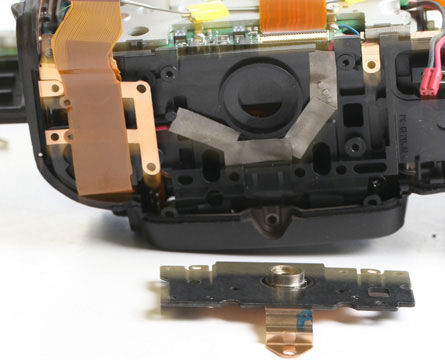
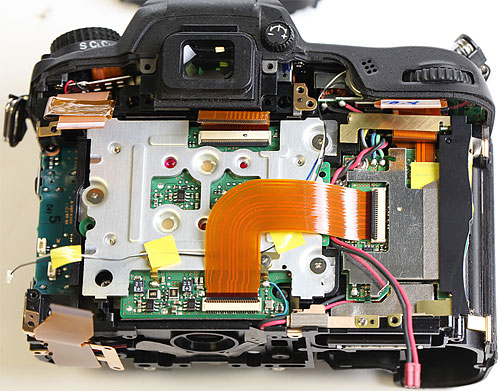
Returning to the back of the camera, there’s still lots of flex cables and circuit boards that were under the main board.
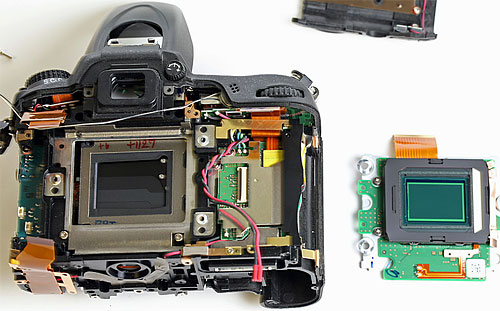
Underneath that large right-angled flex and the aluminum shielding you see above, you can see a deeper circuit board. That is actually the back side of the camera’s sensor unit. A few screws and flex disconnects and that’s out too. Now you can see the shutter from the back side, with its lovely grayscale gradient on the 4 sections of the curtain.
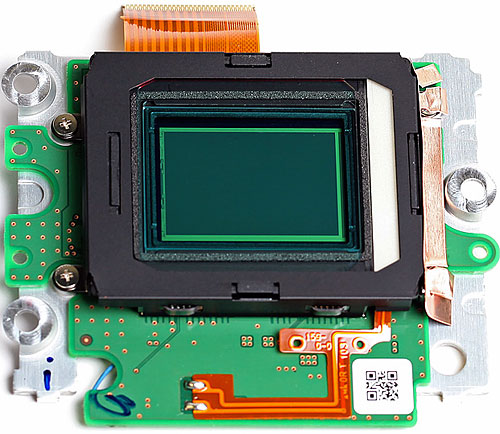
If you look carefully at the sensor closeup below, you might see the divot in the upper right corner that led to this little adventure. Doesn’t look like $500 worth of repair, does it? Then again, after spending all of this time getting here, I’d charge a bit, too, if I was the repair technician.
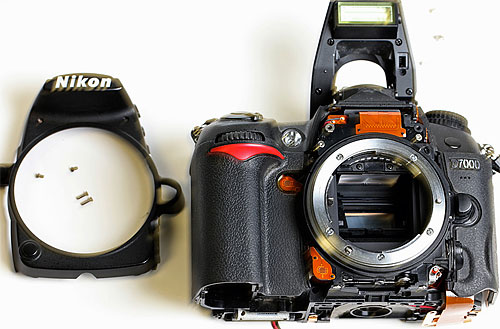
Now it’s time to go back to the front of the camera (Getting bored yet? I told you SLRs were way more complex than mirrorless.) to remove the front cover . . .
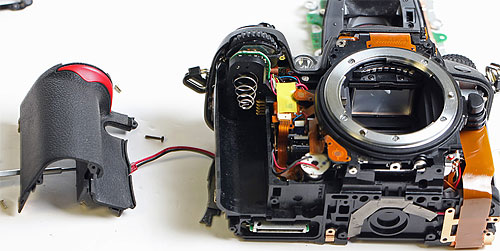
. . . and the right-hand grip. Did you ever want to know why D7000 grips never peel off like some others we won’t mention? Because isn’t a thin piece of leatherette just glued over the body covering access screws. The screws holding the grip on are located inside the battery compartment, so the grip can be permanently bonded to the plastic underneath, not just attached with some double sided tape.
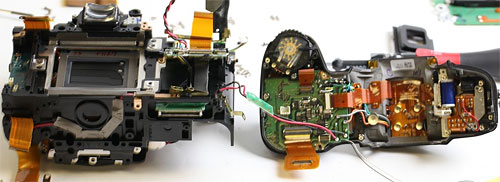
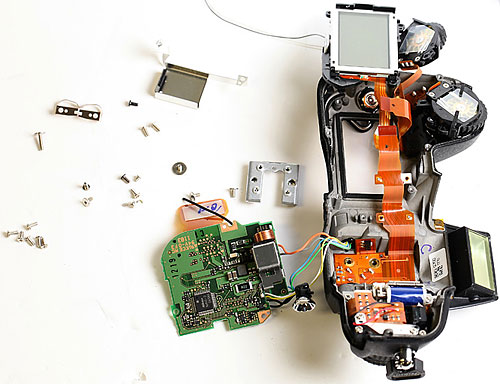
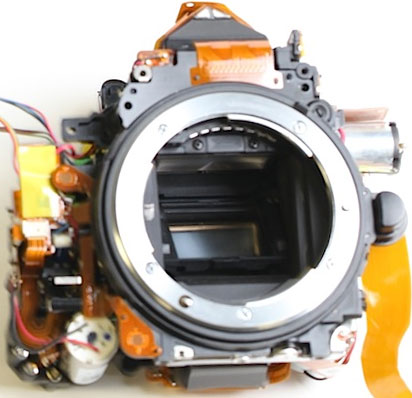
Finally (for phase 1, at least) we now have access to all the screws holding the top assembly in place and can remove that and separate the mirror box from the battery holder /chassis assembly. The mirrorbox (left) and top assembly (right) are shown below.
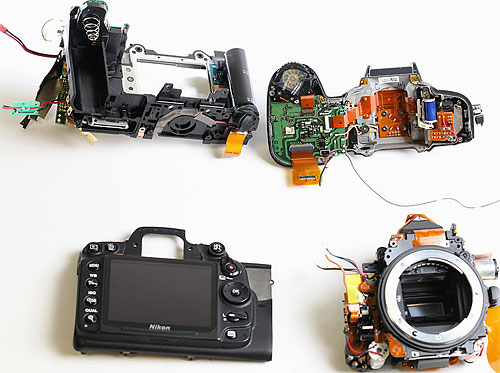
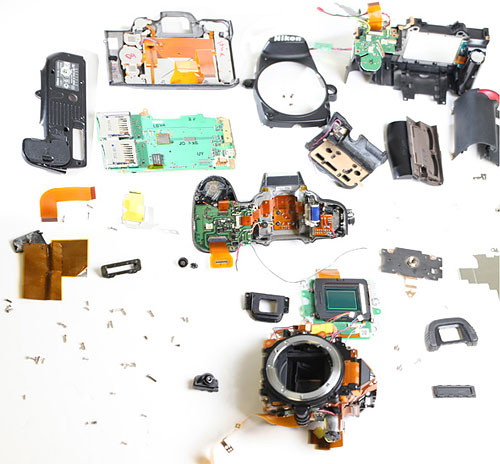
Let’s take a break and summarize what we’ve done, in case you’ve gotten confused (and that’s easy to do). We’ve now separated the camera into four main components. Going clockwise from upper right they are: 1) the top assembly with flash, 2) the mirror box assembly (central portion of the camera), 3) the rear/LCD assembly, and 4) the battery box / chassis. All except the battery box are going to be disassembled further. The battery box could be disassembled a bit more, but there’s not much point in it unless you needed to replace one of the small circuit boards or a wire.
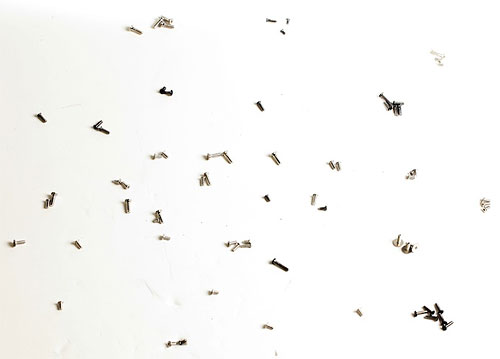
Oh, yeah, we’ve already removed 63 screws with, I believe, 11 different sizes / thread pitches. That’s way more than the NEX camera had in its entirety, and we still have another 50 or so to go. It’s not too shocking that a loose screw rattling around (and shorting electric circuits) in an SLR body isn’t unheard of.
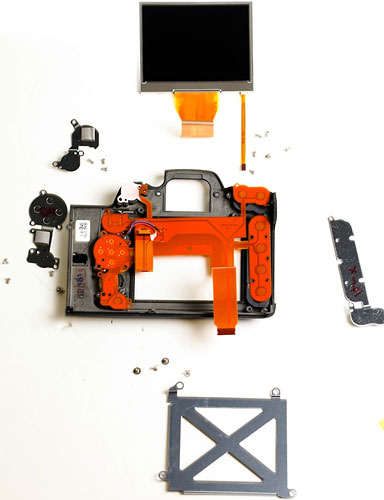
We’ve also removed various and assorted other parts and circuits. Here’s a look at things as they are now.
|
Parts after preliminary disassembly. The mirror box, top assembly, and LCD/back assembly are not disassembled yet. Photo courtesy of Roger Cicala / LensRentals. |
Secondary Disassemblies
Back Assembly
First we’ll take apart the back assembly, which is one of the nicest (from an engineering point) parts of the camera, very well done and very logically laid out, without some of the “where are we going to shove this in?” feel that some of the tortuous flexes and long, winding wire runs bring to mind in the main camera body.
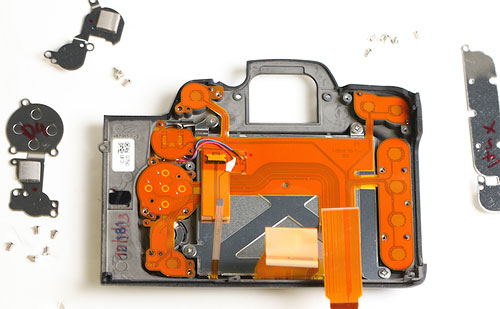
The button arrangement is especially elegant: There are stiff metal backs that are tightly screwed down.
Once those are removed you can see that the flexes contain small electronic microswitches that were under the metal plates . . .
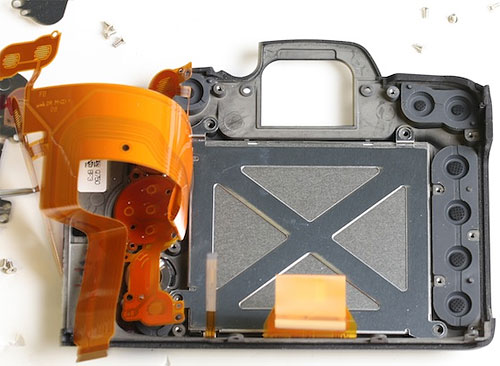
and if you peel the flexes up, the rubber buttons you actually push on the outside of the camera are underneath the electronic switches. No mechanical parts to wear out, get dirt in them, or break. Very nice.
And while we have the flex lifted up, we can go ahead and remove the LCD. Oh, since I’m keeping count, there were another 19 screws in the back assembly.
Top Assembly
The top assembly is often sold as, and replaced as, a unit, although it can get taken apart for replacing the upper LCD or flash components.
Another 16 screws and the LCD, flash circuit board, and switches are accessible, but most of these flexes are soldered in place so we’ll leave them be. This is as disassembled (except for the flash unit) as I can get the top assembly to be without making some useful parts useless. If you’re disoriented, the front right hand dial switch is in its normal place, the LCD is removed and folded up over where the rear dial switch would normally be, and the rear dial switch is removed and hanging by its flex between the LCD and front switch.
The Mirror Box Assembly
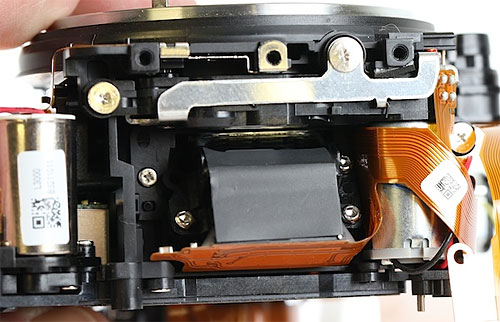
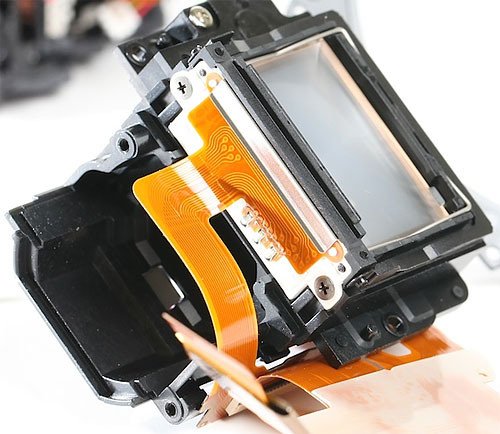
This single piece probably has more parts than any other section of the camera. Unfortunately, a lot of it is difficult to see and to access. There are a couple of subsections, though, that are interesting and large enough to see. The first is the prism at the top of the mirror box and the second the autofocus assembly (covered by a piece of gray tape) at the bottom.
Seen from below, the size of the flex cable gives you an idea of how much electronic signaling is going back and forth between the AF sensor and the main PCB board (a lot). The AF sensor is very precisely aligned to the mirror box, so once we touch it nothing short of a service center realignment would let this camera focus properly again.
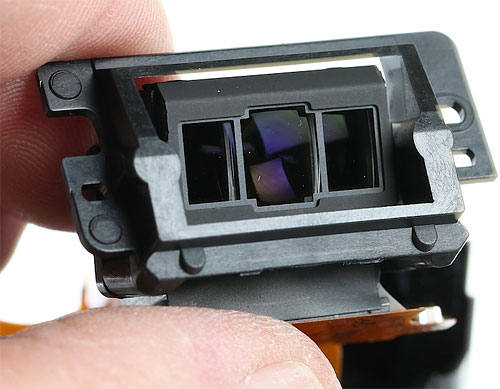
So, of course we touch it. When the autofocus sensor is removed, you can see how the front reflects the shape of the Nikon D7000 sensor array. (That’s just some dust on the front, which BTW was present when removed. It could have gotten there during the disassembly process, but it could also have been there all along. That much dust on an imaging sensor would certainly affect the images. I wonder if this would affect the autofocus sensor?
A couple of more screws and the pentaprism / focusing screen assembly comes right off of the top of the mirrorbox. Again, this could be disassembled further, but at this point it becomes just lots of screws, shims, and tiny parts. Nothing to see here. And this post has gone on for far too long, but I think we’ve done enough to demonstrate how complex an SLR is compared to a mirrorless camera.
|
The focusing screen / pentaprism assembly removed from the mirror box. Photo courtesy of Roger Cicala / LensRentals. |
The Bottom Line
By itself, this little post doesn’t do anything but give all of us adolescents the opportunity to see some camera guts. But if you compare the disassembly of the D7000 to that of the Sony NEX we did a couple of weeks ago, it’s readily apparent just how much more complex the inside of the SLR camera is. It would have to be: the mirrorless doesn’t need a pentaprism and viewfinder, mirror assembly, or autofocus assembly, nor does it have a built-in flash. But even considering that, this is obviously a much more complex camera.
The difference in complexity is especially striking when you consider that I didn’t take all of the SLR assemblies down to individual parts like I did for the NEX. Scroll back up to the disassembly picture above with all the pieces laid out. Then consider that there are more individual pieces left to disassemble in just the mirrorbox than there were pieces in the entire NEX camera.
I think the disassembly makes it very clear why a D7000 costs $1,200 and an NEX-5N costs $700. But my second thought, because I’ve been thinking a lot lately about where the camera industry is going in the next few years, is which camera is more profitable for its manufacturer: the $1,200 camera or the $700 camera? I’m guessing the latter, basing my guess on the number of parts, the complexity of assembling the system, and assuming there’s a higher failure rate in quality control from the more complex assembly. I’m pretty comfortable saying there’s at least as much profit in the $700 mirrorless as in the $1,200 SLR, probably more.
Just food for thought, but we know the mirrorless market is growing faster than the SLR market. If my assumption is correct, and mirrorless cameras are also more profitable than at least low end SLRs, it makes me curious about which camera manufacturers may be doing well in 3 or 5 years.
And fanboys: before you state the obvious, yes we all know the money is in the lenses and the high-end SLRs are much more expensive than the intro level systems. But high-end SLRs are a tiny, tiny, fraction of the camera market. And mirrorless manufacturers will be selling lenses too. Assuming, of course, they start making some decent ones. But right now, high quality native mirrorless lenses include about four or five for m4/3 and a couple for Sony E mount. Given some recent releases, though, I suspect that is going to change soon.
(Roger Cicala is the founder of LensRentals.com. Visit LensRentals.com to check out that cool lens you've been hankering for, and for some of the best customer service on the Internet!)
