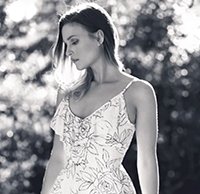
Soup up your black and white conversions in Photoshop with this free tutorial
posted Friday, February 19, 2016 at 10:09 PM EDT

Portrait photographer Nino Batista has recently written an article for Fstoppers and made a tutorial video about his favorite black and white conversion method in Photoshop.
Despite regularly deciding that an image will be converted while shooting and then using Capture One software for the conversion, sometimes Nino doesn't decide to make an image black and white until later on. In these cases, he uses Photoshop for the black and white conversion. He has created a free action (download link) that he uses for his Photoshop black and white conversions.
Nino breaks down what his action actually does in the video below. His action stamps his layer and creates a variety of adjustment layers, which are unchanged by default. He also has two layers with luminosity masks that each select dark and bright tones.

The first adjustment that he makes to his image are slight adjustments to the black and white conversion layer, adjusting different color sliders to get a sense of what he wants his final black and white image to look like. For more fine control, utilize curves. You can adjust the RGB curve, but you can also go in and adjust each channel independently for more control over the image. It's the same story with the levels adjustment layer, which also allows you to adjust each channel independently.
After achieving the overall look of the image that he wants Nino then goes into toning the final image. Toning is a matter of personal preference but Nino almost always tones his black and white images. He particularly likes the look of warm highlights and cool shadows. The trick with toning is subtlety, making it so that your toning work isn't obvious to the viewer.
To see more of Nino Batista's work and tutorials, visit his website and YouTube channel.
(Seen via Fstoppers)