Quick and easy black and white conversions: Putting Adobe Camera Raw to work
posted Wednesday, August 3, 2016 at 3:30 PM EST

As photographer Jeff Rojas says, "There are a million different ways to convert color images to black and white," but you don't need to leave Adobe Camera Raw to get great monochrome images. The Camera Raw Filter's advantages include its simple user interface and its powerful built-in tools. Keep in mind, you will want to work with a raw file in order to get the best results out of ACR.
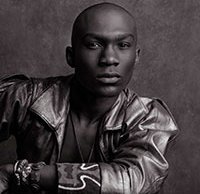
After opening Camera Raw Filter, you will want to first completely desaturate your image. You are going to be working to create the best possible monochrome result, so you will need to see your image in black and white in order to make the necessary adjustments. After desaturating your photo, adjust exposure to your taste. Rojas prefers moodier, darker images so despite his portrait being slightly underexposed, he wants to darken it further. You may want to adjust exposure until your image has a few highlights, it's all up to you!
When adjusting exposure and contrast, you can set ACR to display blue dots which indicate pure black areas in your image by pressing the U or O keys. You can see the rest of Rojas' tutorial on this simple, but effective, black and white conversion method using Adobe Camera Raw in the video below.
If you're looking for a more sophisticated method for black and white conversions in Photoshop, you can check out this technique by Nino Batista which relies on adjustment layers and luminosity masks. You can also download the free Silver Efex Pro plug-in from Nik Software/Google, which is my personal go-to method for black and white conversions in Photoshop.
You have many options, but Rojas' tutorial shows that a good black and white conversion method need not be complex or time-consuming. To see more of his work, visit his website and follow him on Instagram.
(Seen via ISO 1200)