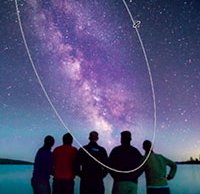
Taking the milky out of the Milky Way: Give your astronomy photos pop in Lightroom with this tutorial
posted Saturday, August 20, 2016 at 4:59 AM EST

While the phase of the moon isn't ideal for capturing shots of the Milky Way right now, Rob & Jonas' Filmmaking Tips YouTube channel has an excellent video tutorial for editing Milky Way photos in Lightroom that'll prepare you for giving the photos you capture on the next dark, clear night the post-processing treatment that will make them shine.
Using an image from photographer Rob Nelson (not the Rob Nelson from Rob & Jonas, but rather a different Rob Nelson), we see a Lightroom workflow from start to finish. After opening the RAW file, the first step increased the exposure quite dramatically, but be careful not to overdo it so that you can easily increase contrast later on.
When increasing the brightness in the foreground of the image, a lot of noise is added at the same time. The photo was shot at ISO 1600-equivalent and exposure was increased dramatically, so this is an inevitability. To correct for it, Rob uses a gradient filter to both increase the exposure in the foreground and also decrease the sharpness to help lessen the amount of visible noise. To see the full workflow and editing process, view the video below.
It's important to start with the best possible image of the Milky Way, so make sure you aren't trying to photograph it somewhere with a lot of light pollution. You can see the impact of light pollution in this very interesting timelapse video. If you can't get somewhere dark, you should check out this tutorial from Ian Norman of Lonely Speck that shows you how to create awesome Milky Way shots even in the absence of dark skies. Interested in taking a look at a 46-gigapixel panorama of the Milky Way captured by astronomers at Ruhr-Universitat Bochum in Germany? Check it out here.
(Seen via ISO 1200)