How to utilize your histogram in the field and when processing RAW files
posted Thursday, January 11, 2018 at 11:00 AM EST

Photographer Dave Morrow spends most of the year traveling and backpacking while capturing stunning landscape photos, which you can see here. As part of his ongoing "Landscape Photography Journals" video series, Morrow has dedicated a pair of videos to histogram shooting techniques and better understanding RGB and luminosity histograms.
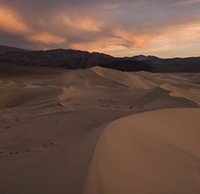
The first video offers a great behind the scenes look of Morrow about two months into his fall photography journey. In a California desert, he starts by setting up camp and then going through his plan for shooting the dunes over the next few days. His video style is excellent as he goes over his plan, shows us RAW files and then discusses the images in great detail.
While not specific to histograms, Morrow shares some nice tidbits of information while shooting. He is a big fan of Live View on his Nikon DSLR camera when shooting. He also utilizes back button autofocus while checking focus at 100% in the Live View, to ensure that the camera locked in at the desired location. By decoupling autofocus from his shutter release, Morrow is in complete control of his composition and camera without having to worry about the shutter messing up his focus.
Once his composition and focus are set, Morrow then goes to his camera's RGB histogram. His goal is to capture as much data as possible in the field without losing any important details in the scene. If you're unfamiliar with histograms, here's a quick intro. Along the X axis, black is to the left and white is to the right. The histogram essentially shows you how bright each pixel is. The Y axis is the number of pixels. If you have large spike in the middle, that means that you have recorded a lot of midtone pixels. The idea is to capture an exposure that pushes your histogram as far to the right as possible without losing important details to white. Each camera can recover highlights differently, so it's important to be familiar with your camera to learn how much detail you can pull back from highlights when performing RAW editing later on.
After you've watched the above video, we join Morrow as he starts processing a variety of RAW images from the episode. Histograms in the field may work in the same manner as histograms on your computer during image processing, but they are used for different reasons. In the field, we expose to the right and use the histogram to ensure we retain shadow detail and not blow out highlight detail. When in the computer, we are using the histogram to ensure we are moving the correct pixels to the right tonal values such that the image looks natural and matches the scene we saw in the field. Of course, this is related to personal taste too.
"The histogram on the computer is a calibration device," says Morrow. In Photoshop, we have access to more detailed and different histograms. Morrow goes over the different histograms in the video below and then shows us how he uses them to process his images.
To see more of Dave Morrow's photography, click here. For more videos like the ones above, click here.
(Via Dave Morrow)