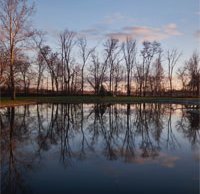
Digitally recreating the look of different film stocks using levels adjustments
posted Thursday, July 26, 2018 at 11:00 AM EDT

There are many different tools in Photoshop you can use to achieve similar results. There are curves adjustments, exposure, brightness and contrast sliders, and much more. There is also the levels adjustment tool, which is deceptively powerful. In the video below, Ted Forbes with The Art of Photography discusses how to use the levels adjustment tool in Capture One (although, you can use the tool in Adobe Photoshop as well) to recreate various film looks for your digital images.
Even if you don't want to recreate the look of a certain film, you can learn a lot about using the levels adjustment tool to manipulate the black levels, white levels and overall colors in your images. Using the levels adjustment tool, there are RGB, red, green and blue channels you can adjust separately and there are three vertical lines you can move within each channel. Black, white and midtone. When adjusting levels in RGB, you are adjusting different brightness and darkness values of the overall image. You can adjust colors when you go in and adjust individual color channels. See the tool in action and learn how powerful it can be in Forbes' video below.
(Via The Art of Photography)