Video: How pro wildlife photographer Kristi Odom edits her image in Adobe Lightroom
posted Wednesday, March 30, 2022 at 11:30 AM EST

Professional wildlife photographer and Nikon Ambassador Kristi Odom's excellent wildlife photography video series for B&H wrapped up last week, finishing the four-part series with Odom's post-processing and wildlife photo editing workflow. If you've missed the previous three videos, you can catch up via the links below:
- What gear does Kristi Odom take into the field?
- How to safely research wildlife and be an ethical photographer
- Composition, camera settings and creativity in wildlife photography
To quickly recap, we last joined Odom in the field in Yellowstone National Park. She saw and photographed a range of wonderful animals, including the bison and wolves the park is famous for. Now it's time to edit four of the photos. The images Odom selected are all quite different, so they each require a different approach to editing.
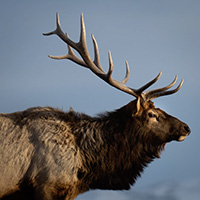
Odom does about '95 percent' of her editing in Adobe Lightroom Classic, so that's the software she's working with in the video below. The first image Odom edited is of an elk from the side. It presents a strong triangle shape. 'I'm really big on looking to see where your eyes go in an image.' Concerning the elk photo, Odom's eyes go toward the bright area of the animal to the left, where its hairs are lighter. To fix this, Odom uses Lightroom's built-in masking tools to make brush the brighter area and reduce the highlights and exposure. It's a subtle adjustment but it makes a big difference. Odom then uses a radial gradient filter to increase the brightness around the eye to better pull the viewer toward the elk's face. It's essentially a form of dodging and burning using a couple different tools within Lightroom.
What about the other three photos? To see how Kristi Odom edits her other selected wildlife photos – and to add a new tricks to your Lightroom editing skillset – watch the full video above. To see more from Kristi Odom, visit her website and follow her on Instagram.
(Via B&H)