=================================================================
To subscribe, unsubscribe or change your email address, visit:
http://www.imaging-resource.com/IRNEWS/index-subs.html
Support the Newsletter!
- Find the best price for anything at http://ir.pricegrabber.com
- Shop Amazon, Adorama at http://www.imaging-resource.com/buynow.htm
=====================================================
THE IMAGING RESOURCE DIGITAL PHOTOGRAPHY NEWSLETTER
=====================================================
Volume 16, Number 3 - 14 February 2014
----------------------------------------------------------------------
Copyright 2014, The Imaging Resource. All rights reserved.
----------------------------------------------------------------------
Welcome to the 380th edition of The Imaging Resource Newsletter!
In this edition, we've packed it full of awesome reviews, news and everything in between! Not only do we have the third and final Shooter's Report installment from William Brawley for the popular Panasonic GM1, but also the second installment of Mike Tomkin's Shooter's Report for the flagship Pentax K-3.
On the feature side, Steve Meltzer takes us back in time with a fascinating look at French photographer L�on Gimpel and his documentary color photograph series The Grenata Street Army that he captured during the First World War.
It's also CP+ expo in Japan this week, and as such, lots of camera manufacturers have announced a slew of new cameras, lenses and accessories. We've compiled a little list down below of all the big releases from Canon, Nikon, Panasonic, Pentax, Sigma and Sony.
Finally, we share some of the most popular news stories from this past week, including first shots and gallery images from the Fuji X-T1 and X-A1 cameras.
Happy reading!
TOPICS
----------
Get Social with IR
Sponsors
Camera Review: Panasonic GM1 Shooter's Report, Part III; Pentax K-3 Shooter's Report, Part II
Feature: The Grenata Army: Amazing Color Photos from 1911, by Steve Meltzer
Just Announced: New Cameras from Canon, Panasonic, Sony and Sigma announced this week
Quick Hits: Sony FE 35mm f/2.8 Lens Review
Popular News
Next Issue
Signoff
GET SOCIAL WITH IR
---------------------------
If you want to stay up-to-date with the latest camera and photography news, get notified when IR posts its latest camera or lens review, and much more, please get social with us on your favorite networking sites by:
By doing so, you'll also be supporting our efforts to deliver the best camera and photography content on the planet. (Google in particular apparently pays lots of attention to Google+ in deciding site/page relevance for its search results, so "circling" us there and +1-ing our site and pages would be an especially big help.) Thanks! We appreciate it!
SPONSORS
--------------
This issue is sponsored in part by the following companies. Please show your appreciation by visiting the links below. (Visiting our sponsor's links really helps support this newsletter, thank you for your attention!) And now a word from our sponsors:

* Sigma *
------
Sigma's approach to photographic equipment is based on quality, craftsmanship, value,
customization and responsibility to photographers and the environment. All encompassed
in our breakthrough, award winning Global Vision lenses:
18-35mm F1.8 DC HSM
35mm F1.4 DG HSM
17-70mm F2.8-4 DC Macro OS HSM
120-300mm F2.8 DG OS HSM
USB Dock
� � All designed to deliver the highest optical quality and performance.
-----------------------------------------------------------------------------------------------------
Are you in the digital photo business? This newsletter is read by more than 47,000 direct subscribers (plus additional pass-along readers), all with a passion for digital photography. For information on how you can reach them, contact us at editor@imaging-resource.com.
-----------------------------------------------------------------------------------------------------
Camera Review: Shooting with the Panasonic GM1, Part III -- Big Lenses, Reader Requests & Final Thoughts
by William Brawley
 |
GM1 + Olympus 50-200mm f/2.8-3.5: A bit on the heavy side and slow to focus, but if the subject doesn't move, you can still capture great images. (147mm, f/3.2, 1/320s, ISO 1250) |
One of the big advantages of an interchangeable lens camera is the flexibility offered by those lenses. You can go from an ultra-wide landscape perspective to an up-close telephoto shot of a bird in a matter of minutes. However, as cameras get smaller and smaller, such as with the Panasonic GM1, you run into issues of comfort, balance and sheer portability when you want to use longer (and inherently larger) lenses. However, the fun of an ILC -- the flexibility -- is that you can do it if you want to, or need to.
In this last Shooter's Report installment, I discuss my experience using larger Micro Four Thirds and even some Four Thirds lenses, just for fun. I also wrap up my Panasonic GM1 review with some reader requests and other small details, as well as my final summary. (Note, we'll be finalizing the entire review with test results, pros & cons and conclusions shortly.)
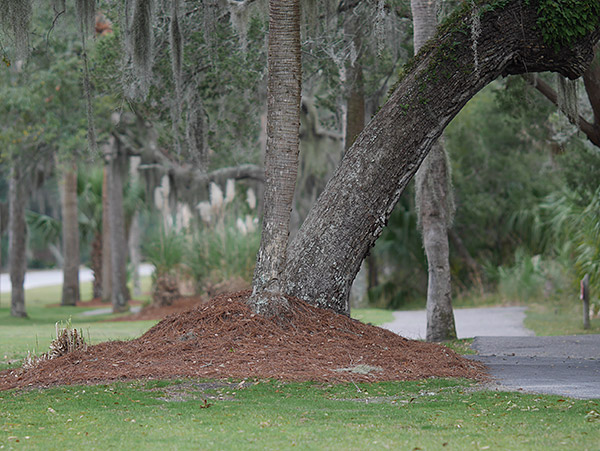 |
GM1 + Olympus 150mm f/2 (150mm, f/2.0, 1/320s, ISO 200) |
Going BIG. The Panasonic GM1, like we've said before, feels like the best truly pocketable interchangeable lens camera. With the included 12-32mm kit lens, the GM1 is indeed a high performance camera that's perfectly suited to photograph a wide variety of subjects, but that combo is quite limited when it comes to shooting that bird in the tree or your child across from you on the soccer field.
I've always been enamored with huge, long lenses, so I took the GM1 along over the Christmas holidays with a couple long and beefy lenses: the Olympus 150mm f/2 Zuiko and Olympus 50-200mm f/2.8-3.5 Zuiko, and had a little telephoto fun. I was curious to see a) if the GM1 had the focusing performance with Four Thirds lenses, like the Olympus E-M1, and b) what the handling was like using such a tiny camera with these large lenses. I should also note that we have a much more practical telephoto lens here at IRHQ -- the Olym
pus M.Zuiko 75-300mm f/4.8-6.7, a Micro Four Thirds lens -- that I used on the GM1 and will discuss further down.
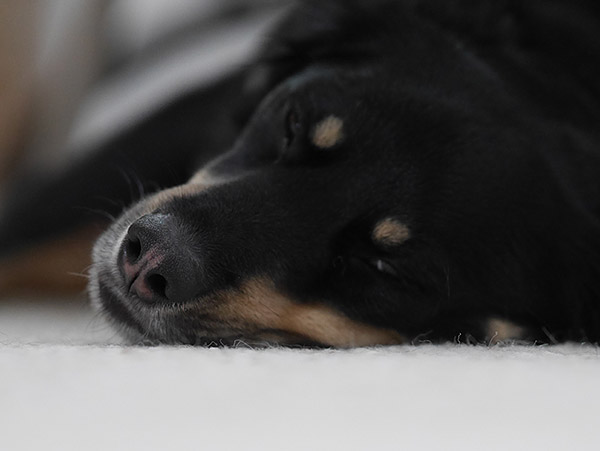 |
GM1 + Olympus 150mm f/2: While the lens is heavy and cumbersome, the quickly-adjustable AF points on the GM1 allows me to put focus exactly where I want. (150mm, f/2.0, 1/125s, ISO 3200) |
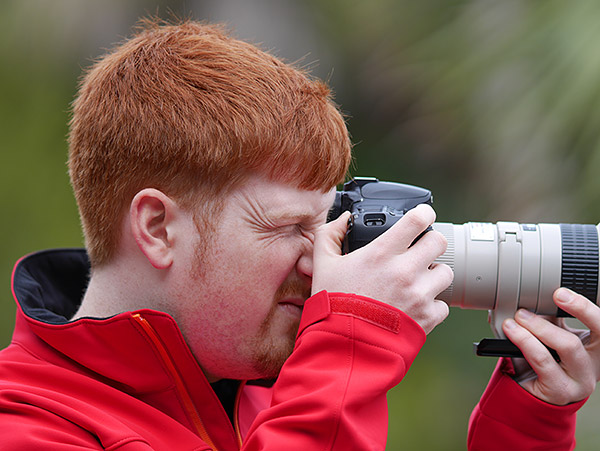 |
Taken with the GM1 + Olympus 150mm f/2. (150mm, f/2.0, 1/400s, ISO 200) |
Unfortunately, I'll have to start this shooter's report section with a negative. No, the Olympus 150mm f/2 Zuiko and Olympus 50-200mm f/2.8-3.5 Zuiko lenses are not practical to use on the GM1. At all. Particularly, the 150mm lens, with its massive size and weight -- 3.6 lbs. of it -- is definitely not suited for the GM1. It was hilarious to behold, however.
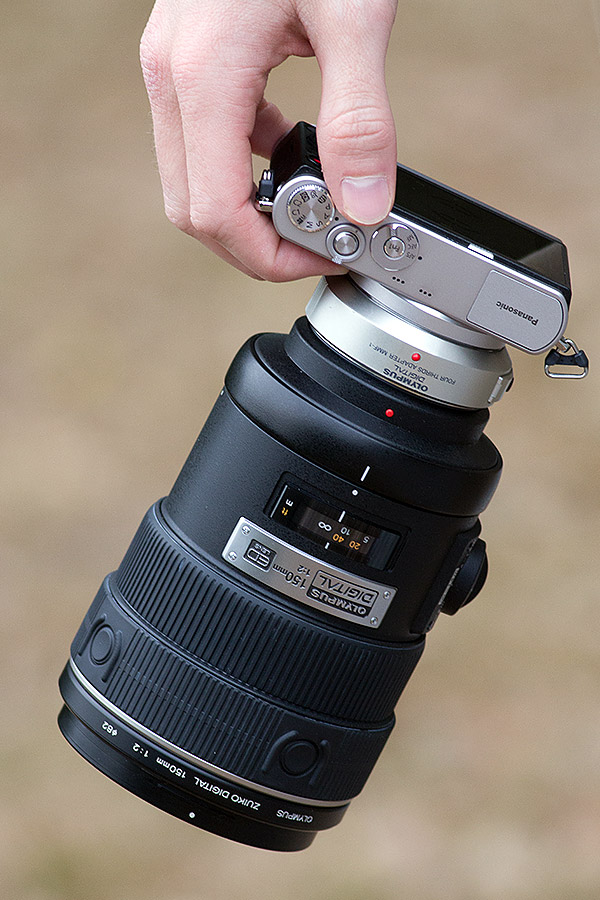 |
Do not try this at home. The Panasonic GM1 + Olympus 150mm f/2.0 with required adapter is quite a ridiculous combo: slow, heavy and unbalanced. No, I didn't carry the camera around like this. |
I was quick to discover that Four Thirds lenses with the M4/3-4/3 adapter do not autofocus well. Like we saw on other Olympus cameras before the E-M1, focusing with the adapter is abysmally slow with a distinct stepping actuation as the camera attempts to acquire focus.
That being said, I had fun shooting with these lenses. Especially the 50-200mm lens, which was the more practical of the pair as it was significantly lighter and more fun to use. The GM1 and 50-200mm lens produced a 400mm equivalent field of view at maximum telephoto. When you consider using a DSLR to get a 400mm focal length with a fast aperture, you're talking about substantially more weight and possibly thousands of dollars. Using the GM1 and the 50-200mm lens was much lighter, and barring the terribly slow AF speed, was very useful to shoot wildlife (albeit only of the slow-moving variety) and other telephoto subjects.
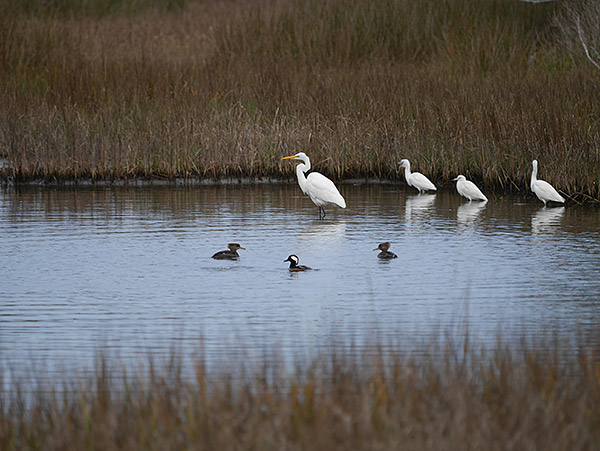 |
(200mm, f/3.5, 1/500s, ISO 200) |
 |
(147mm, f/3.2, 1/320s, ISO 1250) |
On the more practical side, I also had a chance to use a more sensible telephoto lens with the GM1: the Olympus M.Zuiko 75-300mm f/4.8-6.7 II. This lens, designed for Micro Four Thirds cameras rather than the larger Four Thirds DSLRs, is still rather large for the tiny body of the camera. However, it's considerably lighter and smaller than the Four Thirds 50-200mm lens, making it much more comfortable to use. The autofocusing performance also was a night-and-day experience compared to the older Four Thirds lenses, focusing very quickly like most other Micro Four Thirds lenses I've used.
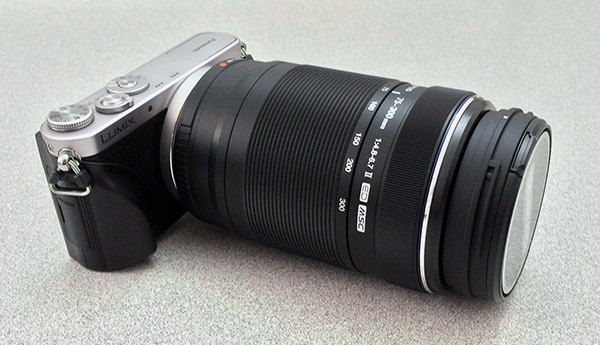 |
Large, but lightweight. The Micro Four Thirds-specific Olympus 75-300mm f/4.8-6.7 II is a much more appropriate telephoto zoom, however the lack of IS and the slow f/6.7 at full tele make it challenging to use on the GM1. |
Similar to the comparison with the 50-200mm, the 75-300mm lens provides a whopping 600mm equivalent focal length, that, in typical DSLR-size lenses, would equate to significantly more weight and bulk, not to mention price. Taking this into account, the GM1 and the Olympus 75-300mm is an amazing combo.
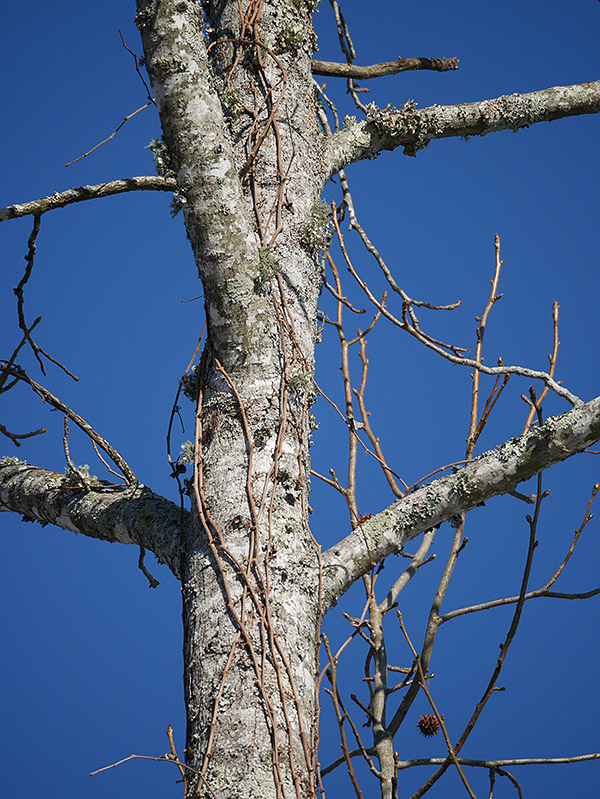 |
GM1+ Olympus 75-300mm: The lens provides a versatile reach, but the lack of IS makes precise framing at full tele a challenge -- the lack of an EVF makes it even more difficult as you have to hold the camera farther out from your center of gravity. (300mm, f/6.7, 1/640s, ISO 200) |
However, the biggest downside to using these longer, and often-heavier lenses, is that the lack of a viewfinder, built-in or otherwise, making for an awkward shooting stance. You're forced to hold the camera farther out in front of your face to use the LCD monitor, rather than centering the camera up against your eye in a more balanced shooting position, making it quite uncomfortable to hold the camera, especially for any length of time.
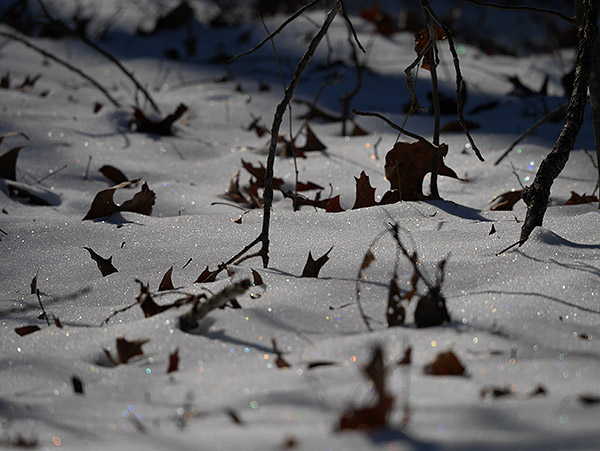 |
GM1+ Olympus 75-300mm. (187mm, f/6, 1/3200s, ISO 200) |
Now, this isn't an issue exclusive to the GM1, as both the Sony NEX-3N and Canon EOS M, for example, offer the flexibility of interchangeable lenses, but lack any form of viewfinder. However, it's an issue nonetheless with this type of camera.
Also, the lack of body-based image stabilization on the GM1 is another ding to versatility and flexibility of lens choice. While it's not impossible to shoot with super-telephoto lenses that lack IS, simply framing your shot is more challenging at these very long focal lengths, as any and all camera vibrations appear magnified the farther you zoom. Combining this with the viewfinder-less shooting position makes the GM1 a not-so-stellar telephoto camera when shooting handheld.
Reader Requests. One of the best things about these episodic Shooter's Reports is that we can now have a dialog with readers and take suggestions for things to test or compare while we review a camera. In this case, I'm going cover a few things readers have asked about or wanted confirmed.
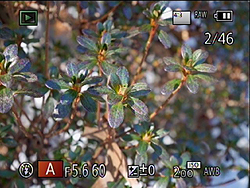
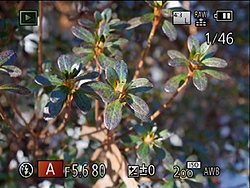
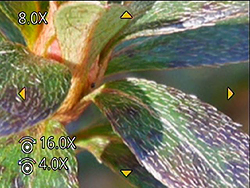
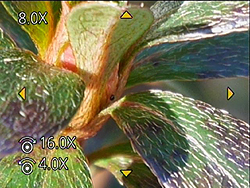
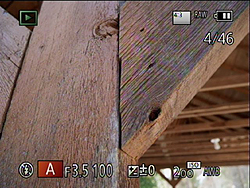
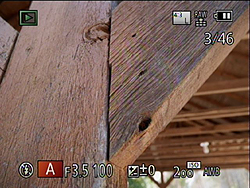
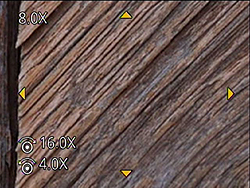
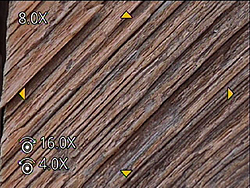
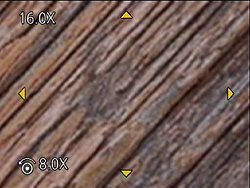
First off, Harald E. Brandt commented after purchasing his own GM1 that the embedded JPEG preview when shooting RAW-only was much lower in resolution that RAW+JPEG, which most likely just displays the corresponding JPEG photo. I tested this out, and yes, this does seem to be the case. When shooting RAW-only, the preview of the shot, when magnified in is noticeably lower in resolution. I wouldn't consider it a deal-breaker for the GM1, but as Mr. Brandt indicated, it does make it more difficult to discern the sharpness of images. See for yourself in the table below:
Panasonic GM1: Playback Preview: RAW vs RAW+JPEG |
 |
 |
RAW |
RAW+JPEG |
 |
 |
RAW @ 8x Magnification |
RAW+JPEG @ 8x Magnification |
 |
 |
RAW |
RAW+JPEG |
 |
 |
RAW @ 8x Magnification |
RAW+JPEG @ 8x Magnification |
 |
 |
RAW @ 16x Magnification |
RAW+JPEG @ 16x Magnification |
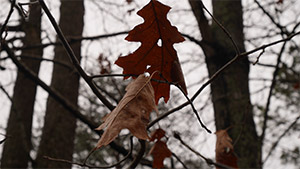
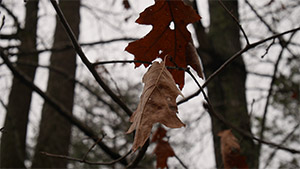
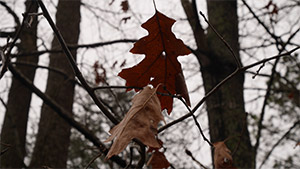
Another reader comment, from Jason Ushkowski, asked about the video priority mode on the GM1 and the image quality of simultaneously taking still photos. The GM1, like many cameras, lets you start recording video from any still shooting mode, and vice versa -- you can take a photo while shooting video (though not in the dedicated Movie Mode, as the shutter button acts as a secondary recording start/stop button). However, the GM1 gives you two options for how to snap still photos while recording video: Motion Picture Priority and Still Picture Priority.
In Motion Picture Priority, pressing the shutter button silently snaps a photo without interrupting the recording process. As the name suggests, priority is on the video recording and not still image quality. As such, the captured still in this mode is a much lower quality (small JPEG) and in the 16:9 aspect ratio (1,920 x 1,080; even when recording 720p video). Up to 30 stills can be captured during video recording in this mode. However, in Still Picture Priority, video recording is briefly interrupted allowing for the capture of a high resolution image, including RAW (4,592 x 2,584 pixels), but the image (even the RAW) is in the 16:9 aspect ratio. Video recording is then immediately resumed, and the resulting single video file is shown with a brief pause where the still was captured. Unlike in Motion Priority, in Still Priority only up to 4 images can be captured during video recording.
Panasonic GM1: Still Picture Priority vs Motion Picture Priority |
| See video on YouTube. |
See video on YouTube. |
|
|
 |
 |
16:9, 4,592 x 2,584 pixels ( RAW) |
16:9, 1,920 x 1,080 |
 |
 |
16:9, 4,592 x 2,584 pixels ( RAW) |
16:9, 1,920 x 1,080 |
The last reader request actually came to me from multiple readers, as "Whayne" and "Geordon" were interested in how the Panasonic 12-35mm f/2.8 lens performed on the GM1. If you recall back in my second SR installment, I described using the fast, high-performance Olympus 12-40mm f/2.8 lens, and despite being a little on the large size for this tiny GM1, I found it to be an excellent experience. Somehow, at that time, I never got around to using what I consider to be Panasonic's equivalent to the Oly 12-40mm. Now I have.
 |
GM1+ Panasonic 12-35mm. (18mm, f/3.5, 1/640s, ISO 200) |
Right off the bat, I felt that the Panasonic 12-35mm f/2.8 was a much better fit on the GM1 than the Olympus 12-40mm. It's noticeably lighter and a bit smaller, making it more comfortable to use with such a small camera. However, one of best things about this lens is how easily and smoothly the zoom ring rotates. Despite being a bright f/2.8 lens, it didn't feel like I had to move a lot of large glass elements around. This was very pleasing given how tiny the camera is and how little grip you have on the camera itself. With other lenses, such as the Olympus 12-40 and the Olympus 75-300, the zoom action is stiff enough that it's hard to hold the camera in shooting position and zoom smoothly -- I'm often having to bring the camera down to adjust the focal length. The 12-35mm f/2.8, in contrast, is very easy to rotate; easily accomplished with only two fingers.
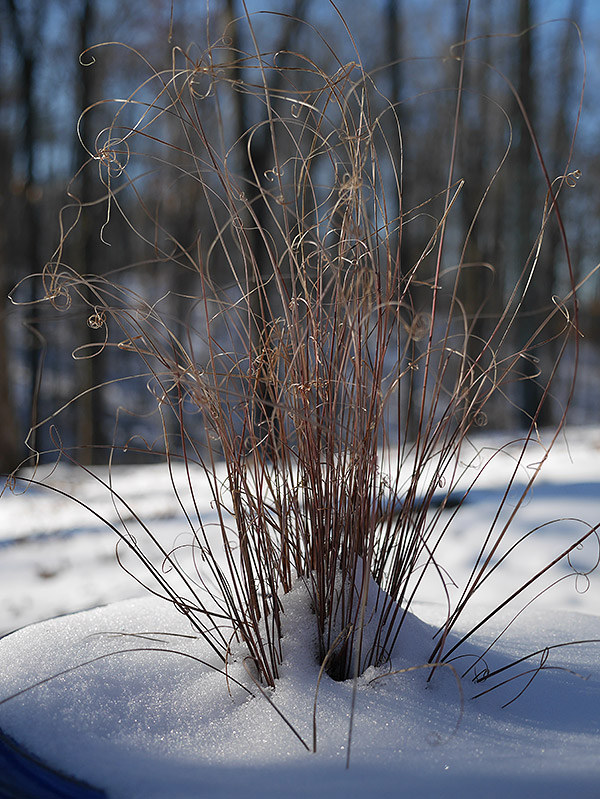 |
GM1+ Panasonic 12-35mm. The Panasonic 12-35mm f/2.8 is a compact, lightweight zoom that feels great on the GM1. The constant f/2.8 aperture helps create some smooth background blur. (22mm, f/2.8, 1/250s, ISO 200) |
And of course, being a highly-rated lens, the images from the 12-35mm were excellent. Plus, the addition of built-in optical image stabilization is a much welcome feature considering the GM1 does not have the sensor-shift in-body IS like it's bigger brother, the GX7. This makes the 12-35mm not only better for stills in low light, but also for video recording.
 |
GM1+ Panasonic 12-35mm. (35mm, f/2.8, 1/250s, ISO 200) |
 |
GM1+ Panasonic 12-35mm. (27mm, f/9, 1/500s, ISO 200) |
Final Thoughts. So, is the Panasonic GM1 an awesome camera? Absolutely. It's a fantastically small, lightweight and high-performance camera that's packed with lots features much like a larger camera, such as the Panasonic GX7. The big story with this camera is, of course, its size. It's one of the best go-anywhere, carry-all-the-time, daily shooters out there today. While I wouldn't consider it "pocketable" in things like jeans or chinos, it's definitely small enough with the retractable 12-32mm kit lens to slip into a cargo pocket or jacket pocket with ease.
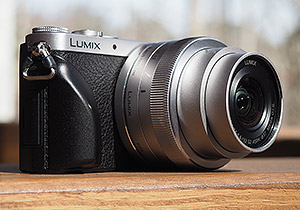
Get a grip. The Panasonic GM1 with Richard Franiec grip.
Unfortunately, its diminutive size can also be a downside. Especially when using larger and heavier lenses, the small, thin design of the GM1 body leaves little area for a secure grip (and the faux leather texture isn't all that "grippy," I found). Thankfully, Panasonic has recognized this issue and created a screw-on grip attachment plate that maintains the small size (no DSLR battery grip-like accessory here) while giving a more secure hold on the camera. Sadly, it's a bit awkward to use in some cases, as it not only uses the tripod socket but also blocks the battery and memory card door. As an alternative, the enterprising Richard Franiec has released a custom grip for the GMI that does not use the tripod socket or block the battery door.
On the performance side of things, there's not much to complain about with the GM1. The autofocusing is amazingly fast. It feels near instantaneous when I half-press the shutter button and locks onto subjects quickly without a lot of hunting back and forth like I've seen with other contrast-detect AF systems. And while it may not be as fast as a traditional phase-detect DSLR, the GM1 is certainly more than capable at shooting the majority of subjects most people tend to take, such as landscapes, portraits, travel and street photography as well as macro shots.
The big downside with the GM1 is if you're a fan of shooting telephoto shots, like I am, and if so, this little camera may not be the best choice. Longer, heavier lenses are quite awkward to use on such a small body (although the ability is there if you need it). Not only do you not have a lot of grip in the hand, but also the lack of a viewfinder or optical viewfinder attachment makes it uncomfortable to hold these longer, heavier lenses out in front of your face for any length of time.
I realize I'm probably trying to find a downside where there is none, as the Panasonic GM1 is clearly not designed for the telephoto wildlife or sports shooter. For 99% of the other possible subjects to photograph, however, the GM1 is an excellent camera with impressive performance and image quality all packed into an extremely convenient, compact and lightweight package. If you want a camera that's big on image quality with a large sensor and the flexibility of interchange lenses, but one that you can take with you everywhere, the Panasonic GM1 is that camera.
[Editor's note from Dave: Panasonic apparently recognizes the tele limitation of the GM1, and showed a prototype 30-100mm lens for it under glass at CES 2014. This forthcoming tele zoom is actually not that much larger than the original Panasonic 14-42mm kit lens, so should make a very nice combination with the GM1. As yet, though, Panasonic hasn't announced either price or availability. In an interview at CP+ in Japan just today, though, product planner Inoue san said "maybe soon." For all the GM1 owners out there, I hope it's soon indeed; I'm sure it will be a popular add-on lens for this camera when it comes out. Combined with the kit lens, you'll be able to go all the way from 24mm to 200mm equivalents in a very compact space!]
-----------------------------------------------------------------------------------------------------
Shooting with the Pentax K-3
by Mike Tomkins
Part II -- Time for some more exciting glass!
Posted: 02/06/2014

Finally, sunshine and blue skies. With the Pentax K-3 in-hand, getting out in some nice weather was a double treat. Here, I gave the K-3 a scene with everything from strong highlight to some fairly deep shadows to judge dynamic range. Click the image above for the high-res shot from the K-3, and click here to see the result from the K-5; raws are available for both.
In the first part of my Pentax K-3 Shooter's Report, I shot exclusively with the 18-135mm kit lens that can be purchased in a bundle with the camera body. In part, I did so because that's the one lens K-3 shooters are most likely to own, and we always try to ensure we cover kit lenses for that reason -- even if they're not the most exciting optics available. It also didn't hurt that I happened to own a copy of the same lens myself, meaning I could shoot side-by-side with my K-5, with no fussing and changing lenses back and forth.
With a consumer camera, the kit lens might very well be the only lens you'll shoot with, but that's almost certainly not the case with an enthusiast SLR like the Pentax K-3, though. For that reason, I was keen to get out and shoot with some of my nicer lenses. Sadly, I didn't have duplicates of these, so shooting side by side with these meant an exceptional amount of switching lenses between bodies.
Matching setups. My primary goal for the second Shooter's Report was to get an idea for just how much more detail could be extracted from the 24.35 megapixel Pentax K-3 than my own 16.3 megapixel K-5, which shares the same sensor as the later K-5 II and IIs models. I also wanted to see how noise levels compared in typical daylight shooting at lower sensitivities, and how the K-3's rendering compares to that of the previous generation flagships. And lastly, I wanted to try out a couple of the K-3's new features -- the antialiasing filter simulation function, and the high dynamic range shooting mode.
As in part one of the shooter's report, I shot with the cameras on default settings -- the fairest way to compare them -- and then made changes to file formats, drive modes, autofocus modes, antialiasing modes, HDR modes, and so forth to both cameras simultaneously. I also mostly kept the aperture and sensitivity the same or at least near to each other, while letting the shutter speed fall where it may to get a similar exposure between cameras.

While it's not night and day, the Pentax K-3's 24.35 megapixel sensor yields noticeably more detail than that of the previous 16.3-megapixel chip -- at least, when a good lens is mounted. Click the image above for the full shot from the K-3, and click here to see the result from the K-5; raws are available for both.
The lenses. Although I do own an smc PENTAX-DA 18-135mm F3.5-5.6 ED AL [IF] DC WR lens, as I noted, I seldom shoot with it -- and for this shoot I consciously left it at home. (It's my travel lens for when I don't have enough space to bring a selection of lenses with me.)
Instead, I took some of my favorite lenses out of my camera bag and brought them along. I had on hand three primes -- the DA 21mm F3.2 AL Limited, DA 40mm F2.8 Limited, and an older FA 100mm F2.8 Macro. I also grabbed a zoom which I've been resolving to try and use a bit more, my DA 10-17mm F3.5-4.5 ED (IF) Fish-Eye. The FA 100mm is a full-frame optic that predates Pentax's digital SLRs; the others are digital-specific, APS-C oriented lenses.
Note that my two Limited primes are the earlier generation and lack the flare-busting HD coating of the newer optics. Pentax also says their apertures aren't quite as round, so the bokeh should be more pleasing on newer lenses. Still, they're not a long way away from optically identical, so if you're looking at those lenses alongside a K-3 body, performance will likely be similar. (And I just got the HD variants in for some testing, so watch out for some side-by-side comparisons soon!)
Detail. It didn't take long to come up with the answer to my first question. In fact, the only thing I noticed even sooner is that the Pentax K-3's LCD monitor is noticeably less glare-prone, and easier to see in bright, outdoor light.
With a nice, sharp prime lens on the Pentax K-3, it's a worthwhile amount sharper than my K-5. Good lenses clearly yield quite a bit more detail than the earlier 16.3 megapixel sensor is capable of resolving. Part of the difference doubtless comes thanks to the lack of an anti-aliasing filter on the K-3, and I wish I still had a K-5 IIs with which to make an even fairer comparison, but the difference in detail between the two cameras is a lot greater than the subtle difference between K-5 and K-5 IIs.
In fact, it was clear enough that I didn't even have to wait until I got home to make that confirmation -- just comparing images side-by-side on the LCD was enough to make the call, although I certainly spent some time in side-by-side comparisons on the PC too. Giving the K-5 some unsharp mask gives the illusion of closing the gap, at least if there aren't areas of extremely fine detail such as text to tip your eye off to the trickery -- but there's no question the K-3 does a better job in the resolution department.
|
Pentax K-3 (100% crop of image downsampled to K-5 resolution)
|
|
Pentax K-5 (100% crop) |
A comparison of output from the Pentax K-3 (top) with the K-5. Here, the K-3's output has been downsampled to match the resolution of the K-5's image, using bicubic interpolation in Photoshop 12.1 (Creative Suite 5.5). Neither image has had sharpening applied. Both were shot handheld with the exact same lens, and focused using phase-detection with the AF point in the same location. Click either image to see the full-resolution original. |
|
Pentax K-3 (100% crop)
|
|
Pentax K-5 (100% crop of image upsampled to K-3 resolution; unsharp mask applied) |
Here, I've instead upsampled the same K-5 image to match the native resolution of that shot with the Pentax K-3. Again, I used bicubic interpolation, but this time I've applied unsharp mask (75%, radius 1.1 pixels, threshold 0) to the K-5 image, to account for the softness you'd expect in an upsampled image. Again, click either image for the full-res original. |
Above and below are a couple of examples, with both cameras tripod-mounted and focused in the same area. Out of curiosity, I first downsampled the K-3 shot to match the resolution of that from my K-5 -- and significantly more detail remains visible even after reducing the resolution. Then I tried upsampling from the K-5 to match resolution of the K-3. Either way, there's no question in my mind: There's a very worthwhile increase in detail here, which could come in handy for very large prints, or for when I want to perform significant cropping post-capture.
|
Another example of the K-3's greater detail capture, this time shot on a tripod and focused with contrast detection. Click here to see a shot with the exact same exposure variables and focus point on the Pentax K-5, and see 100% crops below. |
|
Pentax K-3 (100% crop of image downsampled to K-5 resolution)
|
|
Pentax K-5 (100% crop) |
A comparison of output from the Pentax K-3 (top) with the K-5. Here, the K-3's output has been downsampled to match the resolution of the K-5's image, using bicubic interpolation in Photoshop 12.1 (Creative Suite 5.5). Neither image has had sharpening applied. Both were shot tripod-mounted with the exact same lens, and focused using contrast-detection in live view mode with the AF point in the same location. Click either image to see the full-resolution original. |
|
Pentax K-3 (100% crop)
|
|
Pentax K-5 (100% crop of image upsampled to K-3 resolution; unsharp mask applied) |
Here, I've instead upsampled the same K-5 image to match the native resolution of that shot with the Pentax K-3. Again, I used bicubic interpolation, but this time I've applied unsharp mask (75%, radius 1.1 pixels, threshold 0) to the K-5 image, to account for the softness you'd expect in an upsampled image. Again, click either image for the full-res original. |
Another nice UI touch. Speaking of the LCD monitor, incidentally, there's one new UI feature on the K-3 that I really appreciate. When you use the playback zoom, there's not only an indication of the zoom level, but also a separate indication when you reach the point where the pixels in the image match those on-screen precisely, at 1:1 scale.
It's perhaps slightly odd that there's a very similar zoom level that doesn't offer a 1:1 match -- as you step through the zoom levels you suddenly notice a much smaller step that, to my mind, could be done away with and I wouldn't miss it -- but having a zoom level that is clearly marked "100%" when the overlay is enabled is great. I wish my K-5 had the same indication!
|
Knoxville's historic Andrew Johnson building, now given over to office use, is one target that almost always gives moiré and false color, thanks to the many venetian blinds in its windows. It didn't disappoint with the K-3 and K-5, giving me a good test of the former's anti-aliasing filter simulation function. Click here to see a shot with the exact same aperture, ISO sensitivity, and focus point on the Pentax K-5, and see 100% crops below. |
Aliasing (and Pentax's unique tool to fight it). One of the more significant changes between my aging Pentax K-5 and the K-3 is the latter's lack of an anti-aliasing filter. As I noted a moment ago, removing that filter does make a noticeable -- albeit not huge -- difference in sharpness. You really do need to be viewing shots 1:1 or printing them at extremely large sizes to notice the difference, but for many shots it's a nice thing to have. My concern with cameras that forgo the optical low-pass filter in the quest for detail, though, is that it increases the incidence of moiré. Once moiré and false color are in your shot, they can be a monumental pain to fix, if you can manage to do it at all.
Ever since I heard about Pentax's unique anti-aliasing filter simulation function in the K-3, described in great detail by Dave Etchells further down\ this review, I've been keen to give it a test and see how it does. It's not a panacea -- there are certainly limitations to the function. Most importantly, flash exposures often have such a short duration that the system won't have time to subtly blur detail like a real low-pass filter would. It also operates with decreased efficacy at shutter speeds faster than 1/1,000 second, and doesn't function at all for HDR captures or for movie recording.
|
|
Pentax K-3 (100% crops, no AA simulation)
|
|
|
Pentax K-5 (100% crops) |
Side-by-side, the K-3 with anti-aliasing filter simulator disabled shows fairly strong banding and false color effects. By contrast, with its built-in optical low-pass filter, the K-5 image looks much cleaner -- although it's not completely free from artifacts itself. Look at the original image by clicking the links, and you'll see some more subtle banding from the K-5 in the window at right -- they just appear further up, likely due to the different sensor resolution requiring detail at a different frequency to trigger the issue. |
Still, it's absolutely unique, unquestionably clever since it operates using a system the camera already has, and it largely solves the issue of having to decide whether to buy a camera with or without a low-pass filter -- if that option is even available. (For many cameras these days, it's not -- you live without the OLPF, or you don't buy the camera.)
With all that said, it can be a bit of a chore to find a real-world scene that provokes moiré and false color in the first place, but one common culprit -- venetian blinds in the windows of an office building -- did the trick, giving me both moiré and false color in shots with both the K-3 and K-5. (Which goes to show that even with an OLPF in place, you're still not immune to this annoying image defect.) The moiré and false color were definitely worse in shots from the OLPF, but would the AA Filter Simulation function fix the issue?
|
|
Pentax K-3 (100% crops, no AA simulation)
|
|
|
Pentax K-3 (100% crops, Type-1 AA simulation) |
|
|
Pentax K-3 (100% crops, Type-2 AA simulation) |
If moiré or false color strike, the K-3 has an anti-aliasing filter simulation function that aims to squash them. It does a surprisingly good job, eliminating the overwhelming majority of the unwanted artifacts in this shot with only a slight reduction in sharpness.. |
The answer was a resounding yes -- in fact, the shots from the K-3 actually seemed ever so slightly better to me than did those from my OLPF-equipped K-5, although that may just have been the luck of the draw with regards to the frequency of detail in the blinds versus the resolution of the sensor.
I didn't see a huge difference between the Type-1 and Type-2 AA filter simulations, and I do think Pentax needs to do a better job of explaining the two modes -- and the distinction between them -- in the user manual, which provides not one word of explanation. Type-2 seemed to have a slightly stronger blur, though, and it's our understanding from the pre-launch press briefing that it describes a circular motion, rather than a linear one.

The K-3's images at lower sensitivities and in good light are just as clean as those from the K-5 -- they just show more detail. Here, you can see a little mottling in the windows if you look at just the red channel, but the same is true of the K-5's shot. Click the image above for the high-res shot from the K-3, and click here to see the result from the K-5; raws are available for both.
AA Filter Simulator bracketing. One feature just added to the Pentax K-3 courtesy of a firmware update -- and I actually delayed this shooter's report just slightly to test it -- is the ability to bracket the AA filter effect, shooting several shots in a row with the effect disabled in one, enabled using Type-I simulation in another, and Type-2 in the third. I'd actually been intending to suggest just this behavior in my shooter's report, as you often won't have the time to check for moiré when you're out shooting in the field, and indeed our technical editor had said much the same when the K-3 first launched late last year. Well, Ricoh apparently has mind-reading capabilities, and they got right down to adding the feature.
I gave it a test, and I think it's a great improvement. Instead of having to fiddle with the menu to shoot all three modes, they're captured in a single press of the shutter button, and within less than half a second -- likely fast enough that you'll get much the same framing and subject pose for all three images, unless your subject is particularly active.
There is one unfortunate catch, however. With firmware v1.02 applied, enabling the new AA filter bracketing function through the menu system immediately disables exposure bracketing, if that was active. (And vice versa.) Personally, I'd like to see the two able to be combined -- shooting off a burst of nine images is still easily within the K-3's buffer capacity, and I can't think of a good reason one function should override the other. (Nor is it the most intuitive behavior for a change of one setting to affect another without any warning whatsoever.)
Still, that aside I'm very happy to see the new AA filter bracketing function arrive before I could even ask for it. Hopefully Ricoh will see fit to provide the ability to couple it with exposure bracketing in a future update.
Noise levels. Any concerns I had about noise at lower sensitivities and in good lighting quickly evaporated once I got home and took a look at my images. Near base ISO, the Pentax K-3 yields images that are indistinguishable from my K-5 in terms of noise -- there's just all that extra detail to play with. Great news!

Click the image above for the full shot from the K-3, and click here to see the result from the K-5; raws are available for both.
Punchy color. Overall, rendering is very similar between the two cameras. At defaults, they have much the same "Pentax look", which is quite punchy and saturated, and especially tends to try and add some pep to blue skies and green foliage. Personally, I find it a little too punchy for my tastes, but that's easily resolved. When I'm shooting JPEG, I typically opt for the Natural custom image setting, which gives a more realistic rendering. I can easily understand why it's not the default, though, because consumers do tend to gravitate towards that punchier look.
Purple fringing. One not-so-desirable attribute I noticed while shooting with the K-3 under bright sunlight is that it seems to show somewhat more pronounced purple fringing on strong highlights than does my K-5. The crops below are from shots taken moments apart, with the exact same lens and subject. This is especially noticeable where you have a very bright highlight adjacent to a high-contrast edge.
Note in the left-hand crops that there's a purple cast at the bottom of the glare on the lamp from the K-3, not present in the K-5 version. Looking back at my night shots, it's noticeable with strong point light sources against a dark background there, as well.
Don't confuse this highlight fringing with the fringing shown in the crops at right, which is more typical and lens-dependent. (We're pretty close to the corner of the frame here.) Both K-3 and K-5 suffer about equally in this regard, although the K-3 shows more blue fringing on the right side, and the K-5 has more purple on the left, plus a little cyan fringing at right.
|
|
Pentax K-3 (100% crops, no AA simulation)
|
|
|
Pentax K-5 (100% crops) |
Color fringing rears its head in this shot. In part, it's because we're very close to the corner of the frame, but the K-3 also shows an unattractive purple fringe beneath the sharp highlight on both lamps. |
These fringes aren't terribly pretty seen 1:1 onscreen, but realistically you'd need a very large print size for them to be noticeable, and the defringing tool in apps like Adobe's Photoshop Lightroom should clean them up without too much fuss. Not a show-stopper, by any means, but if you shoot scenes with lots of sharply defined point light sources, it might be something to bear in mind.
|
Nice rich color from the Pentax K-3, and very similar to that from the earlier K-5. Both images were taken just moments apart. Click here to see that from the K-5, shot with similar exposure variables, including auto white balance and the default "Bright" custom image mode. The "Natural" mode yields less saturated results. |
More consistent metering. Compared to that in the K-5, the Pentax K-3's new metering system with its finer-grained metering sensor does seem to be doing a better job. I've taken a look back over my images, and fewer of them seem to need exposure compensation in the first place. Those which do, other than unusual scenes that would confuse pretty much any metering system, invariably seem to ask for just a touch of negative exposure compensation. Doubtless that's partly down to my personal tastes: I don't like to lose highlight detail when I'm shooting JPEG-only. Shooting raw I think the exposures are close enough that I'll need to dial in exposure compensation only for particularly difficult subjects -- the overwhelming majority of shots are near enough to the center of the ballpark that the exposure latitude of raw will get me the rest of the way to a perfect exposure without issue.
|
White balance from the Pentax K-3 and K-5 was mostly pretty similar, but occasionally they diverged pretty radically. Here, the K-3 did a much nicer job than did the K-5, which gave the scene a very cold cast. Both cameras metered pretty equally, needing -0.7EV of exposure compensation to hold onto the highlights. That's not surprising, given the deeply shaded subject. Click here to see the result from the K-5. |
HDR -- served raw! Lastly for this section of the Shooter's Report, I wanted to take a look at the K-3's HDR capabilities. There are two upgrades in the raw department, and between them it strikes me that I'd be much more likely to use in-camera HDR.
As things stand, although my K-5 supports HDR -- even handheld -- I simply never use the feature. That's largely because it can only output processed images in JPEG format. Once I head home, if I decide I'm not satisfied with the result once I look at the HDR in Lightroom -- well, it's probably too late to do anything about it. So I shoot my HDRs as separate images in raw, and process them once I get home -- if I remember. More likely, I get too busy and the HDR never happens at all.
With the K-3, you can save HDR images in either .PEF or .DNG raw format -- and it's not just a processed image, either. You can also control the step size between exposures, something that couldn't be done with the K-5, and which gives you quite a bit more control. The raws actually include all three source images in a single file. There's a positive and a negative to that approach, as I quickly discovered.
|
|
Pentax K-3 (HDR 2; 1EV steps)
|
Pentax K-3 (HDR 2; 2EV steps)
|
|
|
Pentax K-5 (HDR 2; 3EV steps) |
Pentax K-5 (HDR 2)
|
The Pentax K-3 gives more control over HDR shooting in-camera, and it also allows you to save the original, source images in a single, combined raw file. You can even shoot raw+JPEG. By contrast, older models like the K-5 allowed JPEG only for HDR capture, and gave no control over step size. The K-5's result also has much more muted color than that from the Pentax K-3's in-camera HDR files. |
On the plus side, if you shoot raw+JPEG as I did in this review, you have matching filenames for both types. And if you shoot raw only, you have a single file that makes it clear to you this is an HDR. On the minus side, though, the file sizes are huge. I'm talking close to 100MB per image huge.
And also, every third-party app I tried -- be it Adobe Photoshop Lightroom, Adobe Camera Raw, or DxO Optics Pro -- didn't recognize that there were three separate images, and cleverly layer them for me or even open them as separate files. As far as every program was concerned, this was a raw file containing a single, non-HDR raw image, and they wouldn't be told otherwise. (Want to try your own program? You can download both .PEF and .DNG HDR raws in the gallery.)
The answer, it turned out, was in Pentax's own, bundled software package, the Silkypix-based Digital Camera Utility 5. (And I'm guessing if you own a current, retail copy of Silkypix, it'll likely exhibit the same behavior.)
For one thing, Digital Camera Utility 5 does recognize the K-3's HDR raw files, both in .PEF and .DNG formats. That in itself felt like a breakthrough, after battling the third-party software without success. It wasn't entirely satisfying, though, because I'm a man of habit. I didn't want to learn another software package -- I wanted to use the apps I'm comfortable with.
|
|
Pentax K-3
(HDR Auto; 2EV steps; auto-align) |
Pentax K-5
(HDR Auto; auto-align) |
The Pentax K-3 and K-5 give similar results with handheld, auto-aligned HDRs. Both cameras do apply a focal length crop if auto-align is enabled, so for really wide-angle HDRs you'll want to make use of a tripod and disable auto-align. Auto HDR was used for both of these shots. |
And then I found nirvana. A little option in Digital Camera Utility's Tools menu by the name of "Separation of HDR RAW file" made life great once more. With that one little option, suddenly the one unwieldy raw file could become three, sharing the same prefix and then _1, _2, or _3. The original file type is respected -- if you shot DNG, you get three separate DNG raws. It even provides an option to rename the new files, should you choose.
For the first time in my many years of owning Pentax DSLRs, I think Digital Camera Utility 5 will be staying on my PC, solely to give me access to this tool. And I think I'll be shooting more HDRs, as well, safe in the knowledge I'll have easy access to the fuss-free, camera-processed version, but with the originals on hand should I want to dig deeper.
|
Image shot with Pentax K-3; click here to see the result from the K-5. |
Still more to come. At least, that will be happening if I buy the K-3 -- which is looking more and more likely. But I'm still not sold yet; there's more testing to do!
My plans for part three of this Shooter's Report are to try out the K-3's wireless connectivity and remote control, courtesy of the Pentax-branded Flucard which I recently received for testing. I'm also planning to test burst-shooting performance and tracking autofocus, and per a reader request, I'll be giving the Multi Auto white balance mode a spin to see how it handles some variant light sources. (Got any requests of your own for features you'd like me to test? Make sure and leave them in the comments section at the end of the review page over on IR!)
At the moment, I'm planning on there being one final Shooter's Report section subsequently, and the early plan for that is to cover flash photography, the completely overhauled movie mode, and a wrap-up of anything else that I didn't hit in the other sections. So watch this space -- with the holidays and the CES show now well behind us, and soon the CP+ tradeshow as well, I'm hoping to get this review wrapped up before too much longer!
-----------------------------------------------------------------------------------------------------
Feature: The Grenata Army: Amazing Color Photos from 1915
by Steve Meltzer
In 1915, as World War I was raging, photographer L�on Gimpel befriended a group of street kids in the Rue de Grenata neighborhood of Paris. The kids had their own 'army' and were at play re-enacting the war's battles. Knowing a good thing when he saw it, Gimpel began to visit the kids regularly on Sundays and helped them construct their arsenal from castoff materials. He probably also helped orchestrate the children as he photographed their valiant struggle against the evil Germans.
 |
P�p�te prepares for action in a biplane whose, “fuselage was made of a box; the machine-gun of a coffee grinder, to which was added a section of a broom handle; and a propeller which could be rotated.” |
L�on Gimpel was born in 1873 to a Jewish Alsacian family who fled to Paris after Germany took over Alsace. He is perhaps best known for his early use of the revolutionary Autochrome Lumi�re color process. In 1904, Gimpel met Auguste and Louis Lumi�re who had just displayed their invention to the Acad�mie des Sciences. At first limited to long exposures, Gimpel applied the autochrome process to still life and landscape photography. With the help of a colleague, Fernand Monpillard, he modified the plates to produce "instant" color pictures.
Thanks to this Gimpel was the only photographer to take color images of everyday life during la Belle �poque and on June 10, 1907 became the first photographer to have images published in color.
 |
“The defense of the house in ruins provided me with a shot full of the picturesque, with my soldiers taking cover in house corners and the 75 gun in full view.” |
During the First World War Gimpel photographed in and around Paris. On one of his walks through the city he encountered this group of children playing soldiers. He was delighted by them and soon came to know them all. The oldest boy in this remarkable band of brothers was the "chief," while the girls in the group lent their support to the cause playing the "nurses."
 |
"The prisoner, framed by two privates, one of whom is P�p�te, is being interrogated by the chief." Note the carrot-plume. |
One of Gimpel's favorites was P�p�te, whom he described as "small, slightly misshaped, rather scrofulous, looking like gnome." In spite of this, it was P�p�te who each Sunday stepped into the cockpit of his biplane to play the role of the courageous French flying ace.
 |
The fearless P�p�te finishes off the dread Hun opponent, shooting him from the skies. |
But playing soldier requires an enemy and the chief's best friend was recruited to play the malevolent German. A paper double eagle adorned the Hun's cap and a carrot comically replaced the feathered plume of the German helmets. At the end of each day's battles the German was executed and the carrot eaten by the victorious French forces.�
 |
The ace pilot P�p�te with his latest victim: "In a flattering pose, one hand on his plane's wing and an expression of triumphant joy impossible to describe, as he contemplates his panting victim, crashed to the ground." |
In the photograph of the execution of the blindfolded German, the Chief had first thought of having a firing squad, but thought that that was insufficient. "To execute a Boche," he said, "nothing but a cannon will do."
 |
There can be no war without medals and the Grenata Street army had its share of decorations. Gimpel wrote "My Army possessed nothing but a Belgian flag � with due respect for the colors of valiant Belgium, we could not possibly fly this flag. I was just going to add a tricolor to my shopping list when the chief confided that such a flag did already exist, but that one of the mothers had taken it out of circulation so it would stay intact until Victory Day." |
At the end of each day, "war” photographer Gimpel would reward his rag-tag army for their successes on the field of battle with barley sugar. The troops loved it, happily crying out in unison "Vive le Photograph."
Long live the photographer!
(Via retronaut, source Australian War Memorial)
-----------------------------------------------------------------------------------------------------
Just Announced: New Camera Roundup
---------------------------------------------
This past week, in the lead up to the CP+ expo in Japan, we'd had a slew of new cameras announced by Canon, Nikon, Panasonic, Pentax, Sigma and Sony. Big hitters include an updated Canon G1 X Mark II, the new 4K-capable Panasonic GH4, NEX-6 replacement Sony A6000, Sigma's unique dp2 Quattro, and Pentax's announced the next 645D medium format camera! Here's a little roundup listing of all the big announcements:
-----------------------------------------------------------------------------------------------------
Quick Hits: Sony FE 35mm f/2.8 Zeiss Lens Review
We've just posted our Sony FE 35mm f/2.8 Zeiss lens review, and like the Sony FE 55mm we reviewed earlier, this is another very solid performer from folks at Sony and Carl Zeiss! This full-frame E-mount lens was announced alongside the Sony A7 and A7R mirrorless cameras serving as a compact, high-quality and relatively fast wide-angle prime lens. The new 35mm f/2.8 features equally impre
ssive specs such as three double-sided aspherical elements, Zeiss's T* coatings for ghosting and flare control, a 7-bladed rounded aperture all surrounded by a solid-feeling, dust- and moisture-resistant metal barrel.
Our tests show this 35mm f/2.8 lens produces outstanding results in pretty much all categories, particularly with sharpness. It's up there as one of the best prime lenses we've ever tested. Although vignetting is noticeable and there's a bit of corner softness, particularly when shooting on full-frame cameras at wider apertures, we think the other performance characteristics handily outweigh these factors. The Sony FE 35mm f/2.8 gives shooters excellent, general purpose, wide-angle focal length perspective that's great for travel and street photography as well as portraits or general all-around shooting.
Jump on over to SLRgear to read our full Sony FE 35mm f/2.8 Zeiss lens review to see our test results and read our final verdict.
This fast, rugged and very compact prime lens is currently available for a very reasonable $798 at Amazon, Adorama, and B&H, and includes front and rear lens caps and a bayonet-mount lens hood. By purchasing this lens, or any other product, at one of our trusted affiliates, you help keep these reviews coming!
In the meantime, check out some sample photos below taken by Rob, our lens technician, with the lens mounted on the Sony A7R. You can view more sample photos, plus download the full-resolution files, over at our Flickr page.
-----------------------------------------------------------------------------------------------------
POPULAR ON THE SITE
-----------------------------
At http://www.imaging-resource.com/news you can keep track of the photo news on our main site. Among the most popular stories over the last couple of weeks:
- Fujifilm X-A1 - Is this the best low light camera for under $1500? (even though it only costs $499?) (http://www.imaging-resource.com/news/2014/02/10/fuji-x-a1-the-best-low-light-camera-under-1500)
- Fujifilm X-T1: First Shots posted! (http://www.imaging-resource.com/news/2014/02/04/fuji-x-t1-first-shots-posted)
- Fujifilm X-T1: First batch of gallery images posted (http://www.imaging-resource.com/news/2014/02/03/fuji-x-t1-first-batch-of-gallery-samples-posted)
- Olympus Q&A: The story of the Stylus 1, the relationship with Sony, and where is the camera market heading? (http://www.imaging-resource.com//news/2014/02/03/olympus-qa-the-story-of-the-stylus-1-the-relationship-with-sony-and-where-i)
- News from the world of 4K: first Panasonic GH4 footage emerges; Blackmagic Production Camera 4K gets price update (http://www.imaging-resource.com/news/2014/02/10/news-from-the-world-of-4k-first-panasonic-gh4-footage-emerges-blackmagic-pr)
- Olympus to show M.Zuiko Pro 7-14mm f/2.8 and 300mm f/4 lenses at CP+ (http://www.imaging-resource.com/news/2014/02/12/olympus-to-show-m.zuiko-pro-7-14mm-f-2.8-and-300mm-f-4-lenses-at-cp)
- More lens news: Cosina updates Nokton 25mm f/0.95, Sony puts price tag on FE 70-200mm f/4 (http://www.imaging-resource.com/news/2014/02/12/more-lens-news-cosina-updates-nokton-25mm-f-0.95-sony-puts-price-tag-on-fe)
- This is the best roundup of iPhone photo editing apps we've seen (http://www.imaging-resource.com/news/2014/02/12/this-is-the-best-roundup-of-iphone-photo-editing-apps-weve-seen)
- Apple shot this incredible tribute to the Mac using just the iPhone 5s (VIDEO) (http://www.imaging-resource.com/news/2014/02/03/apple-shot-this-incredible-tribute-to-the-mac-using-just-the-iphone-5s)
- Form Before Function: the Hasselblad HV is a Sony a99 with a new coat of paint (http://www.imaging-resource.com/news/2014/02/03/form-before-function-the-hasselblad-hv-is-a-sony-a99-with-a-new-coat-of-pai)
----------------------------------------------------------------------------------------------------
NEXT ISSUE
---------------
We'll see you next on February 28, with a regularly scheduled edition (and lots more news and analysis to share)!
SIGNOFF
-----------
That's it for now, but between issues visit our site for the latest news, reviews, or to have your questions answered in our free discussion forum. Here are the links to our most popular pages:
Newsletter Archive: http://www.imaging-resource.com/cgi-bin/dada-nltr/mail.cgi/archive/irnews
Daily News: http://www.imaging-resource.com/news
SLR Gear: http://www.slrgear.com
New on Site: http://www.imaging-resource.com/new-on-ir
Review Index: http://www.imaging-resource.com/camera-reviews
IR Photo Contest: http://www.dailydigitalphoto.com
Google + http://plus.google.com/+imagingresource
Facebook: http://www.facebook.com/imagingresource
Twitter: http://www.twitter.com/IR_Lab
Happy snapping!
Dave Etchells & the IR Editorial Team
editor@imaging-resource.com
|

