Panasonic Lumix DMC-GF2 Optics
Panasonic LUMIX G Lenses
 The Panasonic GF2 is compatible with any Micro Four Thirds lens, with
Panasonic, Olympus, and third parties together offering at least twenty lens models at the time of writing (March 2011). Panasonic has dubbed the bulk of their Micro Four Thirds lenses "LUMIX G,"
and the company has released 11 models to date. Six of these are zooms, as identified by their Vario branding, while five are primes -- among these, one macro and one 3D lens. Of the Panasonic lenses on offer, two are available in a kit along with the GF2 -- the 14-42 mm zoom, or the 14 mm prime. (In some markets, it's also possible to buy a kit consisting of both lenses.)
The Panasonic GF2 is compatible with any Micro Four Thirds lens, with
Panasonic, Olympus, and third parties together offering at least twenty lens models at the time of writing (March 2011). Panasonic has dubbed the bulk of their Micro Four Thirds lenses "LUMIX G,"
and the company has released 11 models to date. Six of these are zooms, as identified by their Vario branding, while five are primes -- among these, one macro and one 3D lens. Of the Panasonic lenses on offer, two are available in a kit along with the GF2 -- the 14-42 mm zoom, or the 14 mm prime. (In some markets, it's also possible to buy a kit consisting of both lenses.)
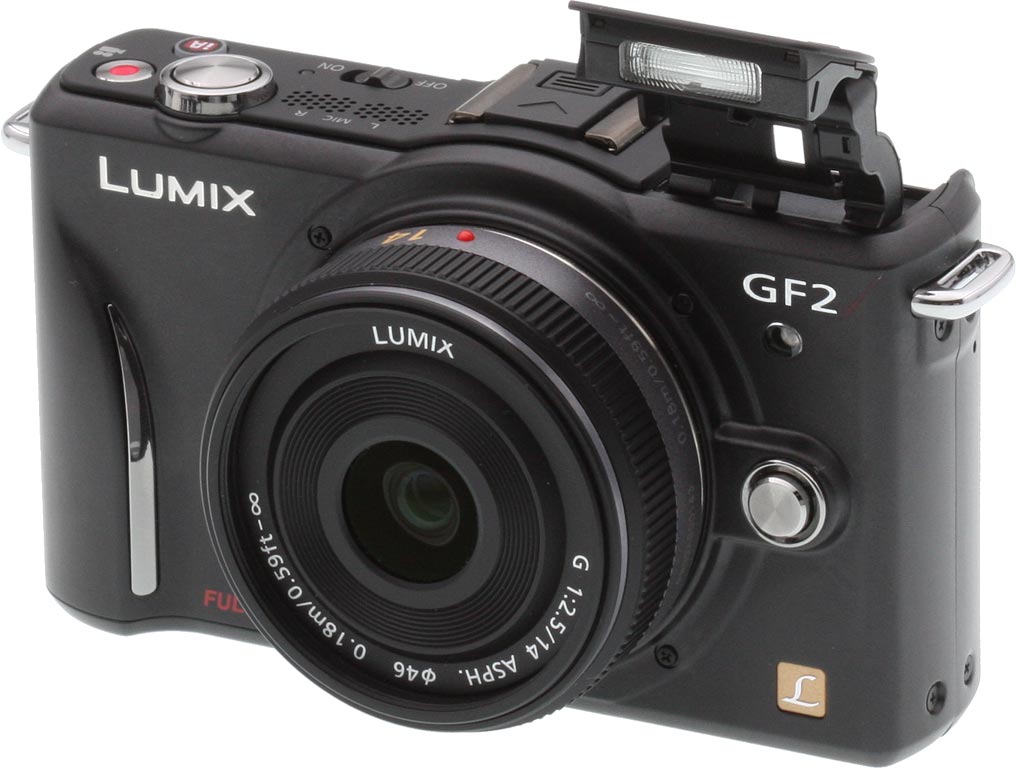
The Panasonic Lumix G 14 mm / f/2.5 Asph. is the company's smallest Micro Four Thirds lens. Despite featuring a metal mount, it's also the lightest by some margin -- at least, with the sole exception of the unusual 3D lens -- weighing just under two ounces. With a maximum aperture of f/2.5, it's among the brightest, bettered in Panasonic's own lineup only by the 20mm f/1.7 prime. (These two lenses would complement each other nicely, with 35mm-equivalent focal lengths of 28mm and 40mm respectively.) The Lumix G Vario 14-42mm f/3.5-5.6 Asph. Mega O.I.S, meanwhile, is the lightest zoom lens in the line, and offers equivalent focal lengths from 28-84mm. To save weight and cost, the 14-42mm lens forgoes an IS switch, with stabilization instead being enabled or disabled through the camera's menu system. It uses a plastic lens mount, instead of a metal one.
The Lumix G Vario 7-14mm f/4.0 Asph. offers the widest field of view among Panasonic's Micro Four Thirds zooms, and is also unique as the company's only zoom to offer a constant maximum aperture -- but no stabilization. The Lumix G Vario 14-45mm f/3.5-5.6 Asph. Mega O.I.S. is just a fraction smaller and has ever so slightly more reach than the 14-42mm, with an equivalent range of 28-90mm, but weighs almost 20% more.
The Lumix G Vario HD 14-140mm f/4.0-5.8 Asph. Mega O.I.S. has by far the most reach of Panasonic's Micro Four Thirds lenses, with 35mm-equivalent focal lengths ranging from 28-280mm, for a 10x zoom range. It's the only lens carrying the "HD" badge, which indicates that it's designed for movie recording. This comes thanks to two specific features -- a nearly silent inner focus direct-drive linear motor for continuous auto focusing, and a seamless aperture adjustment.
The Lumix G Vario 45-200mm f/4.0-5.6 Mega O.I.S., while it has a more modest 4.4x zoom range, reaches out to a stronger 400mm-equivalent telephoto. The Lumix G Vario 100-300mm f/4.0-5.6 Mega O.I.S. offers the strongest telephoto of all, though, at 600mm equivalent. It's also the heaviest of Panasonic's offerings, at a little over 1.1 pounds, not to mention the largest, at just under five inches in length when retracted, with a maximum diameter of 2.9 inches.
Finally, the Lumix G Fisheye 8mm f/3.5 offers the widest field of view, and the Leica DG Macro-Elmarit 45mm f/2.8 Asph. Mega O.I.S. has the tightest field of view among the primes. The latter is also the only model not carrying Lumix G branding, is also the only prime in the group to offer image stabilization. The Lumix G 12.5mm f/12 is pretty much unique, not only within Panasonic's line, but for Micro Four Thirds as a whole, allowing simultaneous recording of two low-resolution images (1.4 megapixel on the GF2) with slightly differing field of view, which are combined to create a single 3D image for viewing on compatible displays.
Although the only one of Panasonic's lenses available to us during our time with the GF2 was the 14mm prime, we've shot extensively with the company's other lenses as part of our reviews of Panasonic cameras, and have also tested them in the lab for SLRgear. Overall, we've found them generally to be of very good quality. Helped in part by in-camera processing which reduces both geometric distortion and chromatic aberration, Panasonic lenses have consistently delivered excellent optical results in our testing and use. Lens quality is an important part of the decision whether or not to adopt a new camera system, and on that score, the Panasonic G-series does very well.
Quite a range of other options are available from Olympus, Panasonic's partner in the Micro Four Thirds format, or are on the horizon from a variety of companies. Olympus currently offers six Micro Four Thirds-mount lenses (or seven if you count the two 14-42mm variants), of which one is a prime, and the remainder are zooms. Third party lens maker Sigma Corp. recently announced that it is working on intends to market lenses for the Micro Four Thirds format, although it had yet to announce specifics as of March 2011. Fans of manual focus will also find interesting the fact that several famous names have thrown their hat in the Micro Four Thirds ring, including Carl Zeiss, Cosina, Komamura, and Schneider Kreuznach, although of these only Cosina has yet to reach market with a 25mm f/0.95 prime. Finally, a new startup company called Noktor has also shipped a completely manual 50mm (100mm equivalent) F0.95 prime lens, manufactured by Goyo Optical, which appears to be based on a design intended for CCTV security cameras.
The Micro Four Thirds mount has an unusually small flange to sensor distance, which means there's plenty of room to insert mount adapters between the camera body and lens flange. As a result, a vast selection of adapters make it possible to mount all sorts of current and historic glass on a Micro Four Thirds camera. Lenses that can be adapted include certain standard Four Thirds, Olympus OM, Canon FD, Nikon F, Pentax K, Sony / Minolta Alpha, Contax / Yashica, M42, T2, Leica M / R, Voigtlander VM / Ai-S / PK-A/R / KA, and Carl Zeiss ZM / ZF / ZK types. These adapters generally have some limitations as to compatibility and available features, which will depend on the specific model being used, but photographers on the Micro Four Thirds platform can rest assured they won't be left wanting in terms of compatibility with other lens mounts.
Because the company's lenses largely feature optical stabilization, the Panasonic GF2 doesn't itself incorporate in-body image stabilization. This means that while third party lenses can be used with the camera, only Panasonic's lenses offer stabilization on the GF2 (at least, for the time being -- it's certainly possible that a third party could offer its own stabilized Micro Four Thirds lens in the future).
Panasonic GF2 Autofocus
The Panasonic GF2 has a 23-area contrast-detect autofocus system, using the main imaging sensor to determine focus, similar to how most point & shoot cameras work. There are four AF Area options, selected by pressing the Left arrow key on the four-way controller, which doubles as an AF Mode button. These options include Face Detection, AF Tracking, 23-area Focusing, and 1-area Focusing. In addition, there are three focus servo modes, selected with the Focus Mode option in the Setup menu. These are Single AF (AFS), Continuous AF (AFC), and Manual.
Touch AF. The autofocus point can be set anywhere within the frame (except the extreme edges) by touching the LCD display, and four different point sizes are available. We found this one of the camera's most compelling features. (Picture shows Panasonic G2, which operates similarly to the GF2).
A built-in AF Assist lamp illuminates the center of the image frame in difficult lighting conditions, to assist in achieving a focus lock. Its effective range varies depending on the lens in use, and it can be disabled altogether for situations when it might prove a distraction to your subject, or otherwise objectionable. Lenses with larger diameters may partially or completely block the assist lamp from illuminating your subject.
When the AF Mode is set to Face Detection, the camera automatically detects up to 15 faces in a scene, and can be programmed to recognize three specific individuals whenever they appear in the frame, allowing them to be prioritized over other faces when recognized. (In other words, you can train the camera to distinguish six specific people from others, and base exposure and focus on just their faces, rather than others in the frame.) The GF2 will focus on an individual selected by the face recognition function if possible, or on the dominant face if no individuals are recognized. When a photo contains more than one recognized face, the camera selects on which face to focus based on the priority selected when programming the faces to be recognized. There's also a three-step control over the facial recognition sensitivity, allowing higher recognition accuracy (but with an increased likelihood that one of the designated faces won't be recognized), or vice versa.
The face selected for focusing is indicated by a yellow frame until focus lock is achieved, at which point the frame color changes to green; other faces get a white frame to indicate their location. Once detected, faces are tracked around the screen automatically. A manual AF point can be set in face detection mode by simply touching the desired point on the screen, and one of four point sizes selected by dragging a slider that appears at the right-hand side. The point position can also be set or adjusted with the arrow buttons on the back of the camera, and the size adjusted by rolling the rear dial. If a manual point is set, all detected faces are still indicated with white frames, but not used for AF calculation.
The AF Tracking mode is great for shooting sports, kids, and pets, as it automatically tracks any moving subject -- not just faces -- around the frame, based on the subject's tone and color. The subject can be selected by touching it on the screen. Alternatively, it can be selected by aiming the camera so as to place the AF point over the subject, then half-pressing the shutter button. In either case, when tracking, the subject is indicated with a yellow frame. Face recognition is disabled when the camera is set to AF tracking mode. The tracking mode also doesn't function when the Panasonic GF2 is set to black & white film modes, or the monochrome My Color mode.
In 23-Area Focusing mode, the GF2 defaults to automatically selecting between all twenty three focusing points. By touching the screen, one of nine groups of AF points can be selected, and the camera will automatically choose only from the points in the selected group. Each group consists of five points, apart from in the extreme corners of the frame, where the groups only contain four points. The selected group is indicated by a cross mark in the center of the cluster of AF points.
Finally, the 1-Area Focusing mode provides a single autofocus point which can be moved anywhere within the frame except the extreme edges, again either by touching the display or by using the arrow buttons. As with the face detection mode, the AF frame size can be changed to Spot, Normal, Large or Extra Large, either by dragging an on-screen slider, or by rolling the rear dial.
In Single AF servo mode, the camera will attempt to determine the point of focus when the shutter button is half-pressed, and then lock focus at this distance for as long as the shutter button remains pressed. Through the Custom menu, you can assign the Q.Menu / FN button to serve as either an autofocus lock button, an autoexposure lock button, or a combined AF/AE lock button, with a second press releasing the lock. A further Custom setting instructs the camera to operate in AF+MF mode, allowing the point of focus to be fine-tuned manually after the autofocus operation is complete.
In Continuous AF servo mode, the camera will attempt to predict subject motion and keep the area under the AF point in focus, for as long as the shutter button remains half-pressed. Because contrast-detect AF systems have to perturb the focus in order to tell whether the image is actually in focus or not, the DMC-GF2's Continuous-AF mode's operation can be seen in the live view feed, at least if you're watching closely: The image will continuously shift very slightly in and out of focus when C-AF is active, as the camera constantly re-checks its focus setting.
A Focus Priority setting in the Custom menu allows the Panasonic GF2 to be set to require a focus lock before the shutter can be triggered, or alternatively to allow the shutter to fire regardless of whether a lock has been achieved. When shooting in burst mode with continuous AF, enabling Focus Priority can reduce the burst speed, because a focus lock must be obtained before each shot in the burst. With Focus Priority disabled, the GF2 simply focuses at the predicted distance for each subsequent image in the burst, without actually confirming a focus lock has been achieved. (For bursts in Single AF mode, focus is locked from the first shot, so the only effect enabling Focus Priority has in this situation is that it delays firing of the first frame in the burst, until a focus lock has been achieved.)
Through a Record menu setting, the Panasonic GF2 can be configured to begin seeking a focus lock as soon as the camera is held relatively steady, before the shutter button is half-pressed. When this Quick AF setting is enabled, the time to obtain an AF lock should be reduced, but at the expense of battery life.
Of course, the Panasonic DMC-GF2 also offers a Manual Focus mode. In MF mode, a Custom setting called MF Assist optionally causes the camera to magnify the preview image by 5x, whenever the focus ring is adjusted, to help determine critical focus. The MF assist preview can be panned around the image frame by dragging your finger across the surface of the display, and the zoom level increased to 10x (and reverted to 5x) by pressing an on-screen magnifying glass icon. After 10 seconds of manual focus inactivity, the Panasonic GF2 reverts to showing the full image frame.
For use with old manual-focus lenses (which lack the communication that would tell the body when the focus ring was being adjusted), or perhaps to simply check the focus that the AF system has achieved, it's also possible to call up the MF assist function without first adjusting focus, by pressing the Left-arrow button when in MF mode. An MF Guide function displays an on-screen gauge with a visual indication of the current relative focus distance, making it easy to see whether you're focusing closer or further away when the focus ring is turned. (It doesn't display the actual focus distance, just a relative range from close-up to infinity.)
While the LCD on the Panasonic GF2 is a relatively high-resolution design, with some 460,000 dots, the optional electronic viewfinder offers less than half this resolution, with some 202,000 dots. For precise manual focusing, the LCD display hence proves a better choice, so long as it isn't obscured by ambient lighting conditions.
Touch-AF Interface
In the above discussion, we mentioned several times how the Panasonic GF2's touch screen can be used to set the AF point, identify the desired subject, or call up the focus-assist display in Manual Focus mode. We've often said that we're no particular fans of touch-screen interfaces, but the touch interface on the previous Panasonic G2 model really made believers of us, and the GF2 retains that heritage. Shawn and Dave first heard about the original G2's touch interface in the non-disclosure briefing, and shared much the same initial opinion: "eh - another gimmicky touch-screen interface." Once they had a chance to shoot with the camera, they found their opinion changing pretty radically. The touch interface on the G2 and GF2 is really done exactly right, and using it to set focus or select a subject for tracking is an incredibly natural way of doing so. Perhaps the best measure of how much we all like it is how often we find ourselves wanting to select an AF point on other cameras we're testing by poking their screens.
Shawn made a video showing how the Panasonic G2's touch interface works, for our review of that camera, and with the touch interface being a similarly integral part of the GF2 experience, we think it's worth re-linking here. Check it out, it's really a very intuitive way of relating to your camera!
AF in Movie mode
In Movie mode, you have the same focusing options available as when shooting stills, and it is possible to adjust focus not only before movie recording starts, but also during recording. There
are a couple of differences from their still image counterparts though -- the most
obvious being the absence of the beep that serves to confirm AF lock. Also, when set to AF-C servo mode, the Panasonic GF2 looks to a setting in the Motion Picture menu to determine whether to allow Continuous AF. If the option is disabled, the GF2 will operate in Single AF mode, regardless of the Focus Mode being set to AF-C, performing an AF operation only until a lock is achieved. If the option is enabled, Continuous AF becomes available during movie recording as well as for still images. Since focus operation is picked up by the camera's internal
microphone, you may want to choose either S-AF or MF modes to minimize
the presence of AF drive noise.
Panasonic DMC-GF2 Sensor Cleaning
The Panasonic DMC-GF2 features an ultrasonic dust-reduction system, especially important since the DMC-GF2's shutter is normally open for full-time Live View. The system automatically runs at power-up, and might as a result slow camera startup slightly. We measured the GF2's delay from power-on to first shot at about a second, about 0.4 seconds faster than the previous Panasonic GF1. While it is slower than some competing SLR models, we never felt that the GF2's startup time was too slow, or came even close to causing us to miss a shot.
We have found, however, that in-camera dust-removal systems are less than perfectly effective. You're still going to need to use a sensor-cleaning kit fairly often, so the advantage of in-body dust removal is perhaps less than it might seem. If you've got dust specks on your sensor (and sooner or later you will), you're going to need to clean it. There are a lot of products out there intended to address this need, but a distressing number of them work poorly (if at all), and many are grossly overpriced. Advertising hype is rampant, with bogus pseudo-scientific jargon and absurd product claims. And prices -- Did I mention prices? How about $100 for a simple synthetic-bristle brush?
So how do you know what product to use?
We don't pretend to have used everything currently on the market, but we can tell you about one solution that worked very well for us. The "Copper Hill" cleaning method is straightforward and safe, and in our routine usage here at Imaging Resource, highly effective. Better yet, the products sold by Copper Hill Imaging are very reasonably priced. Best of all, Nicholas R (proprietor of Copper Hill) has put together an amazingly detailed tutorial on sensor cleaning, free for all.
Sensor cleaning is one of the last things people think about when buying a d-SLR, but it's vital to capturing the best possible images. Take our advice and order a cleaning kit from Copper Hill right along with your d-SLR, so you'll have it close at hand when you need it: You'll be glad you did!
(While they've advertised on our sister site SLRgear.com from time to time, we receive no promotional consideration from Copper Hill for this note. We just think their sensor cleaning products are among the best on the market, and like their way of doing business. -- We think you will too. Click here to check them out.)
14mm Pancake Lens Test Results
Zoom
Very good performance with the 14mm f/2.5 ASPH kit lens.
| 14mm @ f/8 |
The Panasonic Lumix DMC-GF2 is available bundled with a Lumix G 14mm f/2.5 ASPH Micro Four Thirds lens. The 35mm equivalent focal range is about 28mm, a result of the GF2's 2x "crop factor." Results were very good at 14mm, with strong detail throughout most of the frame and only a hint of softness in the corners at f/8. Coma distortion in the trees was low, but a very small amount of chromatic aberration is visible around the bare limbs in the top left. Overall, very good performance.
Macro
A much larger than average minimum area, with good detail. Flash had trouble though.
| Macro with 14mm kit lens @ f/5.6 |
Macro with Flash @ f/5.6 |
The Panasonic Lumix DMC-GF2's macro performance will depend entirely on the lens in use. However, with the 14mm kit lens, the Panasonic GF2 captured a much larger than average minimum area measuring 5.69 x 4.27 inches (145 x 108 millimeters). Detail was very good with just a hint of softness. There was only a small amount of blurring in the right corners, though stronger blurring along the far left side. (Most lenses have some softening in the corners at macro distances, and the Panasonic GF2's kit lens has less than most.) The built-in flash had trouble throttling down at such a close distance, resulting in a strongly overexposed image with uneven coverage. (Thus, external lighting may be the best bet for macro shots with this lens.)
Geometric Distortion
Low geometric distortion with the 14mm kit lens in JPEGs, much higher than average distortion in uncorrected RAW files.
| In-Camera JPEG: Barrel distortion at 14mm is 0.5 percent |
| Uncorrected RAW: Barrel distortion at 14mm is 2.0% |
When shooting JPEGs, the Panasonic GF2's 14mm kit lens produced just under 0.5 percent barrel distortion, which is much less than average especially for a wide-angle lens, and hardly noticeable in its images. This is the tendency for the lens to bend straight lines outward (like a barrel -- usually at wide-angle).
To see how much correction is taking place in the camera, we converted a RAW file from the above shot with dcraw, which does not correct for distortion. As you can see, the actual barrel distortion is very high at about 2.0%. We expect this for smaller interchangeable lenses though, so it's nothing to be concerned about unless you are using a RAW converter which does not understand the embedded "opcodes" to perform distortion corrections automatically. Most RAW converters these days (including Adobe Camera Raw and SilkyPix) are capable of applying distortion correction automatically, as specified by the manufacturer. (There's going to be some loss of resolution as a result of such correction, because pixels in the corners of the frame are being "stretched" to correct for the distortion. Obviously, a lens that doesn't require such correction, and is also sharp in the corners to begin with would be preferable, but relaxing constraints on barrel and pincushion distortion brings other benefits in the lens design.)
Chromatic Aberration and Corner Sharpness
Moderate level of chromatic aberration from the 14mm kit lens in JPEGs. RAW files also show moderate amounts. Corners were just slightly soft wide-open.
| 14mm @ f/2.5: Upper left C.A.: Moderate Softness: Minor blurring |
14mm @ f/2.5: Center C.A.: Very low Softness: Very Sharp |
Chromatic Aberration. Chromatic aberration in the corners with the Panasonic Lumix DMC-GF2's 14mm kit lens is moderate but dull and blue-ish. The camera does a pretty good job of removing it from JPEGs. As usual, what little color fringing there is gradually reduces in brightness and width as it approaches the center of the image, where it is almost nonexistent.
Corner Softness. The Panasonic GF2's 14mm kit lens produced only very mild blurring in the corners, and what little softness there was didn't extend far into the frame. Some corner shading ("vignetting") is also noticeable from the difference in brightness of the crops above.
| 14mm @ f/2.5: Upper left: Camera JPEG |
14mm @ f/2.5: Upper left: Uncorrected RAW |
Chromatic Aberration Correction. As mentioned above, the Panasonic GF2 applies some chromatic aberration correction to its JPEGs, as uncorrected RAW files show more distinct green and magenta coloration. RAW files converted with Adobe Camera Raw or SilkyPix are also automatically corrected, so we used dcraw for the uncorrected conversion on the right.
Overall, a very good performance for a pancake kit lens here, especially since these shots were taken wide-open at f/2.5, and both corner softness & shading improves when stopped-down.
Panasonic GF2 LCD Viewfinder
Viewfinder Test Results
Accuracy
Excellent accuracy from the LCD monitor.
| 50mm, LCD |
The Panasonic GF2's LCD monitor proved quite accurate when used as a viewfinder, showing about 101% coverage with our low-distortion Olympus 50mm f/2 reference lens. Excellent results here. We did not have access to the optional electronic viewfinder during testing, so we couldn't check its coverage.
The images above were taken from our standardized test shots. For a collection of more pictorial photos, see our Panasonic Lumix DMC-GF2 Photo Gallery .
 Fujifilm GFX 50S Review
 Fujifilm X-T3 Review
 Olympus E-M5 III Review

Follow Imaging Resource